Last Updated: July 23, 2015
WordPress Business Directory Manage Options Image shows you how to set up Image Settings, Thumbnails, Listings and more.
Latest News: I have added another link to the menu.
This post shows you how to set up your images. It is important to adjust your image settings before you start uploading the images. Remember that when you adjust these settings it will only affect the new listings you create. If you wish to change your already uploaded images, you will have to upload the images again. (I suggest that you organize these settings before you begin uploading images.)
In this post I have also included instructions for the Reset Defaults tab.
WordPress Business Directory Plugin Tutorials
- Install and Activate
- Manage Options General
- Manage Options Listings
- Manage Options Email
- Manage Options Payment
- Manage Options Image
- Form Fields
- Add New Fields
- Manage Fees
WordPress Business Directory Manage Options Image Steps
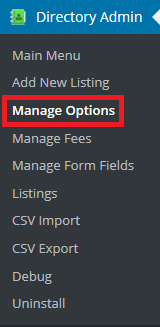
Step 1 ) Go to Directory Admin -> Manage Options to start setting up the plugin. See image below.

Step 2 ) Go to Directory Admin -> Manage Options -> Image to start setting the following options.

Image Settings:
- Allow images?
- Min Image File Size (KB)
- Max Image File Size (KB)
- Min image width (px)
- Min image height (px)
- Max image width (px)
- Max image height (px)
- Turn on thickbox/lightbox?
Thumbnails:
- Thumbnail width (px)
- Thumbnail height (px)
- Crop thumbnails to exact dimensions?
Listings:
- Number of free images
- Use default picture for listings with no picture?
- Show Thumbnail on main listings page?
Step 3 ) Go to Directory Admin -> Manage Options -> Reset Defaults to start setting the following options.

- Use this option if you want to go back to the original factory settings for BD. Please note that all of your existing settings will be lost. (I recommend that you create a backup before you reset the plugin.)
Click on the following URL Form Fields to continue with the set up.
I hope this tutorial helps you.
If you have any questions please let me know. I will be updating this post from time to time.
Enjoy