Last Updated: July 23, 2015
WordPress Business Directory Add New Fields shows you how to add different form fields type and which fields to include in the form.
Latest News: I have added another link to the menu.
This post shows you how to add new form fields. Each form field type you select to add to your form provides you with different options to set up. Remember there are 9 different form field types for you to add to your form.
WordPress Business Directory Plugin Tutorials
- Install and Activate
- Manage Options General
- Manage Options Listings
- Manage Options Email
- Manage Options Payment
- Manage Options Image
- Form Fields
- Add New Fields
- Manage Fees
WordPress Business Directory Add New Fields Steps
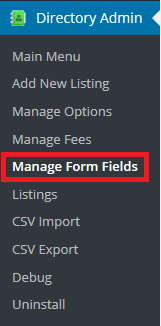
Step 1 ) Go to Directory Admin -> Manage Form Fields to start setting up your form. See image below.

Step 2 ) Go to Directory Admin -> Manage Form Fields and click on Add New Form Field button.
You will see a new window open which allows you add and set up the following fields.
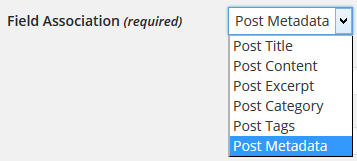
The following image Field Association (required) allows you to select from one of the following options.
- Post Title
- Post Content
- Post Excerpt
- Post Category
- Post Tags
- Post Metadata

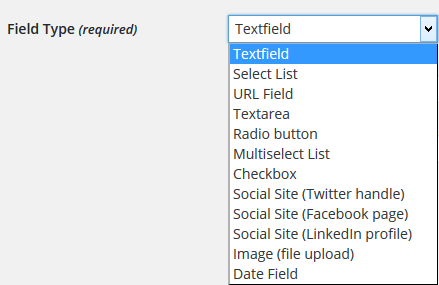
The following image Field Type (required) allows you to select from one of the following options.
- Textfield = (Note: Selected for this example. Each field type you select provides different settings to configure.)
- Select List
- URL Field
- Textarea
- Radio button
- Multiselect List
- Checkbox
- Social Site (Twitter handle)
- Social Site (Facebook page)

You can setup the following fields.
- Field Label (required)
- Field description (optional)
Step 3 ) The following list Field validation options allows you to select from the following options.
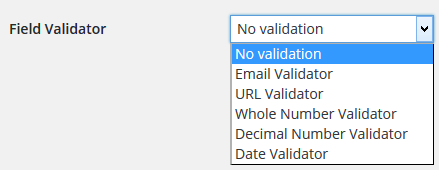
The following image Field Validator allows you to select from one of the following options.
- No validation
- Email Validator
- URL Validator
- Whole Number Validator
- Decimal Number Validator
- Date Validator

The following list allows you to select from the following options.
- Is field required?
Step 4 ) The following list Field display options allows you to select from the following options.
- Show this value in excerpt view?
- Show this value in listing view?
- Include this field in the search form?
- Hide this field’s label?
Click on the following URL Manage Fees to continue with the set up.
I hope this tutorial helps you.
If you have any questions please let me know. I will be updating this post from time to time.
Enjoy