Last Updated: July 23, 2015
WordPress Business Directory Manage Options Email shows you how to set up E-Mail Notifications, E-Mail Template, Payment related and more.
Latest News: I have added another link to the menu.
This post shows you how to personalize the e-mails sent to customers and clients found under the E-Mail tab. It is important that you write up the correct message before you publish your Business Directory. You might want to spend a bit of time editing your messages. Once this is completed everything will be automated.
WordPress Business Directory Plugin Tutorials
- Install and Activate
- Manage Options General
- Manage Options Listings
- Manage Options Email
- Manage Options Payment
- Manage Options Image
- Form Fields
- Add New Fields
- Manage Fees
WordPress Business Directory Manage Options Email Steps
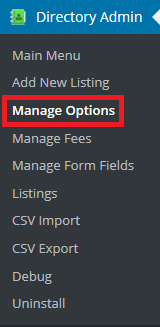
Step 1 ) Go to Directory Admin -> Manage Options to start setting up the plugin. See image below.

Step 2 ) Go to Directory Admin -> Manage Options -> E-Mail to start setting the following options.

General Settings:
- Display email address fields publicly?
- How to determine the listing’s email address?
E-Mail Notifications:
- Notify admin via e-mail when…
- CC this e-mail address too
- Notify users via e-mail when…
E-Mail Templates:
- Email confirmation message
- Listing published message
- Listing Contact Message
Payment related:
- Payment abandoned reminder message
Renewal Reminders:
- Pending expiration e-mail message
- Listing Renewal e-mail message
- Listing auto-renewal reminder (recurring payments)
- Listing Renewal e-mail message (recurring payments)
- Renewal reminder e-mail message
Click on the following URL Manage Options Payment to continue with the set up.
I hope this tutorial helps you.
If you have any questions please let me know. I will be updating this post from time to time.
Enjoy