Last Updated: July 23, 2015
WordPress Business Directory Manage Options Payment shows you how to set up Payment Settings, Authorize Net Gateway, Google Wallet and more.
Latest News: I have added another link to the menu.
This post shows you how to set up the Payment Settings and the various other options. You can even set up Google Wallet which makes it more interesting. It is important that you set up your payments correctly so that you won’t run into any issues while running your Business Directory.
In this post I have also included instructions for the Registration URL.
WordPress Business Directory Plugin Tutorials
- Install and Activate
- Manage Options General
- Manage Options Listings
- Manage Options Email
- Manage Options Payment
- Manage Options Image
- Form Fields
- Add New Fields
- Manage Fees
WordPress Business Directory Manage Options Payment Steps
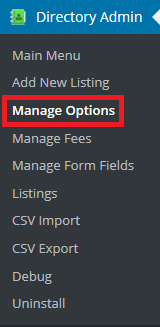
Step 1 ) Go to Directory Admin -> Manage Options to start setting up the plugin. See image below.

Step 2 ) Go to Directory Admin -> Manage Options -> Payment to start setting the following options.

Payment Settings:
- Turn On payments?
- Put payment gateways in test mode?
- Perform checkouts on the secure (HTTPS) version of your site?
- Currency Code
- Currency Symbol
- Thank you for payment message
- Ask users to come back for abandoned payments?
- Listing abandonment threshold (hours)
Authorize Net Gateway:
- Activate Authorize.net?
- Login ID
- Transaction Key
Google Wallet:
- Activate Google Wallet?
- Seller Identifier
- Seller Secret
Step 3 ) Go to Directory Admin -> Manage Options -> Registration to start setting the following options.

Registration Settings:
- Require login to post listings?
- Registration URL
Click on the following URL Manage Options Image to continue with the set up.
I hope this tutorial helps you.
If you have any questions please let me know. I will be updating this post from time to time.
Enjoy