Last Updated: July 23, 2015
WordPress Business Directory Manage Form Fields shows you how to set up the forms in your business directory.
Latest News: I have added another link to the menu.
This post shows you how to set up your forms, add fields and delete fields. You can also change the order of your fields by dragging them up or down until you are happy with the order. Remember each field can be made mandatory “REQUIRED” or not.
This feature is the second in the list when you click on Main Menu to set up after the Manage Options menu. It is important that you work out all the different fields that you will require for your form.
WordPress Business Directory Plugin Tutorials
- Install and Activate
- Manage Options General
- Manage Options Listings
- Manage Options Email
- Manage Options Payment
- Manage Options Image
- Form Fields
- Add New Fields
- Manage Fees
WordPress Business Directory Manage Form Fields Steps
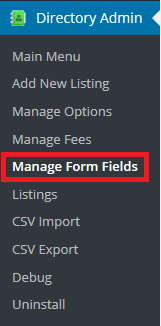
Step 1 ) Go to Directory Admin -> Manage Form Fields to start setting up your form. See image below.

Step 2 ) Go to Directory Admin -> Manage Form Fields to start creating or editing your form. By default the plugin sets up a form with default fields added, which you can customize as you please.
The following image allows you to carry out the following options.
- Add New Form Field
- Preview Form

Step 3 ) The following image shows you the default fields added by the plugin when you install and activate the plugin. This image only shows you 3 fields so you can see the difference. The plugin sets up by default 13 fields.
The following image allows you to carry out the following options with each field.
- Order = you can sort the order of the fields by dragging or clicking on the arrows to move the fields up or down.
- Label/ Association = This tells you what each label represents. You can Edit or Delete each field.
- Type = lets you know what type of field has been set up.
- Validator = lets you see if the field is required or not.
- Field Attributes = this lets you see whether the field is Required, in except or in listing.

Click on the following URL Add New Fields to continue with the set up.
I hope this tutorial helps you.
If you have any questions please let me know. I will be updating this post from time to time.
Enjoy