WordPress Business Directory Plugin Setup shows you how to set up a directory structure on your website and help you generate revenue.
Last Updated: November 19, 2024
Latest News: Updated the changelog details.

This post shows you how one can create a powerful Business Directory and help you generate more income on your website. In return you are also promoting the businesses that wish to sing up to your directory listings for a fee. You can also create free directory listings for any type of community for example religious, farming, gardening, music, web development, animal lovers and more.
Business Directory plugin version 6.4.7 Changelog.
- New: A new option was added to set a redirect URL for the login process. Now the users can be redirected to any page after logging in.
- Fix: Issue with the caching mechanism for listings when using Elementor
- Fix: 2 PHP notices when using PHP 8.4
- Fix: A PHP warning on the email templates page
- Fix: The label for the upgrade button now shows “Install Now” if the user already has access to the add-on
What You Need:
- Business Directory Plugin
- Click on the following URL Business Directory Plugin (Note: This is an affiliated link. I get a small commission.) to learn more about their service and Premium Modules.
WordPress Business Directory Plugin Tutorials
- Install and Activate
- Manage Options General
- Manage Options Listings
- Manage Options Email
- Manage Options Payment
- Manage Options Image
- Form Fields
- Add New Fields
- Manage Fees
WordPress Business Directory Plugin Setup
Step 1 ) Install and activate the plugin. When you first activate the plugin you will see the following message. See image below.
This message lets you know that certain structure needs to be set up before you begin. Click on Create required pages for me button. I highly recommend you carry this to avoid any complications.

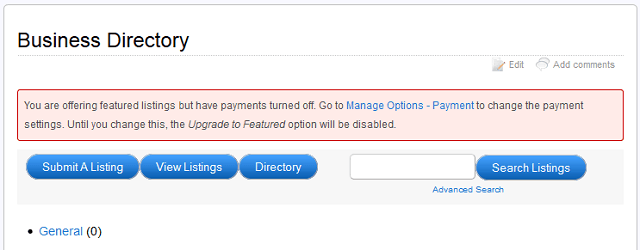
Step 2 ) The following image Business Directory displays the menu structure the plugin creates for you. Once again the plugin is reminding you that you have featured listings but you have payments turned off. Click on Manage Options – Payment link to set up this option.
Pages Created:
- Submit A Listing
- View Listings
- Directory
- Search Listings
- Default General category created

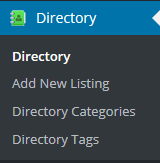
Step 3 ) The following image Directory allows you to set up and configure the following.
Directory Menu:
- Directory
- Add New Listing
- Directory Categories
- Directory Tags

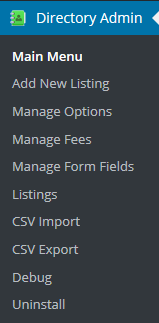
Step 4 ) The following image Directory Admin allows you to set up and configure the following.
Directory Admin Menu:
- Main Menu
- Add New Listing
- Manage Options
- Manage Fee
- Manage Form Fields
- Listings
- CSV Import
- CSV Export
- Debug
- Uninstall

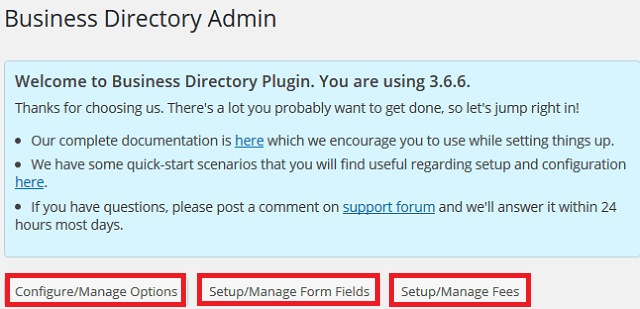
Step 5 ) The first action you need to take is to set up the plugin. Click on Main Menu as illustrated in the previous image above. Once you have clicked you will see the following image Business Directory Admin.
You have three main buttons to click on and set up.
Admin Set Up:
- Configure/Manage Options
- Setup/Manage Form Fields
- Setup/Mange Fees

Click on the following URL Manage Options General to continue with the set up.
I hope this tutorial helps you.
If you have any questions please let me know. I will be updating this post from time to time.
Enjoy