Backup Restore WordPress Using UpdraftPlus Backups plugin tutorial teaches you how to backup WordPress using UpdraftPlus Backups plugin.
Last Updated: February 6, 2025
Latest News: Updated the menu.

UpdraftPlus is a very simple plugin to set up and manage your backups. It has many advanced options and many premium addons to increase the functionality of the plugin.
Everyone knows how important it is to backup your WordPress site. You have spent countless hours configuring, updating, customizing and much more your website. Some of you might get your site compromised by someone hacking into it. Other issues might be related to an update going wrong, your server crashes or your hosting company goes bust.
Creating regular backups will make sure you can recover your site from any of the above incidents. You also need to test your backups regularly to make sure they do work. There is nothing more frustrating than trying to restore your site and the backup does not work.
That is when UpdraftPlus comes to the rescue.
Changelog
UpdraftPlus Version 1.25.1 Changelog
- SECURITY: Fix a non-persistent reflected XSS vulnerability due to a missing nonce combined with missing sanitisation. This could allow an attacker, who persuaded you to click a personally-crafted link to your site’s dashboard whilst you were logged in, to once run JavaScript code in your dashboard. Thanks to Asaf Mozes for finding and responsibly disclosing this issue.
- FIX: Prevent the restoration from failing when there is a ‘sync-xhr=()’ permission policy on the response header.
- FIX: Improve the approach of acquiring a suggested region for Amazon AWS S3 if a failure arises during the getBucketLocation() call, particularly when the XML response fails to provide a field for the suggested region – this resolves issues with regions (e.g. us-east-2) which recently changed their response behaviour
- TWEAK: Broaden the support to incorporate the “ap-southeast-4” region of Amazon AWS S3 and additional recently updated regions
- TWEAK: A regression in the paid version update checker to version 4.13.2, resulting in non-appearance of notices concerning subscription status or WP version compatibility.
What you need:
UpdraftPlus Backups Restore Tutorials:
- Backup And Restore WordPress Using UpdraftPlus Backups
- Restore Existing Backups
- Settings
- Advanced Tools
- Troubleshooting
Backup Restore WordPress Using UpdraftPlus Backups
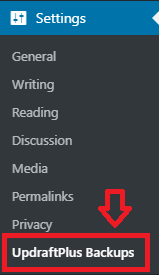
Step 1 ) Install the plugin like you would normally do. Go to Settings -> UpdraftPlus Backups as illustrated in the image below to start creating site backups.
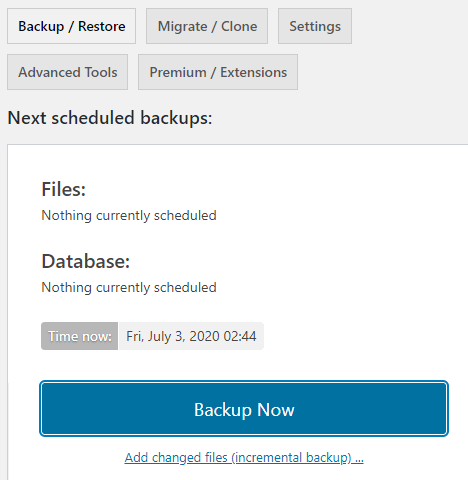
Step 2 ) The following image displays the admin menu tabs. The following is a list of features you can configure before you start backing up your site.
UpdraftPlus Admin Menu:
- Backup / Restore
- Migrate / Clone
- Settings
- Advanced Tools
- Premium / Extensions
Next scheduled backups:
- Files:
- Database:
- Click on Backup Now when you are ready to create a backup.
Take a new backup options
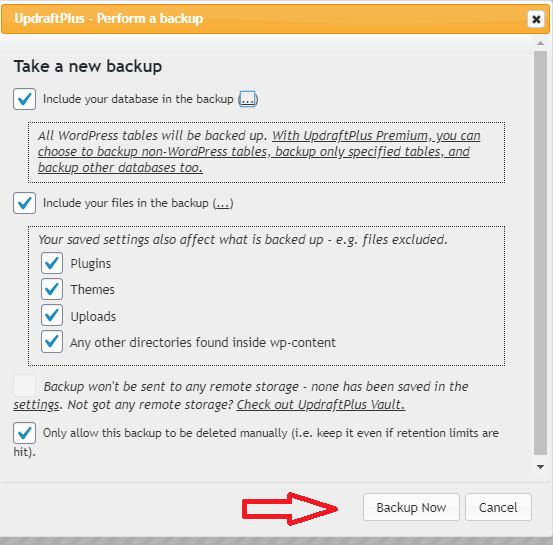
Step 3 ) To create a backup, click on Backup Now button from above. It gives you the following options.
Take a new backup options:
- Include your database in the backup
- Include your files in the backup
- Plugins
- Themes
- Uploads
- Any other directories found inside wp-content
- Backup won’t be sent to any remote storage
- Only allow this backup to be deleted manually (i.e keep it even if retention limits a hit).
- Click on Backup Now button when you are ready to begin your backup.
Step 4 ) The following image shows you the backup in progress.

Existing backups
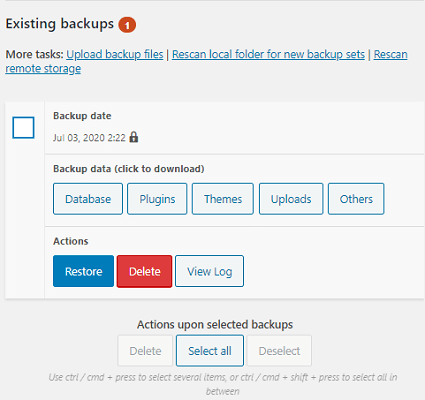
Step 3 ) Once the backup is completed you should see the backup listed as illustrated in the image below. You can then choose to carry out the following options.
Existing backups:
- More tasks:
- Upload backup files
- Rescan local folder for new backup sets
- Rescan remote storage
- Backup date
- Backup data (click to download)
- Database
- Plugins
- Themes
- Uploads
- Others
- Actions
- Restore
- Delete
- View Log
Click on the following URL Restore Existing Backups to learn more.
I will be updating this tutorial from time to time so keep coming back for the latest. If you have any questions please let me know.
Enjoy.
If you want to test your website locally, read the following instructions.
In the following tutorials you will learn how to setup WordPress locally using xampp and install your backup locally to run some testing.
- First read the following tutorial Install WordPress locally using Xampp to set up your WordPress locally
- Second read the following tutorial Test Your WordPress Site Locally which will show you how to restore BackWPup backup locally for testing and editing.
How can the site be restored if you cannot get to the settings page of the plugin?
Hi Joe, thank you for your question. If you have no access to the plugin then you have to manually restore your website using cpanel or what ever platform your server is using. Then you have to use phpMyAdmin to restore the database. Here is a link that works in a very similar manner.
Let me know if the above helps you.
Kind regards
Hello,
I stumbled upon your website while trying to look for information on where does this backup plugin store the backup file. I did not configure it to backup to Dropbox etc, I am a first-time user and click the Backup Now button to begin. Interestingly, it doesn’t mention where it backup to. Is it stored on their server or mine?
Thanks!
Hi Perrin, thank you for your question. If you did not select an external server then the backup is saved in your server. Check my third tutorial from the menu above, it lets you know more about back ups.
If you have any more questions please let me know.
Regards
thanks great article help me alot
You are most welcome.