WP eMember Plugin Membership Levels tutorial will show you how to set up and manage levels for your members.
Last Updated: October 17, 2019
Latest News: Updated a link.
WP eMember Plugin Membership Levels
Manage Levels
Step 1 ) Go to WP eMember -> Membership Level to manage the following options. See image below.
Membership Level Options
- Manage Levels
- Manage Content Protection
Step 1-a ) When you first install the plugin you will have to create new levels, click on Add New button to start creating new levels. In this tutorial I created two levels Madrid and London so you could see what happens after you create these levels.

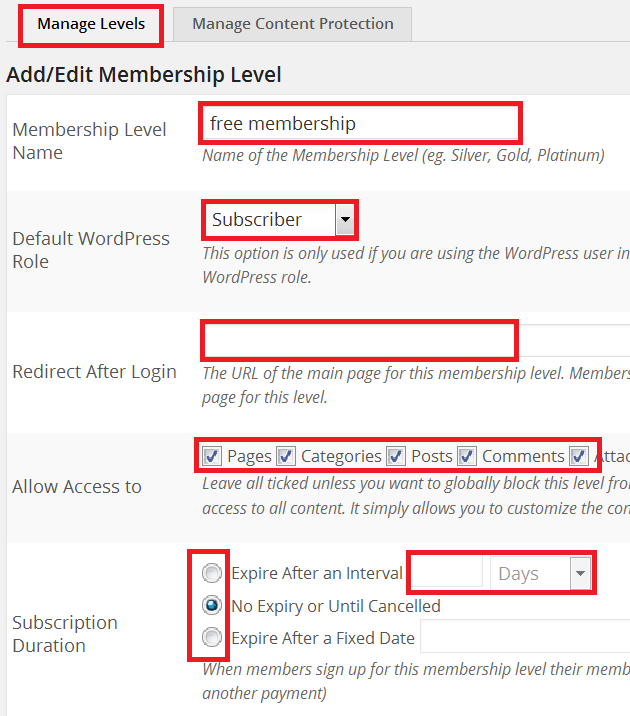
Step 2 ) The following image Add/Edit Membership Level, allows you to set up the following options.
Add/Edit Membership Level Settings
- Membership Level Name
- Default WordPress Role
- Redirect After Login
- Allow Access To = Pages, Categories, Posts, Comments, Attachments and Custom Posts
- Subscribe Duration
- Autoresponder List/ Campaign Name (Optional)
- Click on Submit button when you are finished.
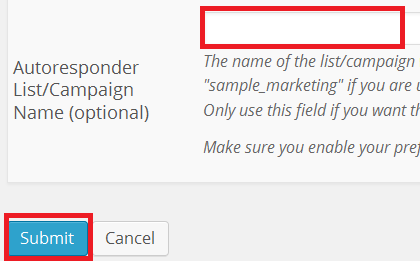
Step 3 ) The following image allows you to set up the following options Autoresponder List/ Campaign Name (Optional). Make sure you click on Submit button when you are finished.
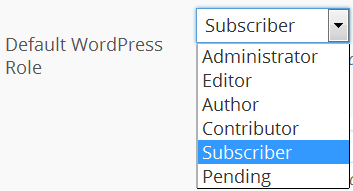
Step 4 ) The following image Default WordPress Role allows you to select from the following roles. These are the default roles available by WordPress for each user added.
Default WordPress Role List
- Administrator
- Editor
- Author
- Contributor
- Subscriber
- Pending
Manage Content Protection
Step 5 ) Click on Manage Content Protection tab to manage the over protection of your website and content. You have the option to protect Custom Post, Comments, Categories, Pages and Posts.
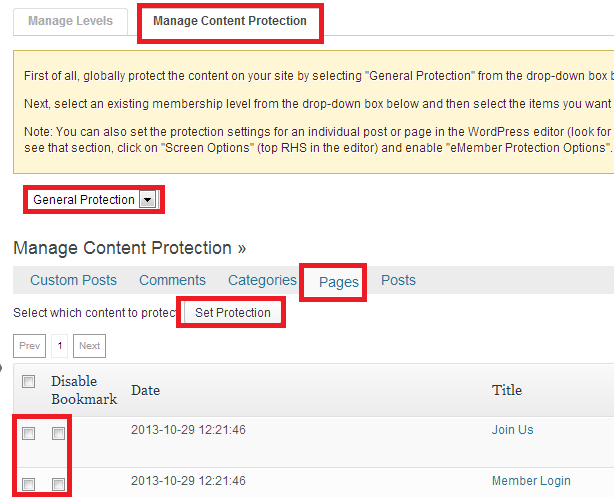
Step 6 ) The image below allows you to select from the following membership level General Protection, Madrid and London. The following membership levels Madrid and London was created for the purpose of this tutorial.
Note: In your set up you will probably have different membership levels.

Information: You can also set the protection settings for an individual post or page in the WordPress editor.(Quoted from the plugin)
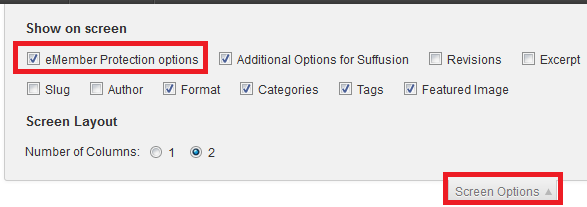
Step 7 ) The following image Screen Options located at the top right hand corner of your pages or posts while in edit mode. This allows you to enable the following option eMember Protection options. This is displayed at the end of a post or page as stated in Step 8 ) below.
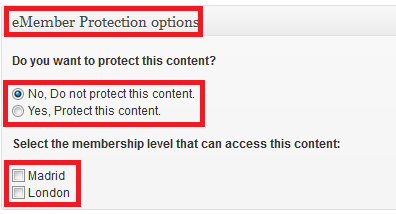
Step 8 ) The image below is displayed at the end of a page or post in your site while in edit mode on the backend. You can select to protect the content or not. If you choose to protect the content, you then select which membership level to assign.
Note: It is important to remember which members belong to which membership level.
Click on the following link Admin Functions to complete the next tutorial.
I will be updating this post from time to time. So keep coming back for more.
Enjoy.
eMember Plugin Tutorial List: