Gimp Editor Image Menu tutorial will cover the following part, Image and Layer. Both have many tools and configurations to play with.
Last Updated: May 22, 2023
Latest News: Updated the links below.
Gimp Image menu has a number of options for you to manipulate, edit, change, crop, merge and more. This tutorial will cover the basic and later on more advance options will be added to help you understand all the available options.
What You Need:
Gimp Image Editor Tutorials:
- Layout
- Tools Menu File
- Tools Edit
- Select
- View
- Image
- Layer
- Colors
- Tools
- Filters
- Filters Part Two
- Filters Part Three
- Windows Help
Gimp Editor Image Menu
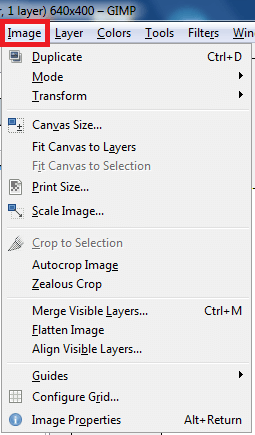
Step 1 ) Click on Image to view all available tools.
List of the tools available:
- Duplicate
- Mode
- Transform
- Canvas Size
- Fit Canvas to Layers
- Fit Canvas to Selection
- Print Size
- Scale Image
- Crop to Selection
- Autocrop Image
- Zealous Crop
- Merge Visible Layers
- Flatten Image
- Align Visible Layers
- Guides
- Configure Grid
- Image Properties

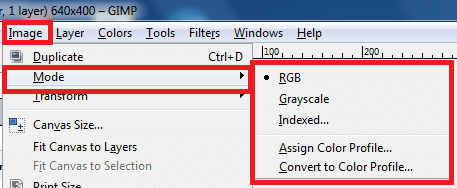
Step 2 ) Click on Image -> Mode to view all available tools.
List of the tools available:
- RGB
- Grayscale
- Indexed
- Assign Color Profile
- Convert to Color Profile

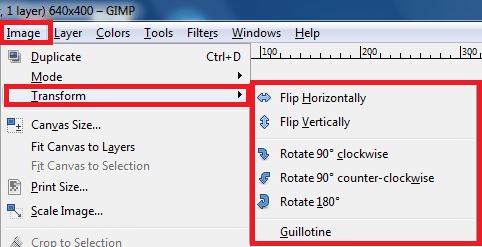
Step 3 ) Click on Image -> Transform to view all available tools.
List of the tools available:
- Flip Horizontally
- Flip Vertically
- Rotate 90° clockwise
- Rotate 90° counter-clockwise
- Rotate 180°
- Guillotine

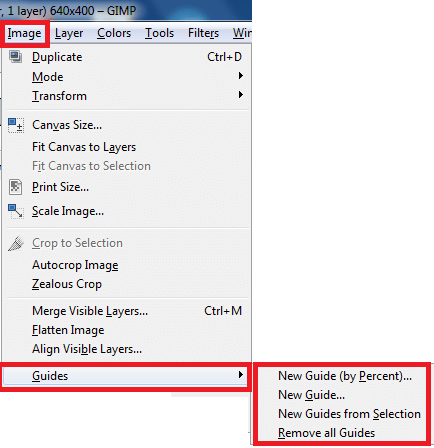
Step 4 ) Click on Image -> Guides to view all available tools.
List of the Guides available:
- New Guide (by Percent)
- New Guide
- New Guides from Selection
- Remove all guides

====================
Click on the following link Layer to learn more about the menu.
I will update this tutorial from time to time. So keep coming back for the latest. If you have any questions please let me know.
Enjoy.
Check out More Gimp Tutorials: