Gimp Image Editor Tools Edit tutorial will cover the Edit, Select and View menu tools. There are many options to select and configure. You need to spend some time to understand all of them.
Last Updated: May 22, 2023
Latest News: Updated the links below.
In this tutorial you will learn about the Edit tool options available in Gimp. Think of this like Word, Notepad and other office applications. You can edit, copy, paste, clear and much more. If you can type a letter or an email you can use these tools.
What You Need:
Gimp Image Editor Tutorials:
- Layout
- Tools Menu File
- Tools Edit
- Select
- View
- Image
- Layer
- Colors
- Tools
- Filters
- Filters Part Two
- Filters Part Three
- Windows Help
Gimp Image Editor Tools Edit Steps
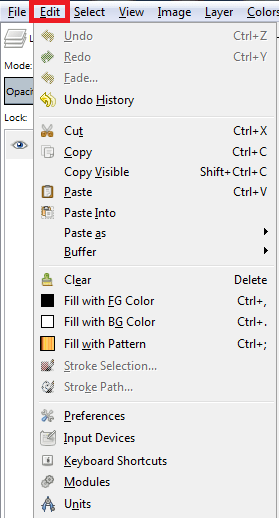
Step 1 ) Click on Edit to manage the following options:
- Undo
- Redo
- Fade
- Undo History
- Cut
- Copy
- Copy Visible
- Paste
- Paste Into
- Paste as
- Buffer
- Clear
- Fill with FG Color
- Fill with BG Color
- Fill with Pattern
- Stroke Selection
- Stroke Path
- Preferences
- Input Devices
- Keyboard Shortcuts
- Modules
- Units

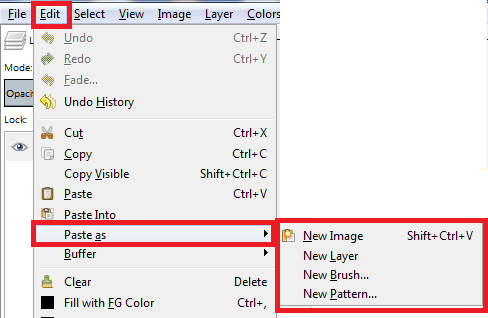
Step 2 ) Click on Edit -> Paste as to add the following options New Image, New Layer, New Brush and New Pattern.

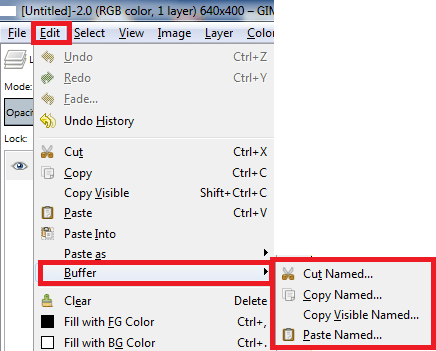
Step 3 ) Click on Edit -> Buffer to work with the following options Cut Named, Copy Named, Copy Visible Named and Paste Named.

====================
Click on the following link Select to learn more about the menu.
I will update this tutorial from time to time. So keep coming back for the latest. If you have any questions please let me know.
Enjoy.
Check out More Gimp Tutorials: