Gimp Image Editor Menu Layer tutorial will cover the following part, Image and Layer. Both have many tools and configurations to play with.
Last Updated: May 22, 2023
Latest News: Updated the links below.
When it comes to image editing, having the option to work with layers helps you further to enrich and create some stunning images, logos, banners and more. Gimp allows you to work with layers. It is something that many at the beginning don’t understand but as they become familiar with layers they get to understand the power of layers.
What You Need:
Gimp Image Editor Tutorials:
- Layout
- Tools Menu File
- Tools Edit
- Select
- View
- Image
- Layer
- Colors
- Tools
- Filters
- Filters Part Two
- Filters Part Three
- Windows Help
Gimp Image Editor Layer Menu
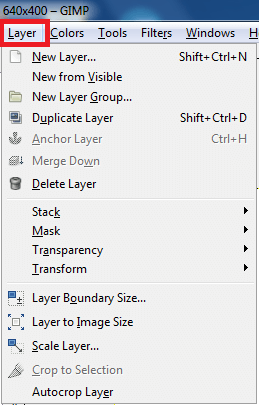
Step 1 ) Click on Layer to view all available tools.
List of the tools available:
- New Layer
- New From Visible
- New Layer Group
- Duplicate layer
- Anchor layer
- Merge Down
- Delete Layer
- Stack
- Mask
- Transparency
- Transform
- Layer Boundary Size
- Layer to Image Size
- Scale Layer
- Crop to Selection
- Autocrop Layer
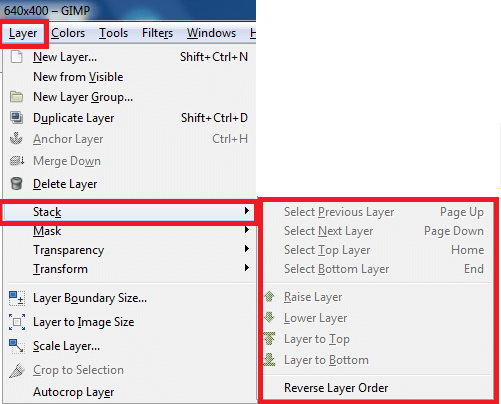
Step 2 ) Click on Layer -> Stack to view all available tools.
List of the tools available:
- Select Previous Layer
- Select Next Layer
- Select Top Layer
- Select Bottom Layer
- Raise Layer
- Lower Layer
- Layer to Top
- Layer to Bottom
- Reverse Layer Order
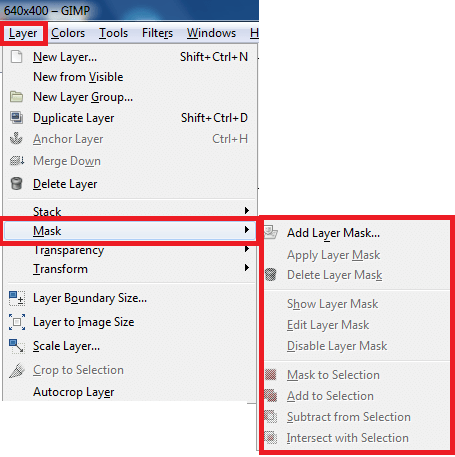
Step 3 ) Click on Layer -> Mask to view all available tools.
List of the tools available:
- Add Layer Mask
- Apply Layer Mask
- Delete Layer Mask
- Show Layer Mask
- Edit Layer Mask
- Disable Layer Mask
- Mask to Selection
- Add Layer Mask to Selection
- Subtract Layer Mask from Selection
- Intersect Layer Mask with Selection
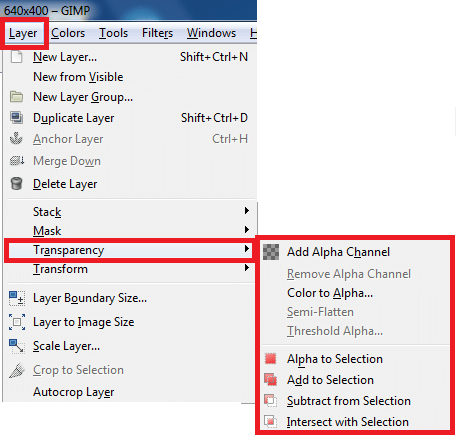
Step 4 ) Click on Layer -> Transparency to view all available tools.
List of the tools available:
- Add Alpha Channel
- Remove Alpha Channel
- Color to Alpha
- Semi-flatten
- Threshold Alpha
- Alpha to Selection
- Add Alpha channel to Selection
- Subtract from Selection
- Intersect with Selection
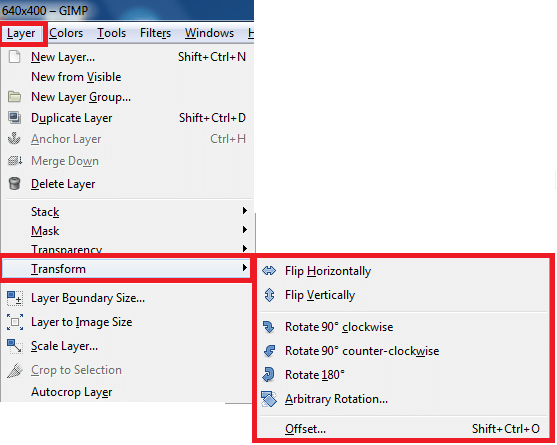
Step 5 ) Click on Layer -> Transform to view all available tools.
List of the tools available:
- Flip Horizontally
- Flip Vertically
- Rotate 90° clockwise
- Rotate 90° counter-clockwise
- Rotate 180°
- Arbitrary Rotation
- Offset
====================
Click on the following link Colors to learn more about the menu.
I will update this tutorial from time to time. So keep coming back for the latest. If you have any questions please let me know.
Enjoy.
Check out More Gimp Tutorials: