Gimp Image Editor Filters Part Three tutorial will cover the following filters web, animation, alpha to logo, python fu and script fu and much more.
Last Updated: May 22, 2023
Latest News: Updated the links below.
This tutorial is part three of the Filters menu. The following selection Blend, Burn-In, Rippling, Spinning Globe, Waves and more is list of filters you can use in Gimp.
What You Need:
Gimp Image Editor Tutorials:
- Layout
- Tools Menu File
- Tools Edit
- Select
- View
- Image
- Layer
- Colors
- Tools
- Filters
- Filters Part Two
- Filters Part Three
- Windows Help
Gimp Image Editor Filters Part Three Steps
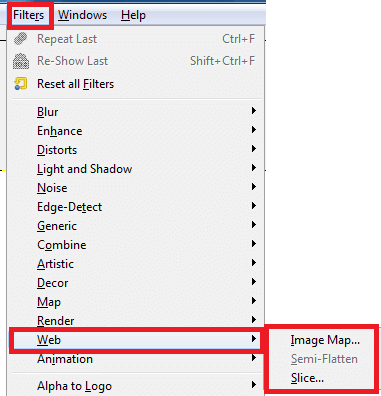
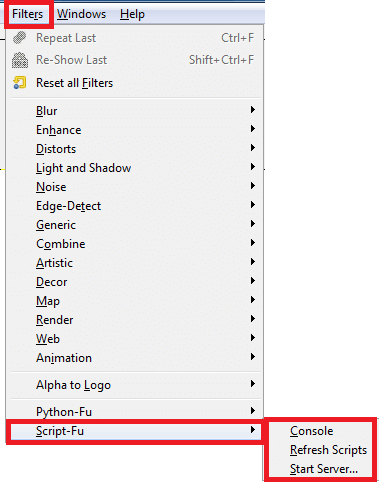
Step 1 ) Click on Filters -> Web menu to edit the following:
- Image Map
- Semi-Flatten
- Slic
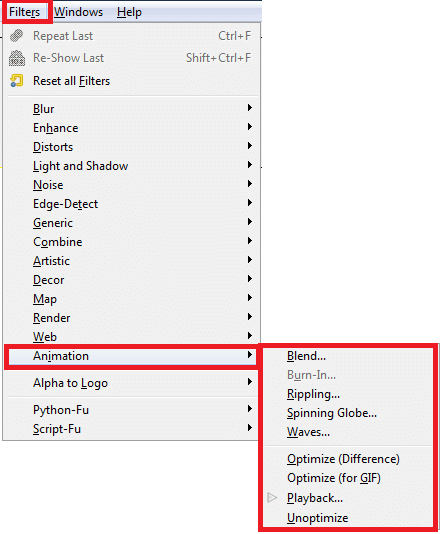
Step 2 ) Click on Filters -> Animation menu to edit the following:
- Blend
- Burn-In
- Rippling
- Spinning Globe
- Waves
- Optimize (Difference)
- Optimize (for GIF)
- Playback
- Uoptimize
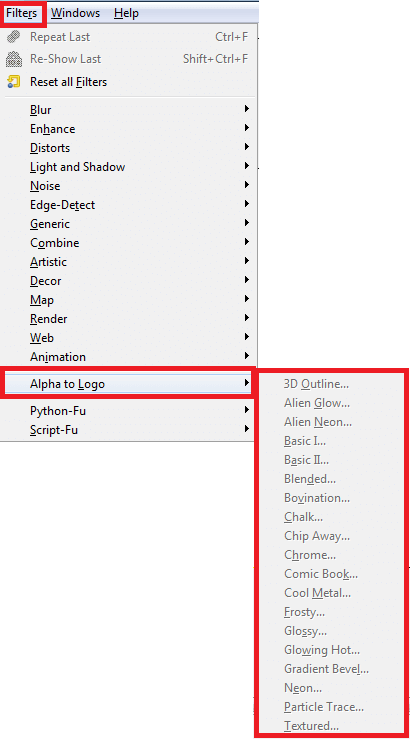
Step 3 ) Click on Filters -> Alpha to Logo menu to edit the following:
- 3D Outline
- Alien Glow
- Alien Neon
- Basic I
- Basic II
- Blended
- Bovination
- Chalk
- Chip Away
- Chrome
- Comic Book
- Cool Metal
- Frosty
- Glossy
- Glowing Hot
- Gradient Bevel
- Neon
- Particle Trace
- Textured
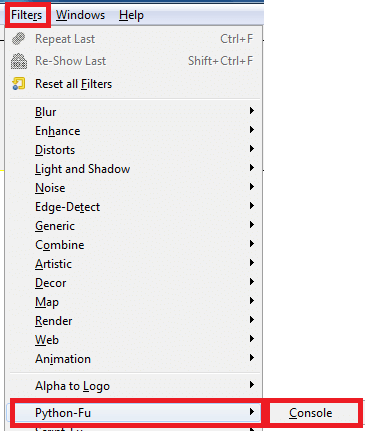
Step 4 ) Click on Filters -> Python-Fu menu to edit the following:
- Console
Step 5 ) Click on Filters -> Script-Fu menu to edit the following:
- Console
- Refresh Scripts
- Start Server
====================
Click on the following link Windows Help to learn more about the menu.
I will update this tutorial from time to time. So keep coming back for the latest. If you have any questions please let me know.
Enjoy.
Check out More Gimp Tutorials: