Gimp Image Editor Colors Menu tutorial will cover the following Color Balance, Hue Saturation, Brightness Contrast, Curve, Posterize and much more.
Last Updated: May 22, 2023
Latest News: Updated the links below.
This tutorial talks about Colors tool. There are many different options to add color. This is left to the imagination of the person editing the photos, images and drawings. However wild your imagination is, Gimp can certainly help you achieve those colors.
What You Need:
Gimp Image Editor Tutorials:
- Layout
- Tools Menu File
- Tools Edit
- Select
- View
- Image
- Layer
- Colors
- Tools
- Filters
- Filters Part Two
- Filters Part Three
- Windows Help
Gimp Image Editor Colors Menu
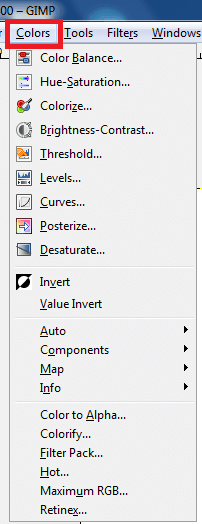
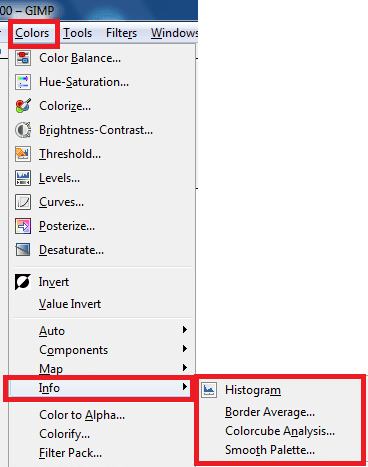
Step 1 ) Click on Colors menu to edit the following:
- Colors Balance
- Hue-Saturation
- Colorize
- Brightness-Contrast
- Threshold
- Levels
- Curves
- Posterize
- Desaturate
- Invert
- Value Invert
- Auto
- Components
- Map
- Info
- Color to Alpha
- Colorify
- Filter Pack
- Hot
- Maximum RGB
- Retinex
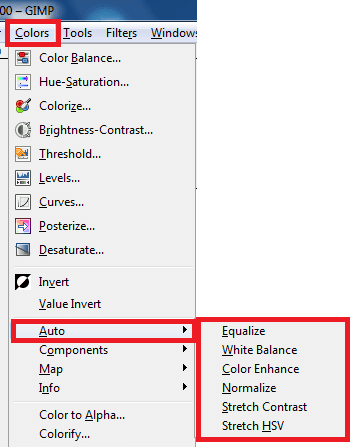
Step 2 ) Click on Colors -> Auto to configure the following settings:
- Equalize
- White Balance
- Color Enhance
- Stretch Contrast
- Stretch HSV
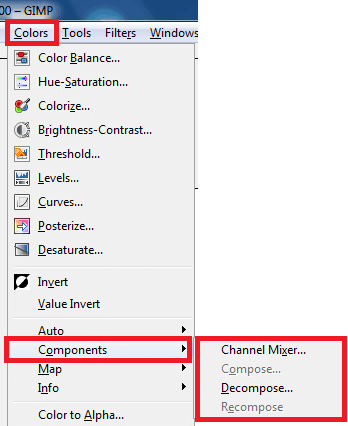
Step 3 ) Click on Colors -> Components to configure the following settings:
- Chanel Mixer
- Compose
- Decompose
- Recompose
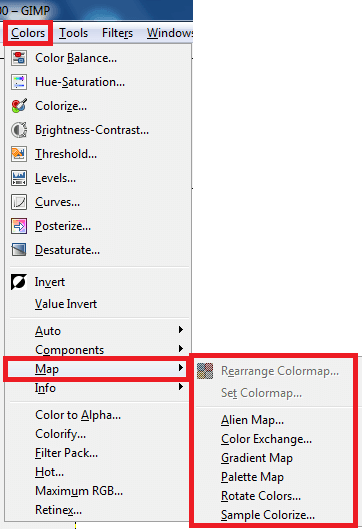
Step 4 ) Click on Colors -> Map to configure the following settings:
- Rearrange Colormap
- Set Colormap
- Alien Map
- Color Exchange
- Gradient Map
- Palette Map
- Rotate Colors
- Sample Colorize
Step 5 ) Click on Colors -> Info to configure the following settings:
- Histogram
- Border Average
- Colorcube Analysis
- Smooth Palette
====================
Click on the following link Tools to learn more about the menu.
I will update this tutorial from time to time. So keep coming back for the latest. If you have any questions please let me know.
Enjoy.
Check out More Gimp Tutorials: