How to make an image background transparent using Gimp, shows you how to make the image background transparent and more.
Last Updated: May 21, 2023
Latest News: I have updated the wording in the document.
Important: Only file formats that support transparency include GIF, PNG and TIFF, through either a transparent color or an alpha channel. Please read more about it on Wikipedia Transparency.
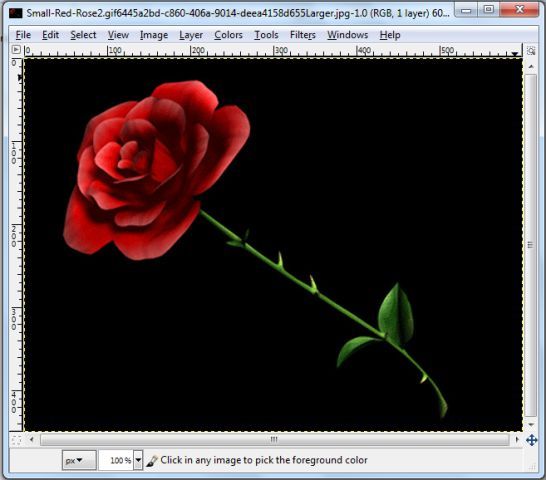
This tutorial shows you how to make an image background transparent. In this post I am using an image of a red rose with a black background color. I chose this image to simplify the visual steps for you. This tutorial was written using Gimp version 2.6.11. The steps can still be followed if you are running version 2.10.2.
What You Need:
Gimp Tutorial List:
- Gimp Image Editor Layout
- How to make an image background transparent
- Create a Banner using Gimp
- Create round corners using Gimp
- Create An Image Map For WordPress Using Gimp
How to make an image background transparent using Gimp
Step 1 ) Open your image and select the area you want to make transparent, in this example the black background will be removed “deleted”. Use shift-click to add more regions/colors.
Tip: Use the zoom tool to see the details more clearly. This will make it easy to select all the areas of an image you wish to select.
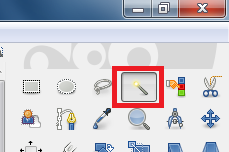
Step 2 ) You will usse the following tool Fuzzy Tool. See images below.
You can see a white line around the red rose. This tells you that the black background has been selected

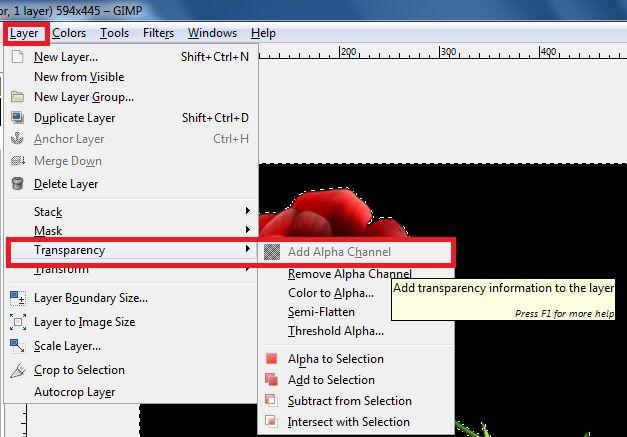
Step 3 ) In the Layer window (the one showing your image), select Layer -> Transparency -> Add Alpha Channel. If this feature is greyed out then it’s already done. This makes sure your image can store transparency data.
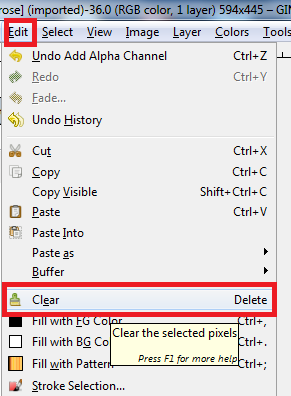
Step 4 ) Click on Edit -> Clear as illustrated in the image below. This will make the selection transparent.
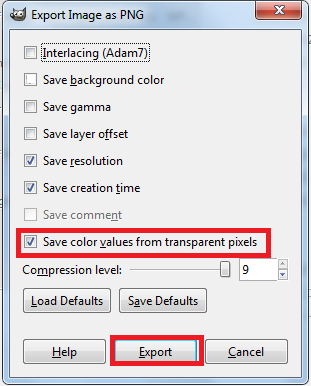
Step 5 ) Export the file as a png format. This is one of the most widely use formats for the internet. See images below.
Note: Make sure you don’t select Save background colour because it can cause some issues.
Note: When you save the image as a PNG file, be sure to select the ‘Save colour values from transparent pixels’ option in the Save as PNG dialog box.
This is the end result

====================
And that’s it. As you can see it is very simple.
You might like to check the following YouTube video transparent background gimp.
Let me know what you think and if you feel that I can improve this tutorial. Any feed back would be appreciated.
Click on the following link Create a Banner using Gimp to learn more about the menu.
Enjoy.
Perfect! Thanks!
You are most welcome.
Great set of instructions. Many thanks.