Create an image map for WordPress using Gimp will show you how to create a simple image map using Gimp and then add the image map to WordPress.
Last Updated: May 21, 2023
Latest News: I have updated the wording in the document.
Even though the title is meant for WordPress, these instructions can be applied to any website using a CMS “Content Management System” or HTML.
I edited the whole tutorial and included the suggestions made by Dave Gustafson.
What You Need:
Gimp Tutorial List:
- Gimp Image Editor Layout
- How to make an image background transparent
- Create a Banner using Gimp
- Create round corners using Gimp
- Create An Image Map For WordPress Using Gimp
Create An Image Map For WordPress Using Gimp
Step 1 ) This example shows you how to create an image with 3 objects.
- Circle
- Rectangle
- Oval
The following image shows you the objects with different colors. I added the colors to help you tell the difference.
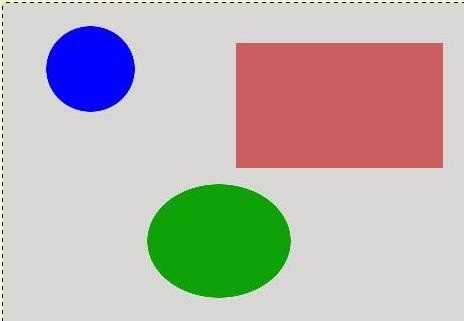
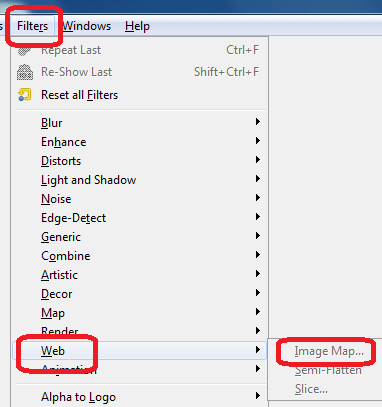
Step 2 ) Next go to Filters -> Web -> Image Map to open the image map tool in Gimp. See image below.
Note: You must have an image opened up in Gimp for the tool to activate or else you will see the tool greyed out like in the image below.
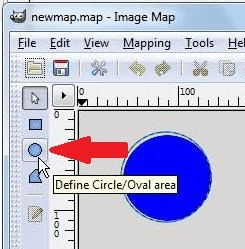
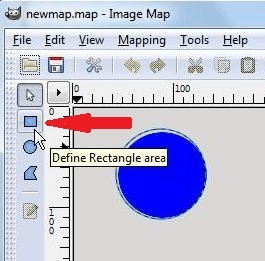
Step 3 ) Next select Define circle oval area and Define rectangle area. The reason why I selected the oval and rectangle is because of the objects that I will be working with in this image. See both images below.
Step 3-a ) Select Define Circle/Oval area.
Step 3-b ) Select Define Rectangle area.
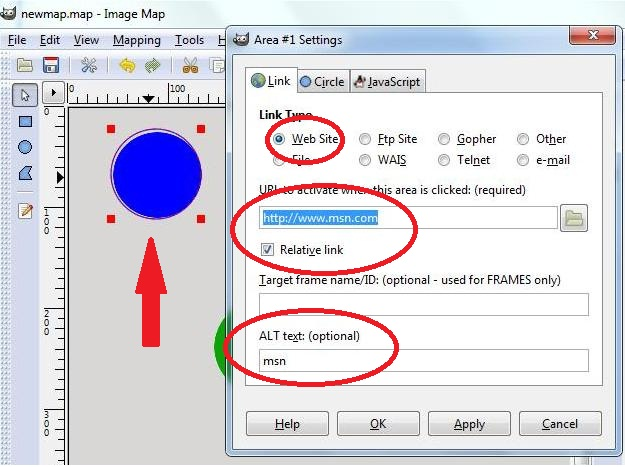
Step 4 ) Next select Define circle oval area for the blue circle in the image. Select Link type -> Web Site and type a URL and select Relative link, type an Alt text (Optional). Carry out the same steps for the oval and rectangle shape making sure you select the corresponding Define shape as mentioned above. See image below.
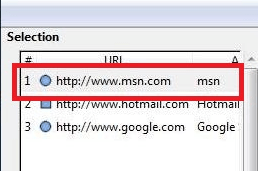
Step 4-a ) The following image shows you the 3 URL’s entered for each object above.
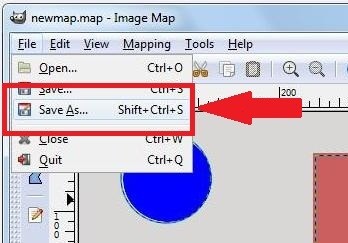
Step 5 ) Next select File -> Save As and type a name for the map file. See images below.
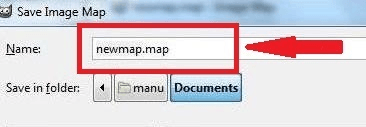
Step 5-a ) In this example I typed newmap.map.
Step 6 ) Next upload into your post or page the image created above in Step 1 ).
Note: A post or page mentioned in Step 6 ) above, is a term commonly used in WordPress. In your case, you might be working with a different platform i.e. Joomla, HTML web page or other.
Step 7 ) Next open the filename.map file you created above using a text editor like notepad in Windows. You can use what ever plain text editor you prefer.
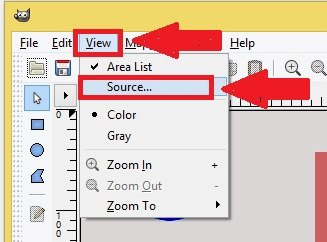
Step 7-a ) If you don’t want to use a text editor you can always click on View -> Source…. and it will also display the code. See image below.
Remember: It is important that the name be exactly the same as the map name or else it will not work.
Copy and paste the code into WordPress post or page. Edit the code by adding usemap=”#map” or what ever name you prefer. You can also delete some of the code that Gimp adds to the source code.
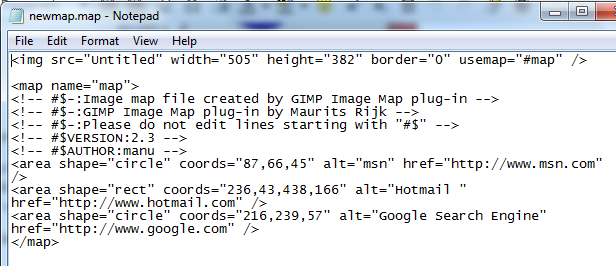
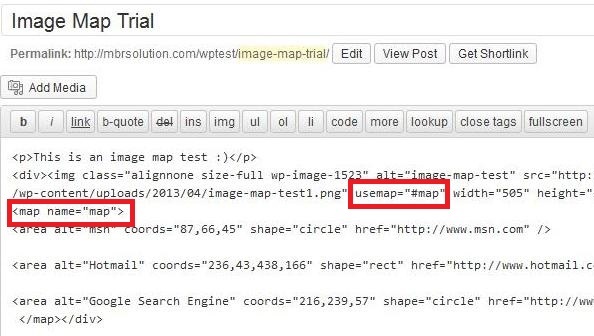
The following two images show you the original code created by Gimp and the modified code copied into WordPress.
Step 7-b ) The following is Gimp’s original code.
Step 7-c ) The following image shows you the edited code copied into WordPress. You can see usermap=”#map” and < map name=”map”> also added.
Step 8 ) The following shows you the extra code used for this example.
Wrap the code in a HTML div tag. This will prevent WordPress or your theme from stripping the code or adding other html tags. It also allows you to control where you would like your image to appear in your webpage.
One more note to remember for the <div> tag use either id or class. For example <div id=”your id name”> or <div class=”your class name”>. If you want the link to open up in a new tab, add the following target=”_blank” to the HTML code below.
<div><img class=”” alt=”” src=”” usemap=”” width=”” height=”” />
<map name=””>
<area alt=”” coords=”” shape=”” href=”” target=”_blank” />
</map>
</div>
====================
That is all you need to do to create an image map using Gimp and add it to WordPress or your HTML website.
I hope you learned something today.
Enjoy.
Many THX for your tutorial. Absolutely great.
I’ve used it befor with the lovely Xara Designer Pro, but the code is so bad. I do not no before, that gimp has an feature like this. And the result in code is realy tidy and clear.
I remember yoiur page :-)
Hello Olaf, thank you for your comment and I am glad my tutorial helped you.
Kind regards
Thanks from me too. I was able to figure out the hardest part with your help. Namely, how to get it onto a wordpress site.
In case it helps anyone else I thought I’d mention that in number 8 when it says, “8 ) Next upload into your post or page the image created in Step 1 ) above using Gimp.” don’t get confused for a minute like I did. You “upload to your post or page the image from Step 1 ) that you created using Gimp.” I thought for a minute I was to use Gimp to upload it but that’s probably because I’m such a beginner.
And this is super picky but again I was confused briefly (easy to do to us newbs) by the use of the word “adds” at the end of the 4th sentence in point 10. Just realize it’s “ads” or maybe even clearer, “advertisements” and you’ll be fine I’m sure.
Hi Dave Gustafson, thank you for your review. I have taken into account your point and have edited the tutorial further. Once again thank you for your review.
Regards
I also meant to say that for those of us not used to using text editors etc. a simple way to get the same code is to go to View–>Source to get it.
Hi Dave Gustafson I have included your suggestion to the tutorial. Thank you.
This method is great, but I have a question: can I have the links opening in a new tab? Thank you!
Hi Elena, thank you for your question. Yes you can open the links in a new tab, simple add the following target=”_blank” and the links will open in a new tab. For example
If you have any more questions let me know.
Kind regards