Create Round Corners Using Gimp tutorial helps you to create round corners using Gimp and add a transparent background.
Last Updated: May 21, 2023
Latest News: I have updated the wording in the document.
In this tutorial you will learn how to create a transparent background which can be applied to any image. In this example a transparent background is added to a simple square with rounded corners.
What You Need:
Gimp Tutorial List:
- Gimp Image Editor Layout
- How to make an image background transparent
- Create a Banner using Gimp
- Create round corners using Gimp
- Create An Image Map For WordPress Using Gimp
Create Round Corners Using Gimp
Important: Only work with PNG images to set a transparent background.
Step 1 ) Go to Filters -> Decor -> Round Corners. See image below.

Step 2 ) The following image Script-Fu: Round Corners, allows you to set the following options.
- Edge radius
- Add drop-shadow = Shadow X offset and Shadow Y offset
- Blur radius
- Add background
- Work on copy
- Click on Ok button
Information: I have added a border around Add background in red. I will talk about this option later on.

Step 3 ) We are going to create 2 types of round corners, one with shadow and the other with no shadow.
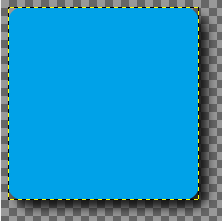
The following is the original image for this tutorial. It has no rounded corners.

The following image has rounded corners and a shadow.

The following image has no shadow.
Important: To achieve this option you need to uncheck Add drop-shadow illustrated in Step 2 above.

Step 4 ) The following image allows you to select different colors for your background corner. Here you can set what ever background colour you desire.
Hint: Remember there are two types of image colors to set up. The foreground and the backgroud color. Make sure you have selected the correct color to change.

The following image has no background colour. It is set to transparent. Remember in Step 2 above, I added a border around Add background in red. If you uncheck this option it will add a transparent background.
Note: When you have a transparent layer active. You first need to remove this, before you can execute the ‘Round Corners’ fi-script. Otherwise you can execute the script (grayed-out).
Next remove the layer alpha:
Right click->Layer->Transparency->Remove Alpha Layer
(Information provide by Melroy van den Berg)
====================
This concludes this simple tutorial.
Click on the following URL Create An Image Map For WordPress Using Gimp to learn more.
I will be updating this tutorial from time to time. Come back for more Gimp tutorials.
If you have any questions please let me know.
Enjoy.
Check out More Gimp Tutorials:
not too bad I am happy about it ;)
When you have a transparent layer active. You first need to remove this, before you can execute the ‘Round Corners’ fi-script. Otherwise you can execute the script (grayed-out).
So remove the layer alpha via:
Right click->Layer->Transparency->Remove Alpha Layer
Thank you Melroy van den Berg for pointing that out. It makes total sense. I will amend my tutorial.