WP PDF Stamper tutorial will show you how to set up and configure the plugin. You will set the following general settings and more.
Last Updated: August 1, 2022
Latest News: Updated the documentation.
The WP PDF Stamper plugin allows you to dynamically stamp a PDF file with the customer’s details (example: name, email, address etc.) upon purchase. The PDF stamper then sends the stamped copy of the PDF file (your eBook) to the customer via email. If you are wondering why it is important to stamp the PDF eBook before giving it to your customer then this page is for you.
Additionally, you can password protect the stamped PDF files with the customer’s email address and encrypt the PDF files to prevent users from being able to copy, modify or print the content of the file.
Note: This tutorial was written using WP PDF Stamper Version 4.4.0 (12/02/2014). I will be updating the tutorials whenever a new version comes out with new features and changes. Current version WP PDF STamper 4.6.9 August 1, 2022.
Important Links:
- Documentation site = Contains all the documentation for the WP PDF Stamper plugin.
What you need:
- PDF Stamper (Note: This is an affiliated link = I get a small commission if you make a purchase.)
WP PDF Stamper Tutorials:
- WP PDF Stamper
- Settings Part Two
- Manual Stamping
- PDF Stamper Ioncube Install Using Xampp. (Optional) (This tutorial shows you how to set up Ioncube locally in your computer or laptop running Windows 7 and Xampp. This allows you to install WP PDF Stamper for local testing.)
- Troubleshooting
WP PDF Stamper Steps
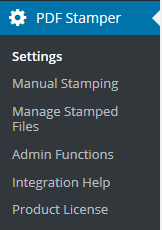
Step 1 ) The following image PDF Stamper displays the admin menu.
- Settings
- Manual Stamping
- Manage Stamped Files
- Admin Functions
- Integration Help
- Product License
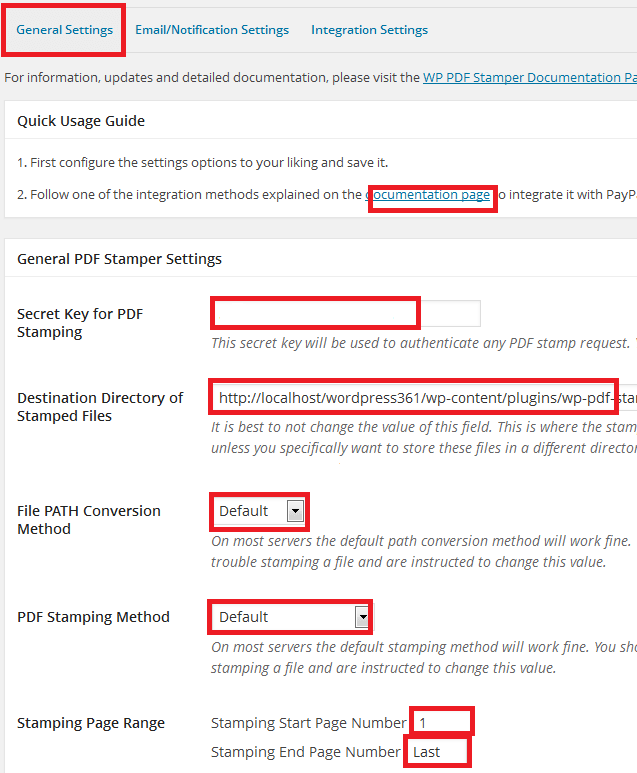
Step 2 ) The following General Settings tab allows you to set up the following.
- Quick Usage Guide. You should read the documentation page before you begin.
- Secret Key for PDF Stamping
- Destination Directory of Stamped Files
- File PATH Converstion Method
- PDF Stamping Method
- Stamping Page Range
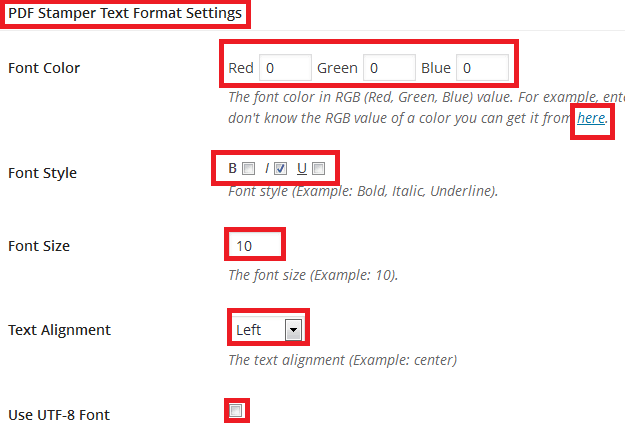
Step 3 ) The following PDF Stamper Text Format Settings allows you to set up the following.
- Font Color. To better understand what are the RGB (Red, Green, Blue) different values settings click on here
- Font Style. You can select B “Bold” or U “Underline”
- Font Size
- Text Alignment
- Use UTF-8 Font
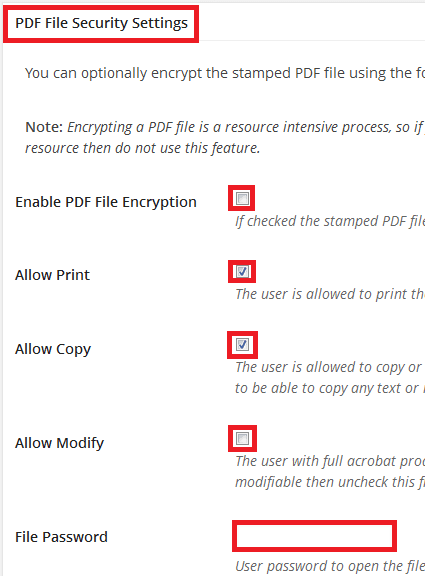
Step 4 ) The following PDF File Security Settings allows you to set up the following.
- Enable PDF File Encryption
- Allow Print
- Allow Copy
- Allow Modify
- File Password
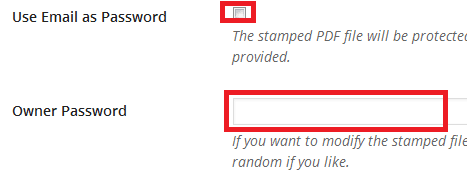
Step 5 ) The following image allows you to set up the following.
- Use Email as Password
- Owner Password
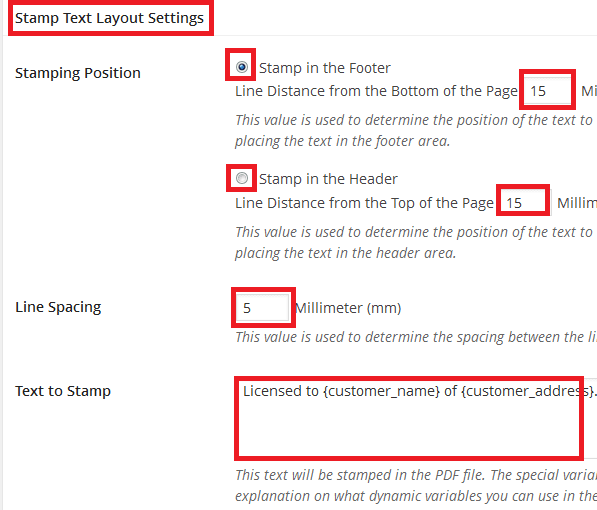
Step 6 ) The following Stamp Text Layout Settings allows you to set up the following.
- Stamping Position. You have two options here, Stamp in the Footer or Stamp in the Header
- Line Spacing
- Text to Stamp

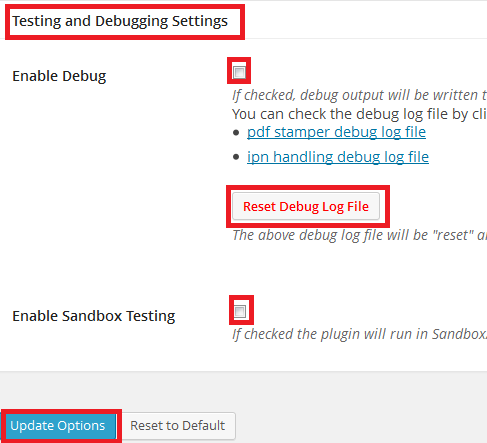
Step 7 ) The following Testing and Debugging Settings allows you to set up the following.
- Enable Debug >> Reset Debug Log File
- Enable Sandbox Testing
- Click on Update Options button
Click on the following link Settings Part Two to complete the next tutorial.
I will be updating this post from time to time. So keep coming back for more.
Enjoy.