PDF Stamper Ioncube Install Using Xampp will show you how to set up PDF Stamper locally using Xampp and install Ioncube.
Last Updated: August 17, 2016
The purpose of this tutorial is to help you run and test PDF Stamper locally on your website. This tutorial was written using Windows 7 and tested using Windows 10. The following instructions should also work in a live server. Just remember the local path is different on a live server.
What you need:
- A licensed copy of WP PDF Stamper (Commercial Plugin)
- Xampp installed locally. You can read my install-wordpress-locally-using-xampp to help you install xampp locally.
- WordPress set up locally. You can read following install-wordpress-locally-page-two tutorial to help you install WordPress locally.
- Download a copy of Ioncube and minimum checker plugin from Tips And Tricks HQ.
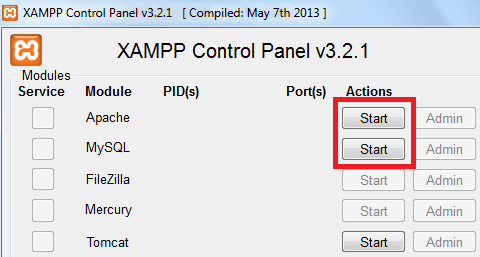
Step 1 ) Start your Xampp Apache Server and MySQL. See image below.
Step 2 ) Extract the files from the folder you downloaded as mentioned above. Create a folder named ioncube and copy the extracted content into the folder. Then copy the folder and content into two locations. See images below.
- First location is inside your WordPress install. For this tutorial the location is E: server/xampp/htdocs/wordpress361/ioncube/. (Please note your location might be different)
- Second location is inside xampp local server. For this tutorial the location is E: server/xampp/php/ioncube/
Information: The reason why you copy ioncube folder in two location is because the server path will contain the files to install and the website path will have the installer wizard for you to run.
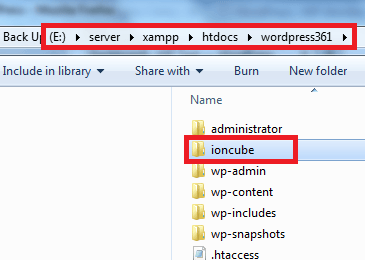
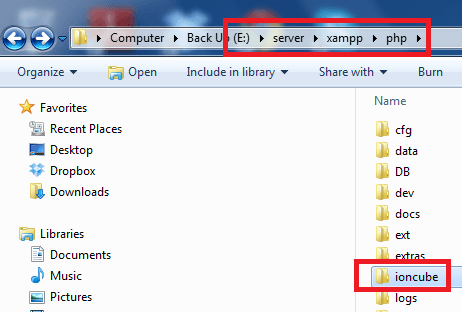
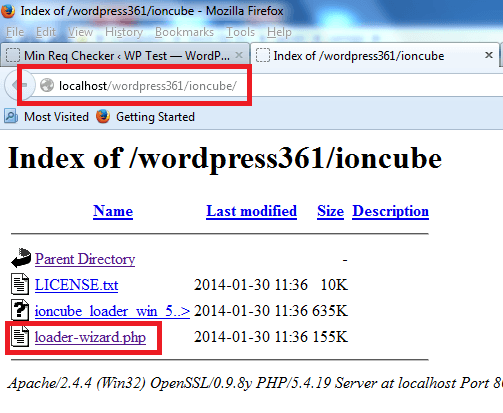
Step 3 ) Type on your browser the following URL localhost/your-wordpress-install/ioncube/ and hit enter. Locate the file loader-wizard.php, and left click with your mouse. See image below.
Step 4 ) If everything goes well you will not the see the following error message. See image below.
For this tutorial, I am running PHP 5.4 version. The following information is telling me that the ioncube folder does not have the correct file version included to install ioncube in my local Apache server.
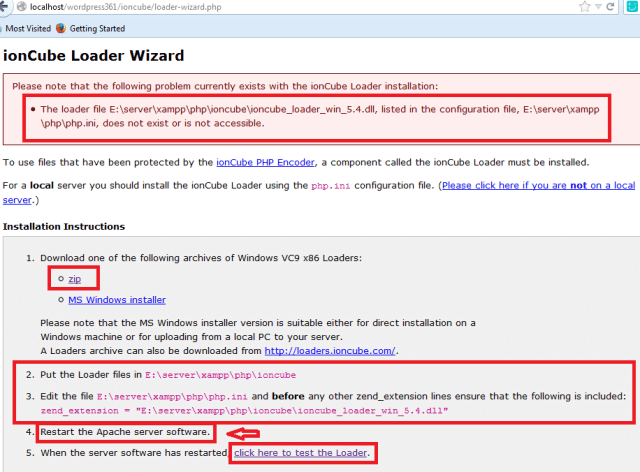
Step 5 ) Follow the instructions above. Download the corresponding zip folder for your operating system. Unzipped the folder and copy ioncube_loader_win_5.4.dll file to the path mentioned above E:\server\xampp\php\ioncube. (yours might be different)
Information: The reason the downloaded folder did not have the correct files because I downloaded the wrong version from the ioncube website on purpose. I just wanted to show you the error message that will be displayed. The following image has five different version. You only need one. Make sure you use the correct version based on your PHP version.(Remember to download the correct folder based on your operating system.)

Step 6 ) Enter the following entry in the php.ini file as mentioned in the instructions above in step 4. See image below. (Your instructions might be different).
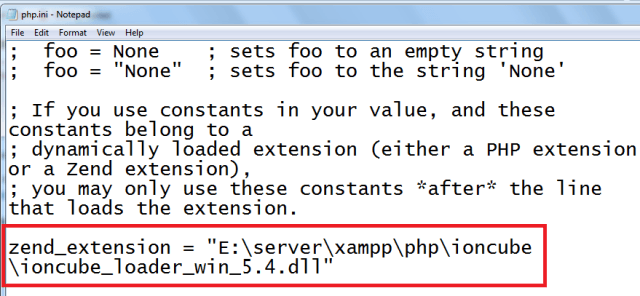
Ioncube Restart Apache
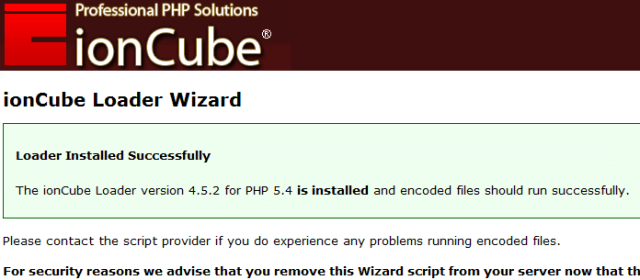
Step 7 ) Restart Apache server as mentioned above in step 4. Click on Click here to test the loader. If everything goes well you will see the following image.
Step 8 ) Log into your local website and run the minimum checker plugin and if all goes well you will see the following screen.
Note: You can delete the ioncube folder and content from the website path. You don’t need it any more.
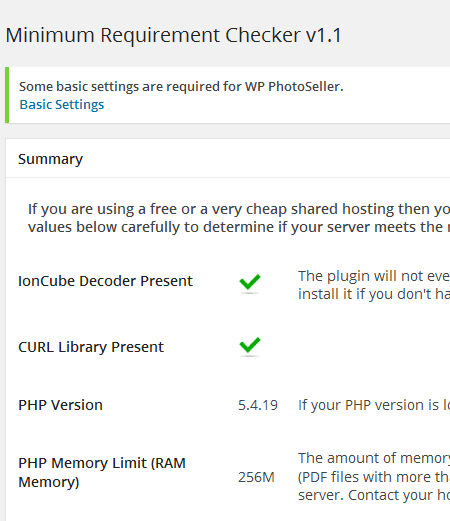
You can now run your PDF-Stamper plugin locally without any problems. (Note you need a valid license key to run WP PDF Stamper)
If you have any questions please let me know.
Enjoy.