Install WordPress Locally Page Two tutorial follows on from my previous Part 1 tutorial. This shows you step by step how to install WordPress.
Last Updated: August 17, 2017
Latest News: I have changed some of the wording to further clarify the steps.
Hint: This tutorial was created using WordPress 4.4.1. You need to make sure your security settings especially in Windows 7 or 8.1 and 10 allow you to run xampp server. If you have Skype installed and you have it running on the background, you might have to adjust the port because Skype uses the same port as Xampp.
Install WordPress Locally Page Two Steps
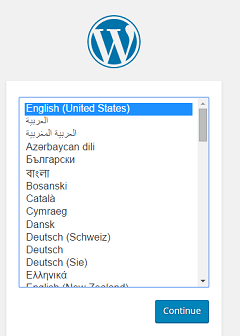
Step 1 ) Type the following on your web browser http://localhost/wordpress/ which is added in the previous tutorial above Part 1 Install WordPress Locally Using Xampp, in Step 6 ). You will see the following image allowing you to select which language your website will be set up in. Once you have selected your language click on Continue button.
Step 2 ) On the second screen you will see the following message. This message simply points out what you need to have available before you begin the installation. Once you have read through the message then click on Let’s go! button found at the bottom of the message.
Welcome to WordPress. Before getting started, we need some information on the database. You will need to know the following items before proceeding.
- Database name
- Database username
- Database password
- Database host
- Table prefix (if you want to run more than one WordPress in a single database)
We’re going to use this information to create a wp-config.php file. If for any reason this automatic file creation doesn’t work, don’t worry. All this does is fill in the database information to a configuration file. You may also simply open wp-config-sample.php in a text editor, fill in your information, and save it as wp-config.php. Need more help? We got it.
In all likelihood, these items were supplied to you by your Web Host. If you don’t have this information, then you will need to contact them before you can continue. If you’re all ready…
Step 3 ) In the following screen you will see the following information for you to enter. Once you have completed the information below click on Submit button.
Below you should enter your database connection details. If you’re not sure about these, contact your host.
Database Name = wordpress The name of the database you want to run WP in.
User Name = username Your MySQL username
Password = password …and your MySQL password.
Database Host = localhost You should be able to get this info from your web host, if localhost doesn’t work.
Table Prefix = wp_ If you want to run multiple WordPress installations in a single database, change this.
Info: Alternative you can skip all the 3 steps above and go straight to Step 4 ) below, which carries out the same task. All it means is that you save yourself from clicking 3 extra times.
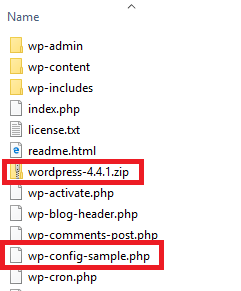
Step 4 ) Open the folder wordpress and locate the following file wp-configure-sample.php. I have also highlighted wordpress-4.4.1.zip folder so you know which version is been installed.
Rename the file wp-configure-sample.php to wp-config.php. This will allow for WordPress to kick start the installation. See image below.
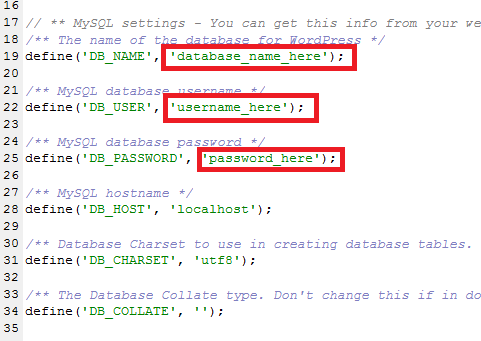
Step 5 ) Use a plain text editor like notepad in Windows and open the file wp-config.php and edit the following areas. See image below.
define('DB_NAME','database_name_here');define('DB_USER','username_here');define('DB_PASSWORD','password_here');
Note: Make sure you type the database name, user name and password you typed in Part 1 of this tutorial when you created the database in the local Xampp server.
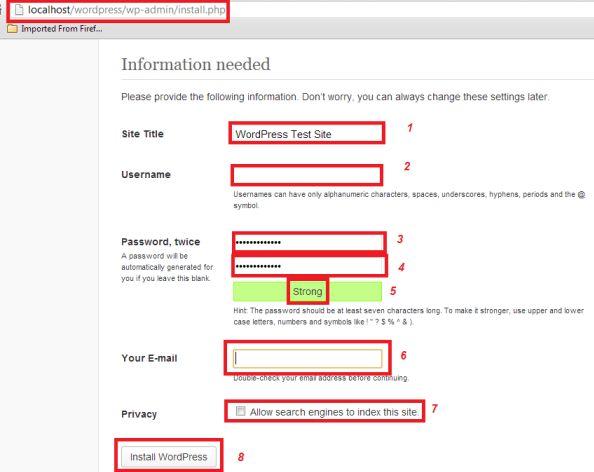
Step 6 ) Go back to your browser and refresh your browser and you will see the following screen. Fill in the following fields Site Title, Username, enter Password, twice, enter Your E-mail and for Privacy make sure you unchecked the box because this is running locally and you don’t need search engines to index the site. See image below.
Note: If you don’t see the following screen go back to Step 4 ) above and make sure you typed the correct username, database name and password.
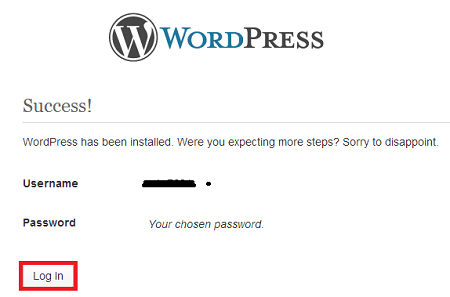
Step 7 ) Your next screen should tell you that you have successfully installed WordPress. Click on Log in.
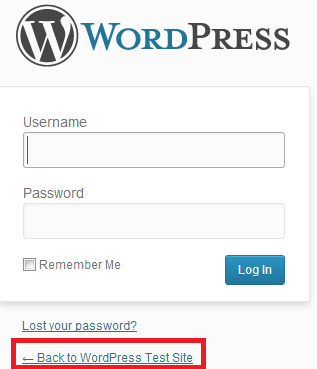
Step 8 ) You can choose to log into your admin panel or simply view your website. I have chosen to view the website.
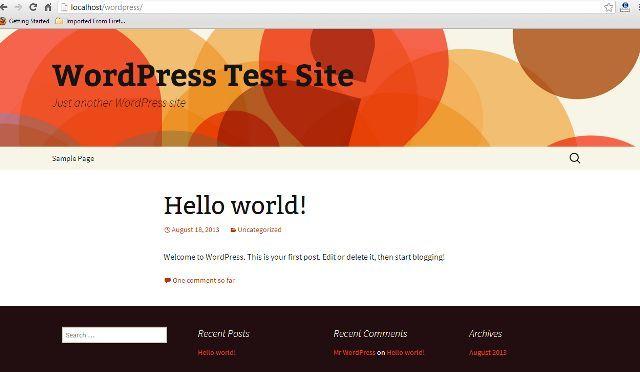
Step 9 ) On your next screen you will see your website live locally. If you are installing WordPress 4.4.1 the theme will be different to the theme you see below.
Troubleshooting
Step 10 ) After completing all the steps above and you type the following on your web browser http://localhost/wordpress/. If you see the following error illustrated in the image below, go back to Step 5 ) and make sure entered the correct database name, user name and password.

============================
That is how easy it is to install WordPress locally using Xampp.
Click on the following URL Install WordPress Locally Security Setup to continue learning.
I hope this tutorial helps you.
Enjoy.
Xampp Tutorial List:
Excellent tutorial but There is a missing element
I had to move the wordpress directory from root to c:xampphtdocs for the browser to see the wordpress installation.
Best Regards John Main
Hi John, I can see what you mean. In the beginning of the tutorial I do mention that you need to follow the on screen instructions when installing Xampp. In the installation it will install in the path you mention unless you decide otherwise. I might add some more instructions to help others who read this tutorial understand where in the hard drive Xampp is installed.
Kind regards
In your step 5, which username and password am I to use.
Hi Daniel, thank you for your question. In Step 5 you need to add the username and password you created in the previouse tutorial. At the top of this post in the list you will see the first tutorial, Install WordPress Locally Using Xampp.
Let me know if you need more help.
Kind regards