WP PDF Stamper Settings Part Two tutorial will show you how to set up and configure the email settings, integration settings and much more.
Last Updated: August 21, 2016
Latest News: I have added another link to the menu.
WP PDF Stamper Tutorials:
- WP PDF Stamper
- Settings Part Two
- Manual Stamping
- PDF Stamper Ioncube Install Using Xampp. (Optional) This tutorials shows you how to set up Ioncube locally in your computer or laptop running Windows 7. This allows you to install WP PDF Stamper for testing.
- Troubleshooting
WP PDF Stamper Settings Part Two Steps
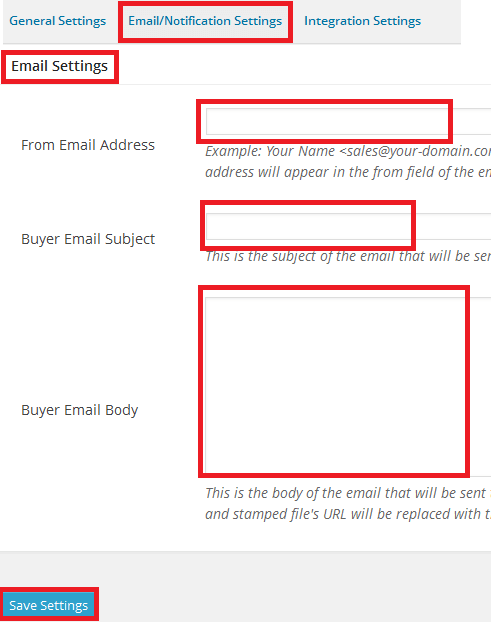
Step 1 ) Go to PDF Stamper -> Settings -> Email/Notification Settings to set up the following.
Email Settings
- From Email Address
- Buyer Email Subject
- Buyer Email Body
- Seller Email Address
- Seller Email Subject
- Seller Email Body
- Click on Save Settings button

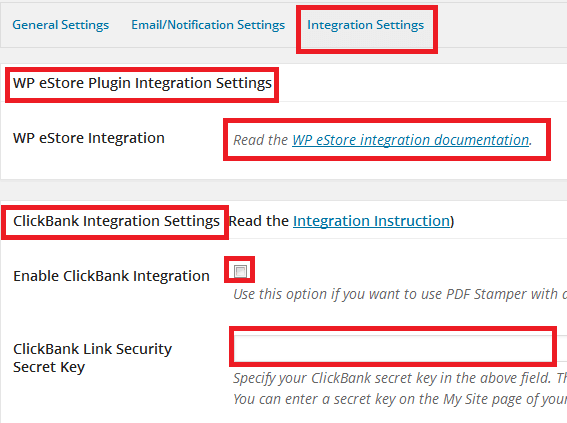
Step 2 ) Go to PDF Stamper -> Settings -> Integration Settings to set up the following.
WP eStore Plugin Integration Settings
- WP eStore Integration
ClickBank Integration Settings
- Enable ClickBank Integration
- ClickBank Link Security Secret Key

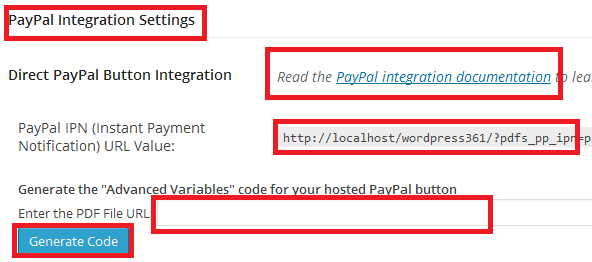
Step 3 ) The following image allows you to set up the following.
PayPal Integration Settings
- Direct PayPal Button Integration
- PayPal IPN (Instant Payment Notification) URL Value
- Enter the PDF File URL
- Click on Generate Code button

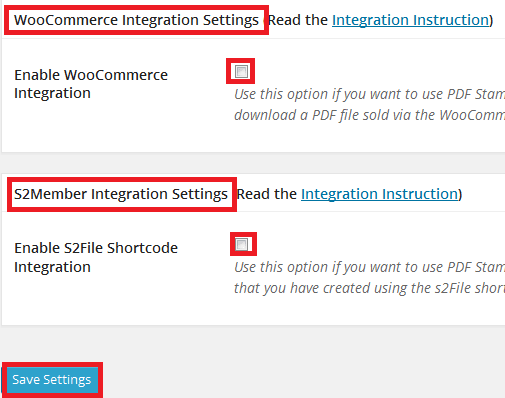
Step 4 ) The following image allows you to set up the following.
WooCommerce Integration Settings
- Enable WooCommerce Integration
S2Member Integration Settings
- Enable S2File Shortcode Integration
- Click on Save Settings button

Click on the following link WP PDF Stamper Manual Stamping to complete the next tutorial.
I will be updating this post from time to time. So keep coming back for more.
Enjoy.