WP Easy PayPal Payment Accept Plugin will show you how to add some simple payment method or donation to your website using a plugin.
Last Updated: January 22, 2025
Latest News: Updated the documentation.

WP Easy PayPal Payment Accept plugin is a very simple yet powerful plugin that allows you to sell items and services using shortcodes. You can even promote a donation system in your site to allow your visitors to make a donation.
You don’t need to spend too much time configuring the plugin settings as you can see from the instructions below. This is simple and easy for anyone to achieve.
WP Easy PayPal Payment Accept changelog version 5.1.3
- The visitor ID won’t be set for admin area anymore since this is only needed for the front-end. This should help with the “headers already sent” error on some sites.
Requirements:
WP Easy PayPal Payment Accept Tutorials
- Settings
- PayPal PPCP New API
- Widget Setup
- Shortcodes
WP Easy PayPal Payment Accept Plugin Steps
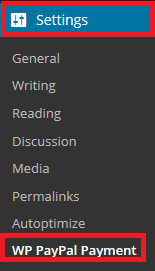
Step 1 ) Go to Settings -> WP PayPal Payment menu as illustrated in the image below.
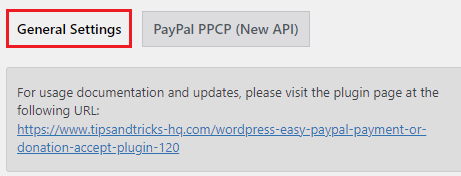
Step 2 ) Go to Settings -> WP PayPal Payment -> General Settings tab as illustrated in the image below to start configuring the plugin’s general settings.
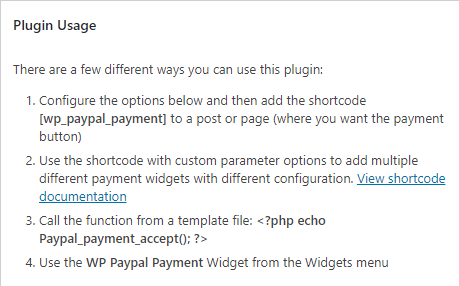
Step 3 ) The following image Plugin Usage lets you know how to add a shortcode to the page or post. You can even add a simple function code to your template.
Note: If you want to learn more about different shortcodes you can use, click on the following URL View shortcode documentation.
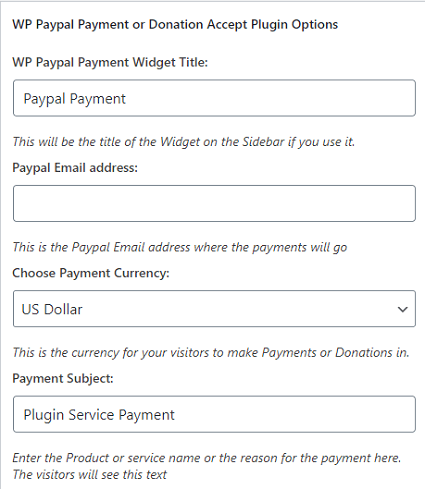
Step 4 ) The following image WP PayPal Payment or Donation Accept Plugin Options allows you to set up the following options.
- WP Paypal Payment Widget Title:
- Paypal Email address:
- Choose Payment Currency:
- Payment Subject:
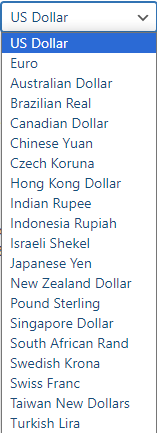
Step 4-1 ) The following image allows you to select from the following list of currencies available from the dropdown menu.
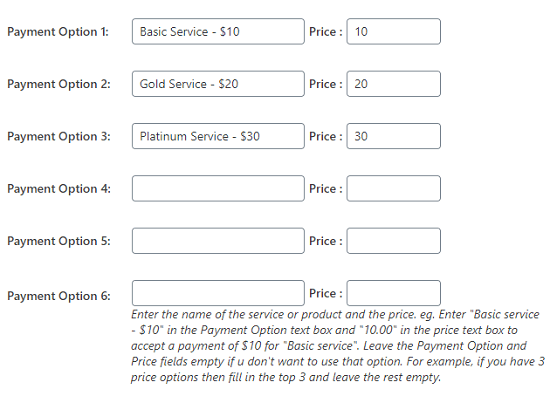
Step 5 ) The following image Payment Options allows you to add up to 6 different payment options to your website.
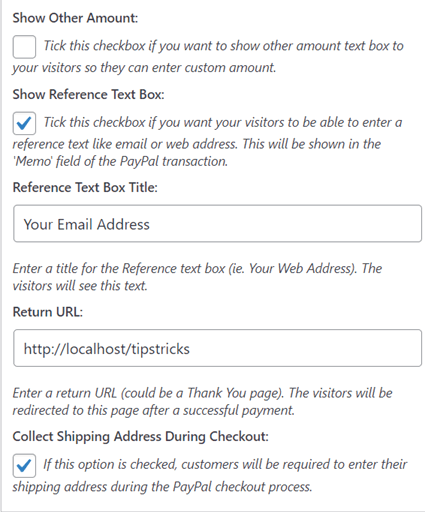
Step 6 ) The following image allows you to select and set up the following options.
Enable Other Fields
- Show Other Amount:
- Show Reference Text Box:
- Reference Text Box Title:
- Return URL:
- Collect Shipping Address During Checkout:
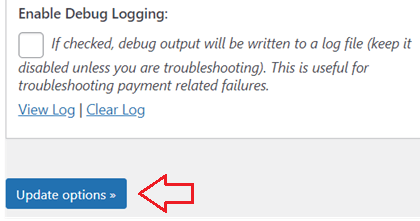
Step 7 ) The following image allows you to select and set up the following options.
Enable Debug Logging Option
- Enable Debug Logging:
- Make sure you click on Update options button once you have completed your settings.
===========================
That’s how simple it is to add some payment method to your website or blog.
Shopping Carts I recommend:
I hope you enjoyed this simple tutorial. I will be adding more information soon.
Enjoy.
Thank you Manuel for this easy-to-follow tutorial. But is it not possible to have a design that incorporates the major currencies like, US dollar, British Pound sterling and Euros? Thank you for your kind response.
Hi Austin, I am not really sure what you mean? Can you provide more information in regards to what you want to achieve?
Thank you
Is there a way to have the label for the individual Payment Options appear in the output receipt? Several of the options are the same price – so it’s impossible to tell which one was selected.
Hi Jimmie, unfortunately at present that option is not available in the plugin.
Kind regards