WordPress Gutenberg Editor Post Settings shows you how to setup all the different options available for a post and much more.
Last Updated: July 14, 2023
Latest News: Updated missing broken link.
The following tutorial shows you how to organize the information displayed in a post. You can choose when to publish a post, add some tags, categories, image and much more. Adding the correct content in a post can help attract more visitors to your site. The extra options can help you manage and administrate the post better.
What you need:
WordPress Gutenberg Editor Tutorials:
- Gutenberg Editor
- Top Left Editor Options
- Top Right Editor Options
- Adding Blocks
- View Post
- Post Settings
WordPress Gutenberg Editor Post Settings
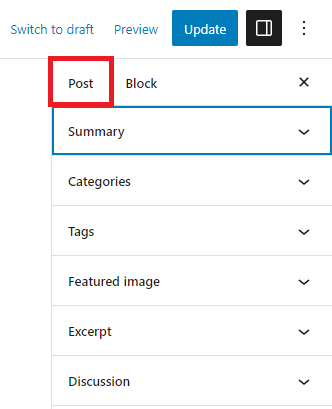
Step 1 ) The following image Post allows you to manage the following options.
Post Options
- Summary
- Categories
- Tags
- Featured image
- Excerpt
- Discussion
Summary
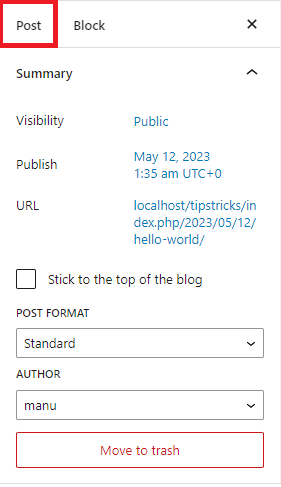
Step 2 ) The following image Summary allows you to setup the following options.
Summary Options
- Visibility = Note: Check Step 2-a ) below.
- Publish = Note: Check Step 2-b ) below.
- URL = Note: Check Step 2-c ) below.
Visibility
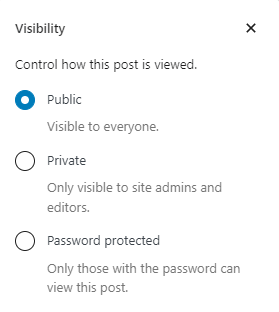
Step 2-a ) The following image Visibility allows you to choose from the following options.
Visibility Options
- Public
- Private
- Password Protected
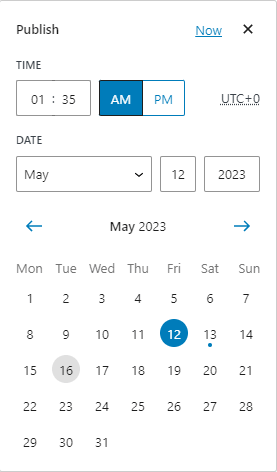
Step 2-b ) The following image Publish allows you to choose from the following options.
Publish Options
- Day, month and year
- Hour, minutes and AM or PM
- Choose a date from the calendar view
- Click on Reset link.
- Click on Calendar Help link.
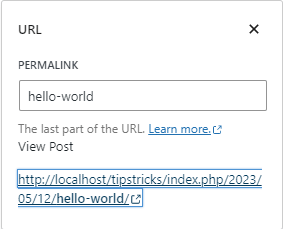
URL
Step 2-c ) The following image URL allows you to view the permalink structure for the post.
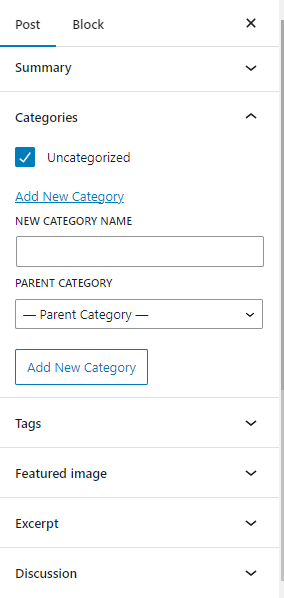
Categories
When adding categories and tags think of them in this manner. Categories represent the chapters in a book and tags represent the index in a book. If you keep this in mind it will help you to sort out categories from tags in your website.
Step 3 ) The following image Categories allows you to assign a category or categories to a post.
Note: You should spend some time planning how many categories you are going to have in your site. Understand how you will be assigning categories to each post is also important. You can also select if a category is going to be the parent of another category. The following link Category has more information.
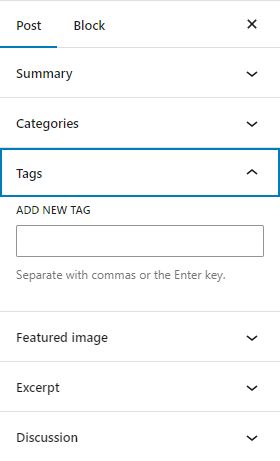
Tags
Step 4 ) The following image Tags allows you to assign tags to a post. This is similar to categories, however one of the huge differences is that you can assign many tags to each post. In saying that you should not assign too many tags. Make sure the tags you assign are related to the post content.
Note: You should spend some time planning how many tags you are going to have in your site. Remember you can add a large number of tags which is different to categories. The following link Tag has more information.
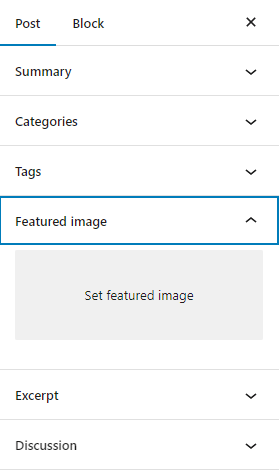
Featured image
Step 5 ) The following image Featured image allows you to select an image by clicking on Set featured image link. This plays a roll in social sharing via social medias like Twitter, Facebook, Instagram etc. It also allows you to display your post based on a featured image.
Excerpt
Step 6 ) The following image Excerpt allows you to enter one or two sentences describing what the post is about.
Note: If you don’t enter an excerpt, WordPress will automatically create an excerpt of the first 55 words in the post. The following link Excerpt has more information.

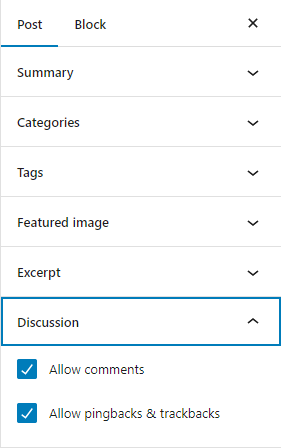
Discussion
Step 7 ) The following image Discussion allows you to enable the following options.
Discussion Options
- Allow comments
- Allow pingbacks & trackbacks
==============================
That is how simple it is to manage the extra information for a post using Gutenberg Editor.
If you have any questions please let me know. I will be updating this tutorial from time to time.
Enjoy.
WordPress Setup Tutorial List: