Gimp Image Editor Filters Part Two tutorial will cover the following filters combine, artistic, decor, map, render and much more.
Last Updated: May 22, 2023
Latest News: Updated the links below.
This tutorial is part two of the Filters menu. The following selection Apply Canvas, Cartoon, Clothify, Cubism, GIMPressionist, Oilify, Photocopy and more is list of filters you can use in Gimp.
What You Need:
Gimp Image Editor Tutorials:
- Layout
- Tools Menu File
- Tools Edit
- Select
- View
- Image
- Layer
- Colors
- Tools
- Filters
- Filters Part Two
- Filters Part Three
- Windows Help
Gimp Image Editor Filters Part Two
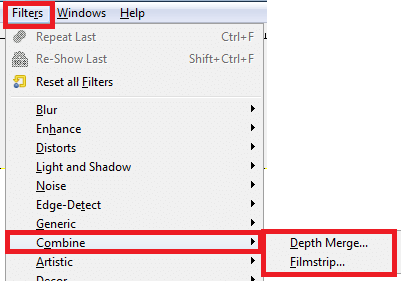
Step 1 ) Click on Filters -> Combine menu to edit the following:
- Depth Merge
- Flimstrip
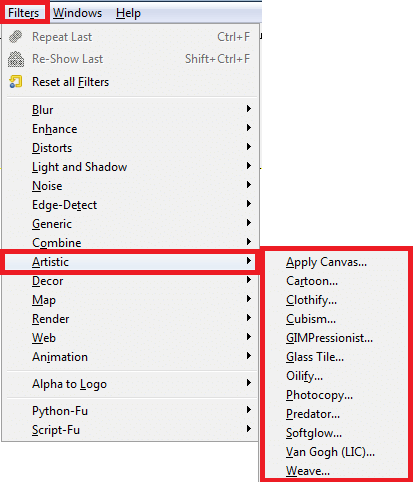
Step 2 ) Click on Filters -> Artistic menu to edit the following:
- Apply Canvas
- Cartoon
- Clothify
- Cubism
- GIMPressionist
- Oilify
- Photocopy
- Predator
- Softglow
- Van Gogh (LIC)
- Weave
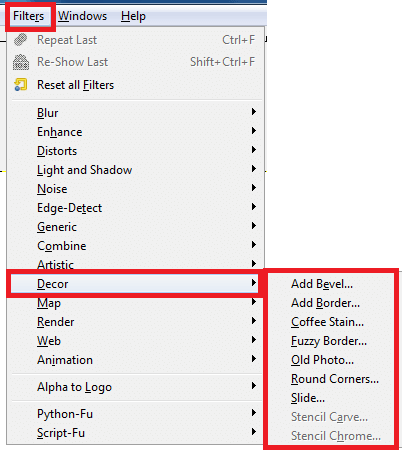
Step 3 ) Click on Filters -> Decor menu to edit the following:
- Add Bevel
- Add Border
- Coffee Stain
- Fuzzy Border
- Old Photo
- Round Corners
- Slide
- Stencil Carve
- Stencil Chrome
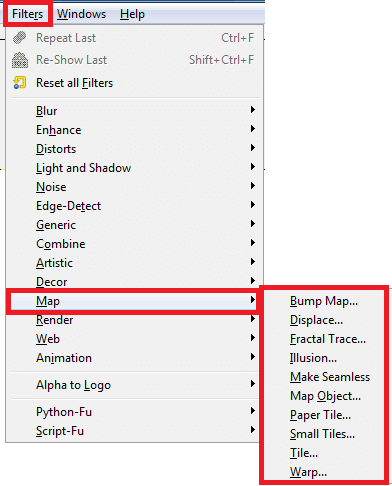
Step 4 ) Click on Filters -> Map menu to edit the following:
- Bump Map
- Displace
- Fractal Trace
- Illusion
- Make Seamless
- Map Object
- Paper Tile
- Small Tiles
- Tile
- Warp
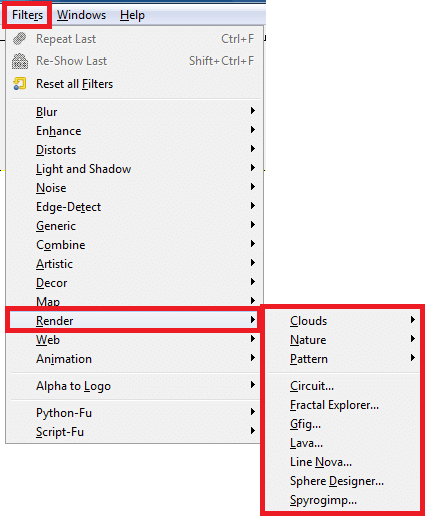
Step 5 ) Click on Filters -> Render menu to edit the following:
- Clouds
- Nature
- Pattern
- Circuit
- Fractal Explorer
- Gfig
- Lava
- Line Nova
- Sphere Designer
- Spyrogimp
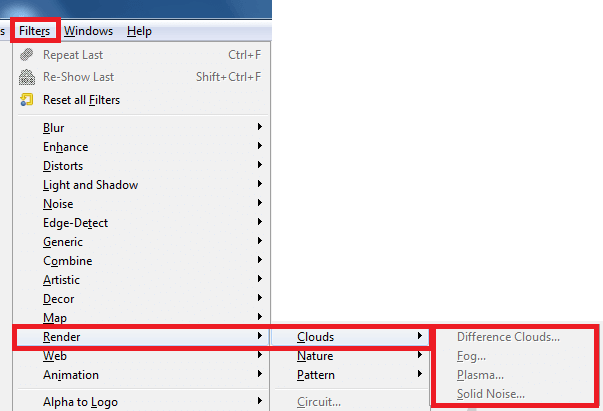
Step 6 ) Click on Filters -> Render -> Clouds menu to edit the following:
- Difference Clouds
- Fog
- Plasma
- Solid NoiseNature
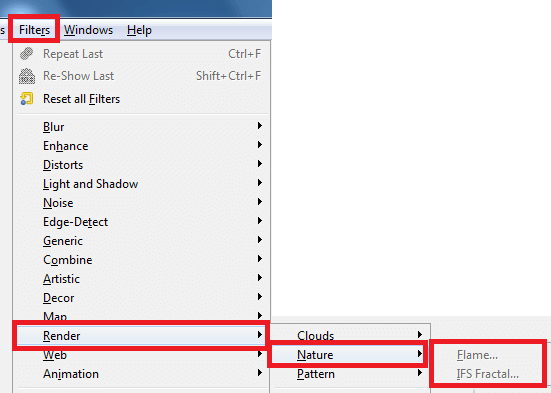
Step 7 ) Click on Filters -> Render -> Nature menu to edit the following:
- Flame
- IFS Fractal
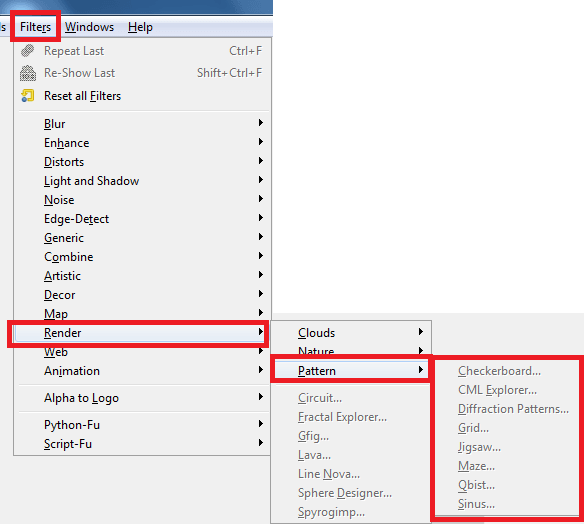
Step 8 ) Click on Filters -> Render -> Nature menu to edit the following:
- Checkerboard
- CML Explorer
- Diffraction Patterns
- Grid
- Jigsaw
- Maze
- Qbist
- Sinus
====================
Click on the following link Filters Part Three to learn more about the menu.
I will update this tutorial from time to time. So keep coming back for the latest. If you have any questions please let me know.
Enjoy.
Check out More Gimp Tutorials: