WP Simple Membership Form Builder Plugin post shows you how to create customized membership forms and add the shortcode to your website and more.
Last Updated: October 13, 2023
Latest News: Updated the documentation.
There are times when you need to add extra fields to your membership forms. You might also decide to customize the profile form for your members by adding extra form fields. This post covers the basic settings available for the Form Builder addon. You will also learn how to add and customize the default form fields added.
Form Builder addon version 5.1.4, checked on October 13, 2023. If you don’t have the latest version then click on the following URL re-download-the-purchased-addons.
Note: When you install the Form Builder Addon, if you have enabled Free Membership in the Settings you will need to create a new Free membership form.
What You Need:
- Simple Membership plugin.
- (Optional: Documentation you might want to read how-to-deal-with-the-common-challenges-of-a-membership-site)
- (Optional: You might be interested in the following documentation adding-a-terms-and-conditions-and-privacy-policy-to-member-registration-page.)
Addons Needed:
- Form Builder Addon (Requires purchasing)
- Form Shortcode (Free Optional addon)
WP Simple Membership Form Builder Plugin
Step 1 ) Install the Form Builder addon you downloaded from the URL above and activate it.
Note: Check the following URL how-to-install-wordpress-plugins to learn about how to install a plugin or addon.
Step 2 ) Go to WP Membership -> Form Builder as illustrated in the image below to start creating new forms. You can also see the Form Shortcode addon activated in the image below.

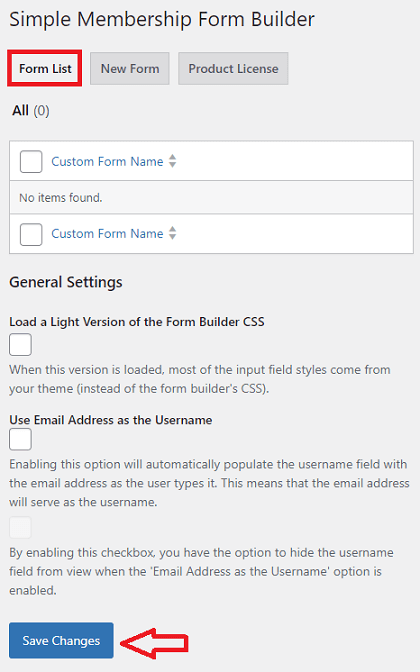
Step 3 ) The following image Form List allows you to manage the following options. It will also display forms created.
Form List General Settings
- Load a Light Version of the Form Builder CSS
- When forms are displayed, you can select and edit or delete the forms.
- Use Email Address as the Username
- Click on Save Changes button when you have finished with the settings.
New Form
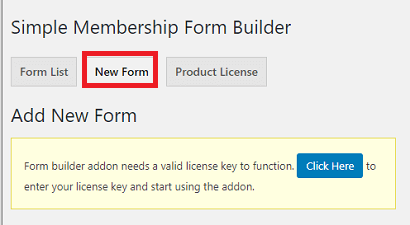
Step 4 ) Click on New Form tab to create a new form. The following image displays the fields you need to fill out and the options you need to select to create the new form.
- Name the form
- Type of the form = In this example I selected Registration form.
- Membership level = In this example I selected Silver membership level.
- Click on Create Form button to begin.
Note: When you create a buy now PayPal button, it will display the form assigned to the same membership level as the PayPal button. The same applies for subscriptions buttons.

License Warning Message
Step 4-a ) If you see the following message illustrated in the image below when you create a new form, this means that you have not entered a license key yet. Please make sure to purchase a valid license key before installing and activating the addon.
Form builder addon needs a valid license key to function. Click Here to enter your license key and start using the addon.
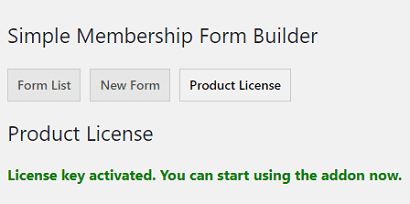
Step 4-b ) Once you have entered a valid license key, you will see the following message. You will then be able to start creating new forms.
License key activated. You can start using the addon now.
Standard Form Fields
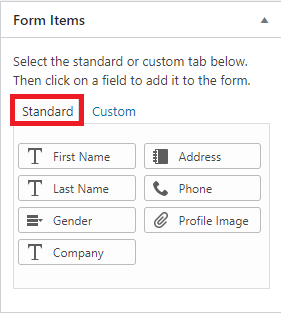
Step 5 ) The following image displays the Standard form fields you can use to create your form.
Standard Form Fields
- First Name
- Last Name
- Gender
- Company
- Address
- Phone
- Profile Image
Custom Form Fields
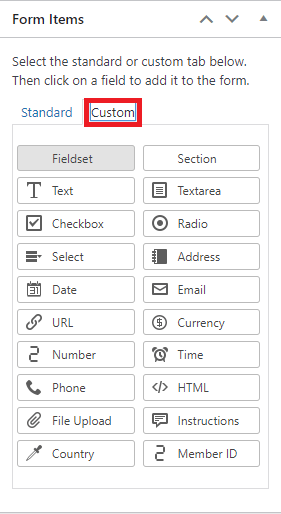
Step 6 ) The following image Custom tab display the extra custom fields you can use to expand your form.
Custom Form Fields
- Text
- Checkbox
- Select
- Date
- URL
- Number
- Phone
- File Upload
- Textarea
- Radio
- Address
- Currency
- Time
- HTML
- Instructions
- Country
- Member ID = Note: This field can be added to the profile edit field (it shows the Member ID of the member.
Default Form Fields
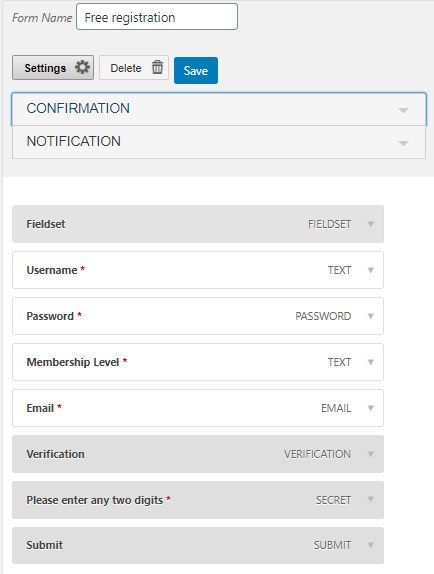
Step 7 ) The following image displays the default standard fields added to your form when you click on New Form button as mentioned above. You can further customize the default form fields by adding more options to each field.
Below is list of standard form fields many use in a site, especially if it a free membership site. Of course you can choose to add some custom fields if you want.
Note: Default fields added by the plugin cannot be deleted.
Default Standard Form Fields
- Form Name = Free registration.
- Settings, Delete, Save button.
- Confirmation
- Notification
- Fieldset
- Verification = Note: This is used to catch the bot submissions. You can use the following captcha option instead: https://simple-membership-plugin.com/simple-membership-and-google-recaptcha-integration/.
- Please enter any two digits
- Submit
Text Fields Settings
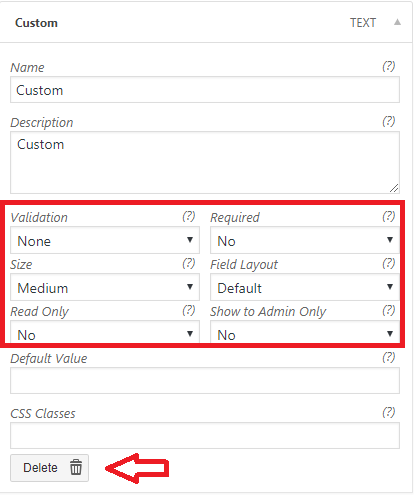
Step 8 ) The following image displays the settings you can configure and set up for a Text field added to a form. I am only including some basic information.
Form Text Field Settings
- Name
- Description
- Text
- Validation = Note: It is important to make sure you select the correct validation for the field.
- Email: makes the element require a valid email.
- URL: makes the element require a valid url.
- Date: makes the element require a date.
- Number: makes the element require a decimal number.
- Digits: makes the element require digits only.
- Phone: makes the element require a US or International phone number. Most formats are accepted.
- Time: choose either 12- or 24-hour time format (NOTE: only available with the Time field).
- Required
- Size
- Field Layout
- Read Only
- Show to Admin Only
- Default Value
- CSS Classes
- You can Delete any custom field added to a form. But you can’t delete any standard field added.
Note: Some fields might not have the same list of settings available for customization as above.
Confirmation Settings
Note: The following two steps are not available when someone signs up as a free member unless you have the Form Builder add-on.
Step 9 ) The following image Settings -> Confirmation allows you to set up the following features after someone submits a form.
- Text
- Page
- Redirect

Notification Settings
Step 10 ) Click on Settings -> Notification as illustrated in the image below to activate Send Confirmation Email to User. This is important if you want to notify the member about their subscription via an e-mail.

Form List
Step 11 ) The following image Form List tab displays the list of forms created using the add-on. In this example I created 2 new Registration Forms. Each form created has a unique Form name, Form ID and each belong to a Membership Level. The Form Builder add-on also created a unique Profile Form for each registration form created.
If you want to use any of the forms created for Free registration because of a particular situation you can use the following addon Form Shortcode. (Remember, in your website your forms will have a different ID)

Free Registration Form Shortcodes
Step 12 ) The following is a list of shortcodes you can use.
- For the Silver Level the shortcode is [ swpm_registration_form level=10]
- For the Free Level the shortcode is [ swpm_registration_form level=6].
Note: for the Free membership form you don’t have to add the level=6 because this is already added in the plugins Settings under Free Membership Level ID. The default shortcode [ swpm_registration_form] created when you install the plugin will work as well.
Note: For every registration form you create the plugin will also create a profile form. Every registration form must have a unique profile form as well or else you will receive error messages. If the profile form is not created you need to create one yourself. The Simple Membership plugin already creates the profile page for you when you install and activate the plugin. The shortcode it adds to the profile page is [ swpm_profile_form ]. You don’t have to edit or change this shortcode. The plugin knows which member has logged in. It will pull the correct profile per membership level. For paid membership the shortcode would look something like the following [ swpm_payment_button id=8100]. (Remember in your payment button id will be different)
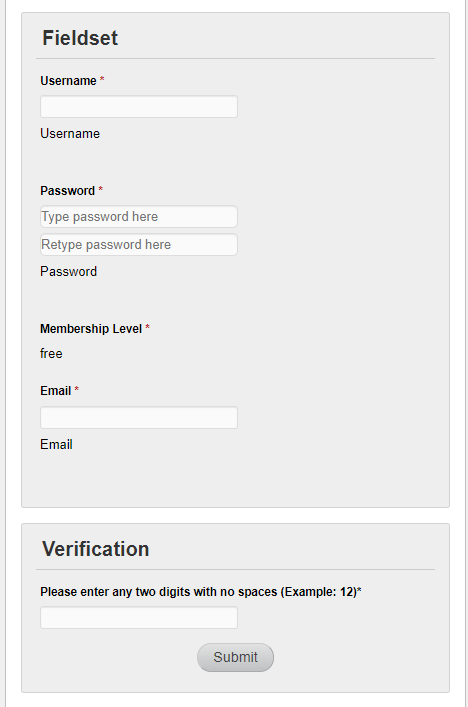
Step 13 ) The following image displays the end result of a very simple registration form.
FAQ
Q1 I am using the Form Builder addon together with Simple Membership. The checkbox for the Privacy Policy doesn’t show up in the frontend. It is activated in the backend but nothing happens. Should this problem already be fixed?
Answer: = The checkbox for the core plugin is only applicable to the core plugin’s registration form. With form builder, you create your OWN custom checkbox fields that you can use for terms and conditions. Form builder lets you create customized checkboxes with whatever text you want to use. Then you can make that checkbox required so users have to check it before they can complete the registration form.
===============
Q2 I would like to require basic information for a free user, but when a paid upgrade is initiated, require more information from the user. Is that possible & what would that process look like?
Answer: = Yes, you can have a different registration form, for each membership level. You can have the additional questions in the “Edit Profile” for the membership level in question. After the paid upgrade, the members can go to their edit profile page and update/add the additional data
https://simple-membership-plugin.com/simple-membership-registration-form-shortcode-generator/
===============
Q3 Is it possible to direct people into a specific membership level depending on what information gets input into the registration form? For example, they input a specific Country into the form when signing up and that will place them into specific membership level.
Answer: = This would need customization work.
===============
Q4 Are conditional fields possible? For example, an input is entered which requires the user to then fill out another field.
Answer: = No
===============
Troubleshooting Steps
Q1 What if the form does not show or you receive a message or an error message?
If you see any of the messages below it means your settings are not correct.
Message
Note: This message shows up when Enable Free Membership feature is disabled under General Settings tab.
Registration
Free membership is disabled on this site. Please make a payment from the Join us page to pay for a premium membership.
You will receive a unique link via email after the payment. You will be able to use that link to complete the premium membership registration.
===============
Q2 When I add a new member through the “Add a member” of the basic part of the plugin, I can specify a phone number with spaces in it : ex : 021 621 21 21, but when I edit the profile later with the Membership Form Builder, the phone number is refused until I get rid of all the spaces. Is there a way to specify which phone number format I allow?
Answer: = If you want to allow space or other characters in the field where you will collect phone number, use a standard text field (instead of a phone number type field). A text field will accept any characters. You can call this text field “Phone Number”.
===============
Error Message
Note: This error message shows up when you have the Form Builder addon active in your site and you entered the wrong free membership level ID under General Settings tab.
Error! Invalid membership level ID! This membership level does not exist. You may have deleted this level. Check the membership level ID and correct it.
=====================================
I hope the information above helps you understand how this addon works.
Click on the following URL Custom Message Add-on to continue.
If you have any questions please let me know. I will be updating this tutorial from time to time.
Enjoy.
Simple Membership Plugin Tutorial List:
Many thanks for this tutorial, it’s very clear.
I purchased the Form Builder Add-On but I’ve a problem and I hope you can help me: submitting the form the membership level id isn’t saved into the db!
I’ve two free levels. One is saved, the second isn’t. The value of the field is always zero and I can’t understand why if the first membership level is saved correctly.
Last question: I would use the hook swpm_front_end_registration_complete_fb to check the value of a custom field, but the callback function receive only the member info and not the custom fields values. Do you know if there is a way to do this check?
Thanks in advance
Hi Ferdinando Cecchini, because of the nature of your question it is best the developers reply to this. Please create a premium support ticket.
Let me know what they say.
Kind regards
Hi! Thanks for the post, it cleared up some questions for me.
However I have an issue that I cannot get past, and I only have the paid version for the form builder, not membership in general so I cannot contact their support.
I’m building a form for member registration and I don’t need the “password” however I don’t have a delete option. How can I get rid of this field?
Hi Pauli, I have replied to your other post.
Thank you
How can I delete the “password” field from my form
Hi Pauli,
If you are referring to the Form Builder addon, that field cannot be deleted. However you can create a premium addon support ticket and one of the developers will assist you further.
Thank you
Hello, I built a new signup form with Form Builder Addon on simple membership.
I put inside custom field like {your situation} and other
i would like to display that custom fields in my page but i can’t find how…
Do you have any idea ?
thank
Hi, what do you mean by I would like to display that custom fields in my page? Are you talking about the profile form?
Hello I have installed the form builder and the from shortcode. But when I create a new form it still shows me the old registration window and not the new form that I have set in WP Forms. How can I link the new form to the registration?
Thank you
Hi, make sure you clear your cache and also your browser cache. Let me know if that helps you.
Thank you