How To Install WordPress Plugins post will show you how to install a plugin, upload a plugin from your computer or laptop into your website and more.
Last Updated: March 8, 2021
Latest News: Updated the documentation.
Plugins are very important for a website. With a plugin you can customize, improve performance, edit the menu, add new features and much more. Making sure you install the correct plugins for your website is also very important. For example: Plugins that improve the speed of a site like cache plugins can help your site become more popular because it loads up faster. At the same time, this makes search engines like Google and Bing happy.
It is also equally important to keep the plugins already installed up to date. This post also shows you how to manage the plugins updates. This is important because it keeps your plugins compatible with the latest WordPress version, keeps your plugins secured and bug free.
The installation process for plugins is similar to the installation process for themes.
Important: Remember to log in regularly to make sure your site is up to date.
Recommended Tool
- You might like to use the following tool plugin tests to find out if the plugin you want to install is compatible with the latest WordPress version.
How To Install WordPress Plugins
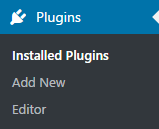
Step 1 ) Go to Plugins -> Add New to start uploading and or installing new plugins.
Upload Plugin
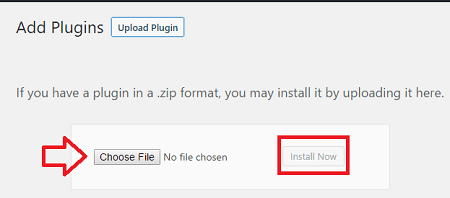
Step 2 ) In some cases you might probably have purchased a commercial plugin or downloaded a plugin locally to your computer or laptop. In this case you will need to upload your plugin to your site. The following steps will show you how to upload a plugin to your site.
Step 2-a ) Click on Upload Plugin button as shown in the following image.

Step 2-b ) Once you have located the zip file you downloaded to your computer or laptop via the Choose File button, click on Install Now button. This will install the new plugin to your site. See the following image.
Note: I recommend in some cases to test the plugins locally or on a live testing platform first. You might like to learn how to set up Xampp locally in your computer or laptop to help you test your plugins.
Searching For Plugins
Step 3 ) The following image Add Plugins shows you how to search for a plugin and or choose a plugin via a group. You can even use a custom filter to narrow down the type of plugin you are looking for. Remember WordPress repository has thousands of plugins to search for. It would be almost impossible to find the correct plugins without these options available.
Plugins Search Groups Options
- Featured
- Popular
- Recommended
- Favorites
Plugins Search Filter Options
- Keyword
- Author
- Tag

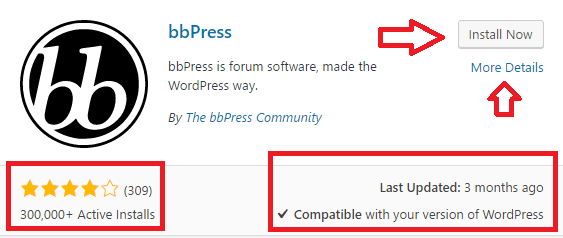
Step 4 ) The following image shows you the search results for bbPress a popular plugin. You can also see some information about the plugin and the button you need to click on to install the plugin and much more.
Plugin Information
- Install Now button.
- More Details link about the plugin.
- Ratings based on the number of reviews.
- Number of installations in websites.
- Last updated
- Compatible with the your current WordPress version. This part is very important to pay attention too.
Note: This information will help you determine whether or not a plugin is being updated regularly, it is popular, how long has it been running, what users think about the plugin via the reviews and much more.
Updating Plugins
Note: Auto-updates can be enabled or disabled for each individual plugin. Plugins with auto-updates enabled will display the estimated date of the next auto-update. Auto-updates depends on the WP-Cron task scheduling system.
Please note: Third-party plugins, or custom code, may override WordPress scheduling.
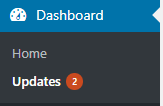
Step 5 ) The following image Dashboard shows you the latest updates available in your site. In this example you can see 2 updates available for updating. These updates can include plugins and or themes.
Step 5-a ) The following image shows you the number of plugins that require updating.
In this example you can see 2 plugins that need to be updated. have been updated. Anti-Malware Security and Brute-Force Firewall and Contact Form 7. The information reveals the current version installed and the latest version available for each plugin.
Note: It is always a good idea to view the version details for the latest update available. Depending on the type of update, you should test the latest version before updating the plugin in a live site. It is always better to prevent issues rather than having to fix any issues.
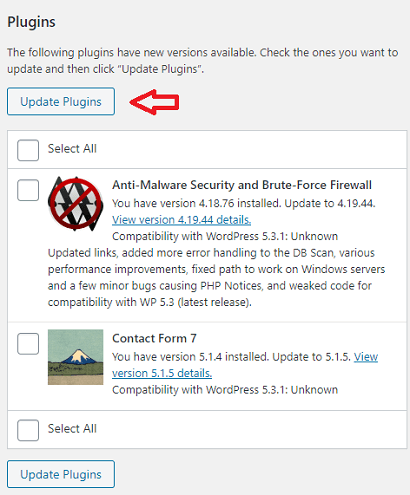
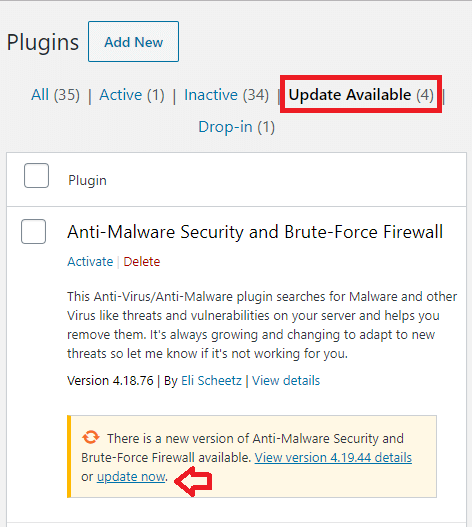
Step 5-b ) The following image also shows you another way you can update the plugins from the Plugins admin menu.
In this example you can see the update now link next to Anti-Malware Security and Brute-Force Firewall plugin. You can also click on View version 4.19.44 details link.
Enable Auto Update
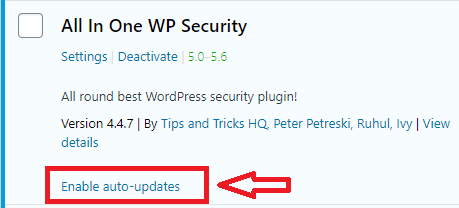
Step 6 ) The following image shows you the link Enable auto-update. Click on this link to enable or disable auto-updating for the plugin in question. This feature was introduced in WordPress 5.5. This is a great security feature added by WordPress. There are many site owners and developers that sometimes forget to update their plugins. This can create a security risk. However at the same time, you might want to control this part because some updates can also break a site. You have to be careful about enabling this feature for certain plugins.
======================================
That is all you need to do to search, upload or add a new plugin to your site.
You might be interested to know some of the plugins I recommend for a website. Click on the following URL WordPress Plugins Compatibility.
If you have any questions please let me know.
I will be updating this tutorial from time to time so make sure you come back for the latest.
Enjoy.
WordPress Setup Tutorial List: