Generate WordPress Backups Using XCloner plugin tutorial shows you how to create a WordPress backup which includes all the files and database.
Last Updated: February 8, 2022
Latest News: Updated the documentation.
XCloner has become a very simple and easy to use backup plugin. The latest version has improved the functionality for backing up WordPress sites. The following tutorial shows you how to set up and create your backups.
What you need:
- Xcloner plugin.
Generate WordPress Backups Using XCloner
Backup Options
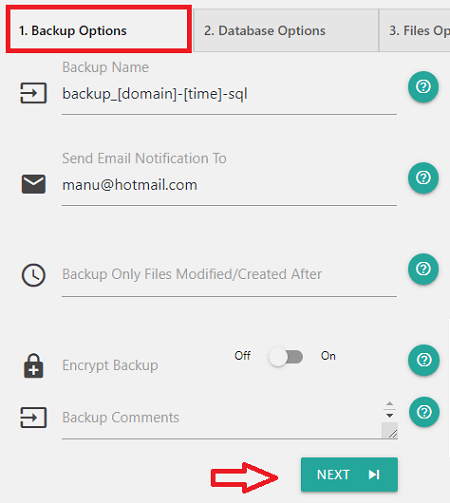
Step 1 ) Go to Site Backup -> Generate Backups -> Backup Options to start creating a backup as illustrated in the image below. The following backup options list allows you to edit the following fields.
Backup Options
- Backup Name
- Send Email Notification To
- Backup Only Files Modified/Created After
- Encrypt Backup
- Backup Comments
- Click on Next button when you are ready for the next step.
Database Options
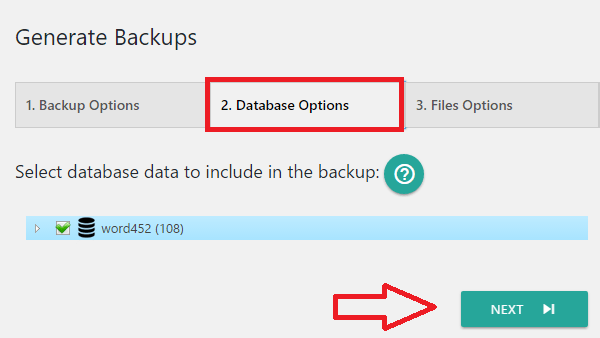
Step 2 ) Go to Site Backup -> Generate Backups -> Database Options to select the database and tables you want to include in the backup. Once you have selected your databases and tables click on Next button. See the following image.
File Options
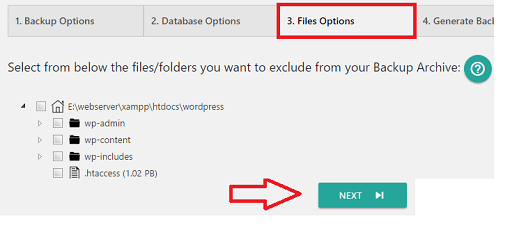
Step 3 ) Go to Site Backup -> Generate Backups -> File Options to select the files and folders you want to include in your backup. Once you have selected your files and folders click on Next button. See the following image.
Generate Backup
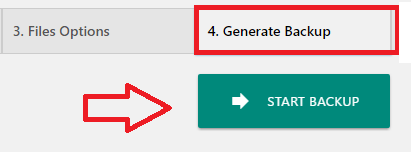
Step 4 ) Go to Site Backup -> Generate Backups -> Generate Backup to start your backup.
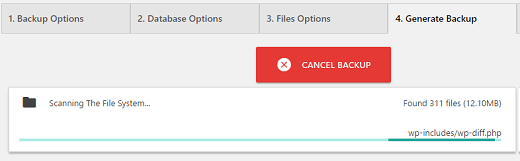
Step 5 ) The following image illustrates the backup in process. You can cancel the backup at any time during the process.
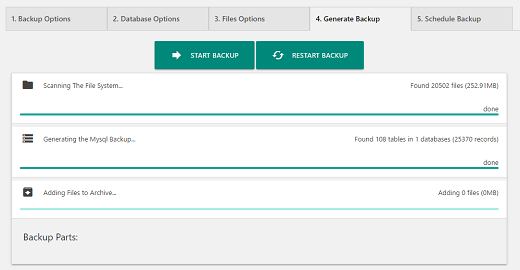
Step 6 ) If everything goes well and no error messages are displayed, you will see a similar image as the following image.
Schedule Backup
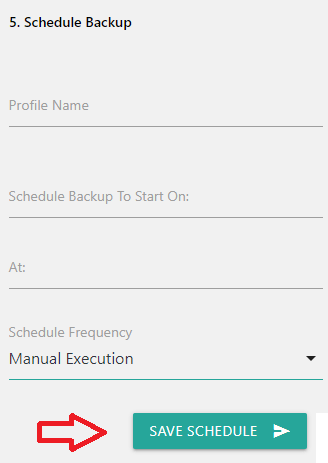
Step 7 ) Go to Site Backup -> Generate Backups -> Schedule Backup as illustrated in the image below to start your backup schedule options.
Schedule Backup Part 1
- Backup Name
- Send Email Notification To
- Backup Only Files Modified/Created After
- Encrypt Backup
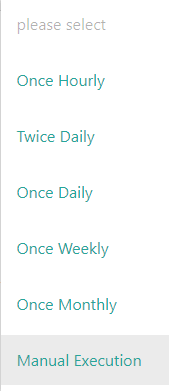
Step 7-a ) The following image allows you to select the frequency of your schedule backups.
Schedule Backup Part 2
- Once Hourly
- Twice Daily
- Once Daily
- Once Weekly
- Once Monthly
- Manual Execution
==========================
Click on the following link Restore WordPress Using Xcloner to complete this tutorial.
I will be adding more information in the near future. If you have any questions please leave a message.
Enjoy.
Go Back To XCloner Tutorials List