WP Fastest Cache Settings will show you how to set up this very simple yet very powerful WordPress cache plugin.
Last Updated: May 12, 2025
Latest News: Updated the changelog version.

Out of all the cache plugins I have tested and read about, this would have to be one of the simplest yet so powerful cache plugin in the market. Apart from being a very simple plugin to set up the support you receive from Emre Vona is impressive.
The free version is more than enough for most people. However it has a great premium version that has many more extras which improve your page speed and performance. This makes Google happy when your website loads up fast. In return it helps with SEO “Search Engine Optimization”.
This tutorial is based on the following changelog. When ever there is a new feature added or a feature optimized or fixed I will update the tutorial.
WP Fastest Cache 1.3.7 Changelog
- [Improvement] Serve cached content via .htaccess rules instead of PHP when URLs include the fbclid query string
- [FEATURE] Added support for Spanish (Chile) and Ukrainian languages
- to update translation files
- to fix PHP Fatal error: Uncaught TypeError: method_exists(): Argument #1 ($object_or_class) must be of type object|string, array given in cdn.php:383
- [Improvement] Added specific handling for BunnyCDN 403 errors
Requirements:
WP Fastest Cache Tutorials:
- Settings
- Advanced Options
- Exclude Options
WP Fastest Cache Settings Steps
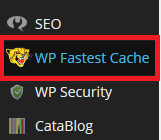
Step 1 ) Log into your website and navigate to WP Fastest Cache menu located on the admin sidebar. See image below.
Step 2 ) The following image displays the tools available in WP Fastest Cache. The following is the list of tools in the admin menu.
Admin Menu Tabs
- Settings
- Delete Cache
- Image Optimization
- Premium
- Exclude
- CDN
- DB

Settings
Step 3 ) Go to WP Fastest Cache -> Settings to enable as many of the following options. Each option has information next to it so that you know what task it will perform. Some have a blue i button for you to click and read more about that option.
Note: Remember that some options are only available in the Premium version.
- Cache System = Enable
- Widget Cache = Reduce the number of SQL queries (Premium version)
- Preload = Create the cache of all the site automatically
- Logged-in Users = Don’t show the cached version for logged-in users
- Mobile = Don’t show the cached version for desktop to mobile devices
- Mobile Theme = Create cache for mobile theme (Premium version)
- New Post = Clear all cache files when a post or page is published
- Update Post = Clear cache files when a post or page is updated
- Minify HTML = You can decrease the size of page
- Minify HTML Plus = More powerful minify html (Premium version)
- Minify Css = You can decrease the size of css files
- Minify Css Plus = More powerful minify css (Premium version)
- Combine Css = Reduce HTTP requests through combined css files
- Minify Js = You can decrease the size of js files (Premium version)
- Combine Js = Reduce HTTP requests through combined js files (Header)
- Combine Js Plus = Minify the combined js files (Footer) (Premium version)
- Gzip = Reduce the size of files sent from your server
- Browser Caching = Reduce page load times for repeat visitor
- Disable Emojis = You can remove the emoji inline css and wp-emoji-release.min.js
- Render Blocking Js = Remove render-blocking JavaScript (Premium version)
- Google Fonts = Load Google Fonts asynchronously (Premium version)
- Lazy Load = Load images and iframes when they enter the browsers viewport (Premium version)
- Language
- Click on Submit button once you complete your settings.
Settings Language
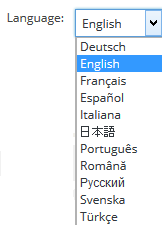
Step 3-a ) The following image allows you to select from one of the following translated languages. More languages will be added soon.
Delete Cache
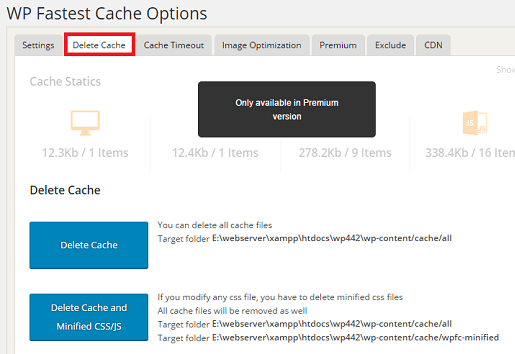
Step 4 ) The following image Delete Cache allows you to click on one of the following buttons.
- Cache Statics = (Premium version)
- Delete Cache
- Delete Cache and Minified CSS/JS
- Cache Timeout
Cache Timeout Wizard
Step 4-a ) The following image Cache Timeout Wizard allows you to select from the following options.
Cache Timeout Wizard Rules
- IF REQUEST_URI
Frequency
- Once Every 1 Minute
- Once Every 5 Minutes
- Once Every 15 Minutes
- Twice an Hour
- Once an Hour
- Once Every 2 Hours
- Once Every 6 Hours
- Once a Day
- Once Weekly
- Once a Month
- Once a Year
- and more……
- Click on Save button when you have completed your setup
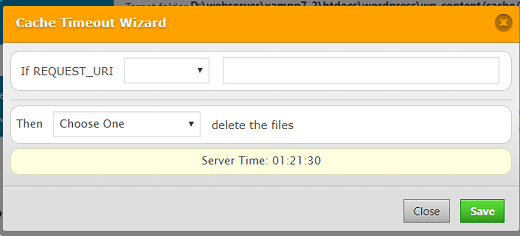
Image Optimization
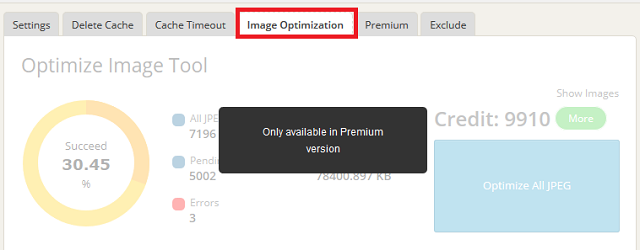
Step 5 ) The following image Image Optimization allows you to optimize your images. (Premium version)
WP Fastest Cache Premium
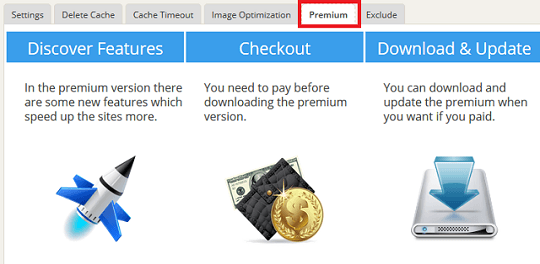
Step 6 ) The following image Premium shows some of the options you get when you purchase the Premium version. (Premium version optional)
- Image Optimization
- Mobile Cache
- Minify HTML Plus
- Combine Js Plus
- Remove Comments
- Delete Cache Logs
- Cache Statics
Exclude Files
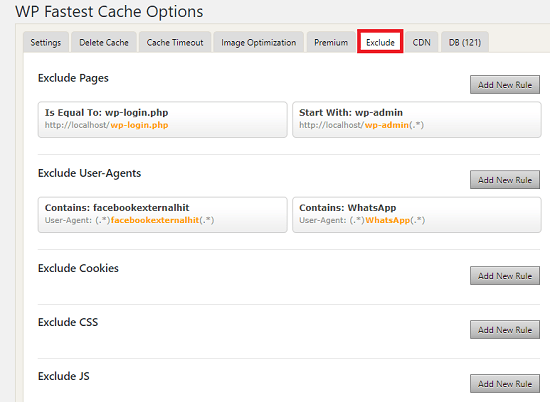
Step 7 ) The following image Exclude allows you to set up the following options.
Exclude
- Pages
- User-Agents
- Cookies
- CSS
- JS
- Click on Add New Rule button to add a new rule to your site.
Note: The following link wp-fastest-cache-exclude-options can help you further.
CDN
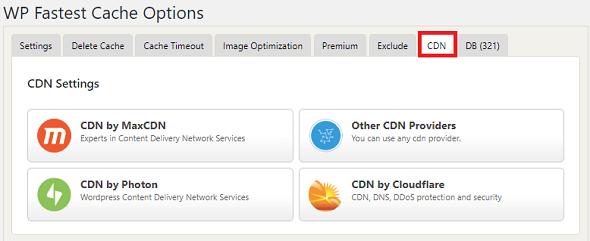
Step 8 ) Go to CDN tab to configure the following CDN services.
- CDN by MaxCDN
- CDN by Photon
- Other CDN Providers
- CDN by Cloudflare
Step 9 ) Go to DB tab to clean up the database. (This is a premium function)
Click on the following URL Advanced Options to continue with the settings.
You might like to check the other Cache Plugins I recommend.
I hope you enjoyed this simple tutorial. I will be adding more information soon.
Enjoy.
Best WordPress Plugins For Blogs List
i buy the WP Fastest Cache Premium
but the Performance grade and the load is not good
and i need the step to use it to have best website and to be faster
also there is for CDN which is the best there is for option
thanks for help
Hi, have you created a support ticket in the forum? This should be your first step, since you purchased the pro version.
Thank you
Hey Guys, How can exclude CallRail (call tracking software) js from caching? This is 3rd party js code, I try to add New Rule for that, but it doesn’t work.
Hi David, can you share the rule you added? Also what plugin are you trying to exclude?
Thank you