WordPress Simple Membership Free Level Setup post shows you how to configure and add a free membership level to your site and more.
Last Updated: June 20, 2020
Latest News: Updated the documentation.
Simple Membership plugin allows you to create free membership levels as well as paid membership levels. In this post you will learn how to create a free membership level and configure the plugin to accept visitors to sign up.
When you create a free membership level, an ID number will be assigned to this level. It is important that you take note of this ID number because later on you will be using this ID number to activate the free membership level option in the plugins General Settings tab.
I have also added some troubleshooting steps below to help you troubleshoot some of the most common issue people run into.
Note: This tutorial is based on SMP version 3.9.4.
What You Need:
WordPress Simple Membership Free Level Setup Steps
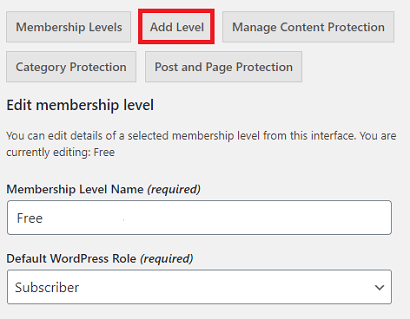
Step 1 ) Go to WP Membership -> Membership Level -> Add Level as illustrated in the image below to create a Free Membership Level in your site.
Membership Level Features
- Membership Level Name (required)
- Default WordPress Role (required)
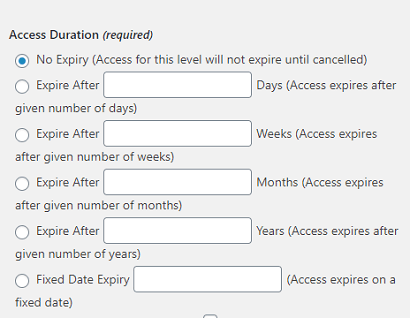
Step 1-a ) The following image allows you to select from one of the following options.
Membership Level Access Duration (required)
- Expire After (x) Days (Access expires after given number of days)
- Expire After (x) Weeks (Access expires after given number of weeks)
- Expire After (x) Months (Access expires after given number of months)
- Expire After (x) Years (Access expires after given number of years)
- Fixed Date Expiry (x) (Access expires on a fixed date)
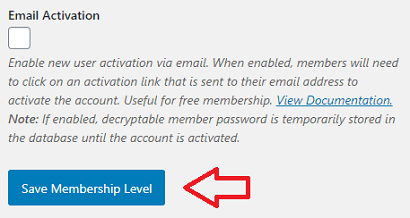
Step 1-b ) The following image Email Activation allows you to activate the e-mail notification for free membership levels.
Free Membership Level Activation Feature
- Email Activation = Note: Click on the following link email-activation-for-members to learn more about e-mail activation.
- Click on Save Membership Level button once you have completed your set up.
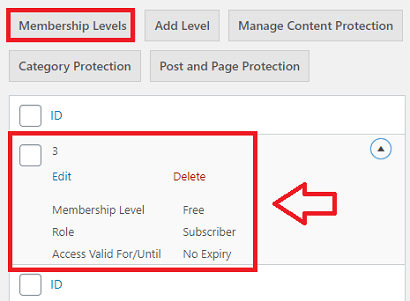
Step 1-c ) Once you have created the free membership level click on Membership Levels tab as illustrated in the image below. This tab will display all the information associated the free membership level you created.
Free Membership Level Information
- ID
- Membership Level
- Role
- Access Valid For/Until
Note: Your ID and other information might be different.
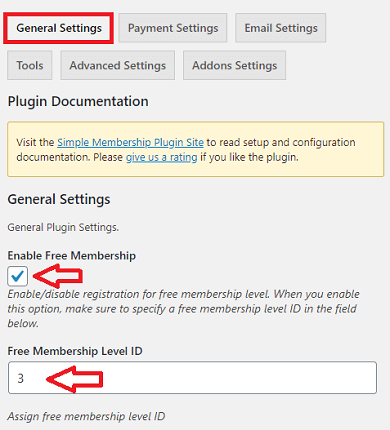
Step 2 ) Go to WP Membership -> Settings -> General Settings as illustrated in the image below to enable and add the following settings.
General Settings For Free Membership Level
- Enable Free Membership
- Free Membership Level ID = add here the free membership level ID you received when you created the account above in Step 1 ).
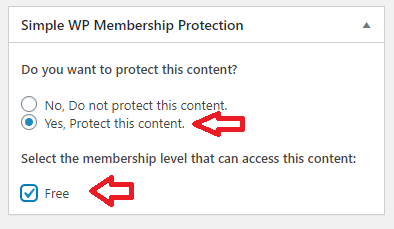
Step 3 ) The following image, shows you the Free membership level assigned to protect the content of the post.
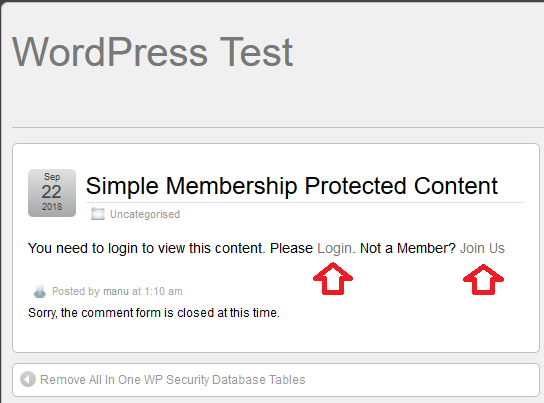
Step 4 ) The following image, shows you the content of the post protected with the Free membership level set up above. What this means is that when ever visitors land on this post, they need to login to view the content. They have a choice to login via the Login link or sign up via the Join Us link.
Note: Click the following link wordpress-simple-membership-custom-message-add-on if you want to learn how to customize the message illustrated in the image below.
Step 5 ) Once you have completed the above, you need to add the following shortcode to the Join Us page.
[swpm_registration_form ]
Note: If your registration page has a different name, you need to add the shortcode to that page.
If everything goes well you should see the following registration form with out any error messages.
Note: Your form might have extra fields if you are using the Form Builder addon.

Troubleshooting the Free Membership Form
Q1 What if the form does not show or you receive a message or an error message?
If you see any of the messages below it means your settings are not correct. Go back to the beginning and check to make sure you followed all the steps above and the free membership level ID is correct.
Message
Note: This message shows up when Enable Free Membership feature is disabled under General Settings tab.
Registration
Free membership is disabled on this site. Please make a payment from the Join us page to pay for a premium membership.
You will receive a unique link via email after the payment. You will be able to use that link to complete the premium membership registration.
===============
Error Messages
Note: This error message shows up when the wrong free membership level ID is entered under General Settings tab.
Error! Failed to retrieve membership level ID from the membership info object.
===============
Note: This error message shows up when you have the Form Builder addon active in your site and you entered the wrong free membership level ID under General Settings tab. Check the following link WordPress Simple Membership Form Builder for more information.
Error! Invalid membership level ID! This membership level does not exist. You may have deleted this level. Check the membership level ID and correct it.
That’s how simple it is to create a free membership level using Simple Membership plugin.
If you have any questions please let me know. I will be updating this tutorial from time to time.
Enjoy.
Simple Membership Plugin Tutorial List: