How To Insert Custom Tags WP Contact Form 7 post shows you how to set up and insert new form tags to your contact form.
Last Updated: July 10, 2022
Latest News: Updated the documentation.
In this tutorial you will learn how to insert two new tags into the form template. The following 2 tags date and drop-down-menu will be inserted into a simple contact form for a driving school site.
These instructions are very simple to follow.
Note: These steps can be used to insert other form tags.
What you need:
- Contact Form 7 plugin
Contact Form Tutorial List:
- Default Settings
- Create a Custom Form
- Insert Custom Tags
- Adding File Upload Tag
- Integration
Recommended Plugins/Extensions
How To Insert Custom Tags WP Contact Form 7
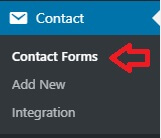
Step 1 ) Go to Contact -> Contact Forms as illustrated in the image below.
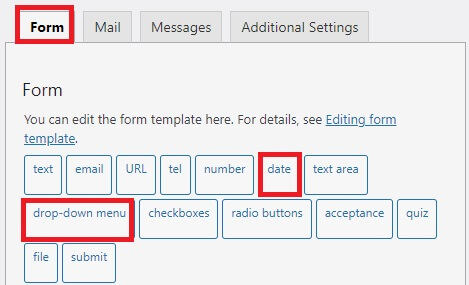
Step 2 ) Click on Form tab as illustrated in the image below. The following image shows you the date and drop-down-menu tags highlighted in red. These tags will be inserted in the form template.
Drop Down Menu Tag
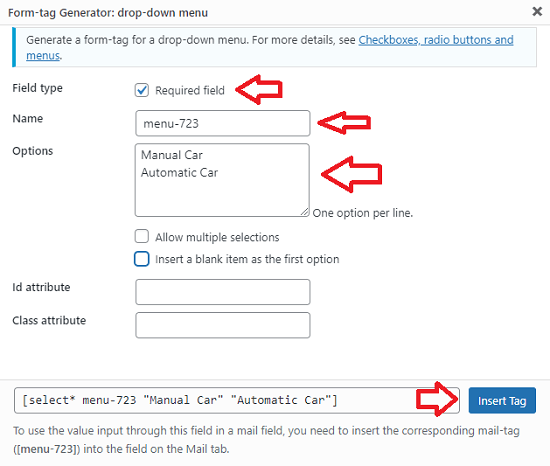
Step 3 ) Click on drop-down-menu tag, the following window pops-up as illustrated in the image below. You can configure the following options.
Form Tag drop-down-menu Options:
- Field type
- Name = I left the name as default added by the plugin. You can choose your own name.
- Options = In this example I added two options, Manual Car and Automatic Car. Each entry is added to a line.
- Allow multiple selections
- Insert a blank item as the first option
- Id attribute
- Class attribute
- Click on Insert Tag button when you are ready to insert the tag into the form template.
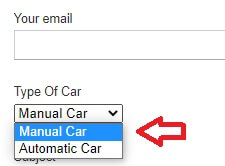
Step 4 ) The following image display the drop-down-menu tag inserted into the form template and displayed in the contact form.
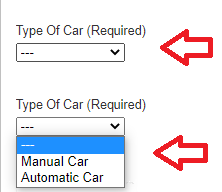
Step 4-a ) The following image display the drop-down-menu tag inserted into the form template and displayed in the contact form. In this example I typed in the word (Required) in the label. I also checked Insert a blank item as the first option. This adds 3 dashes to the menu as illustrated in the top part of the image below. The bottom part of the image shows the dropdown menu expanded with the 3 dashes an the two type of cars available for selection. This options looks more professional and makes more sense than the example in the image in Step 4 ) above.
Date Tag
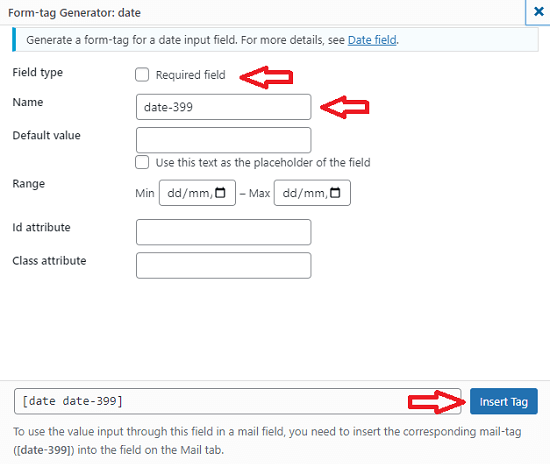
Step 5 ) Click on the date tag, the following window pops-up as illustrated in the image below. You can configure the following options.
Form Tag date Options:
- Field type = Make sure this field is also checked. The date is required for a driving school site.
- Name = I left the name as default added by the plugin. You can choose your own name.
- Default value
- Range
- Id attribute
- Class attribute
- Click on Insert Tag button when you are ready to insert the tag into the form template.
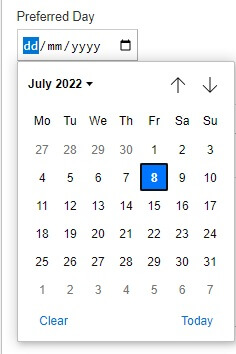
Step 6 ) The following image display the drop-down-menu tag inserted into the form template and displayed in the contact form.
Step 7 ) The following link create-a-custom-form-using-wp-contact-form-7 illustrates the contact form completed and displayed in the site.
==============================
That’s how simple it is to duplicate an existing form to create a new contact form in your site using Contact Form 7 plugin.
If you have any questions please let me know.
Enjoy.