Create A Custom Form Using WP Contact Form 7 post shows you how to duplicate a form to create a custom contact form.
Last Updated: February 2, 2023
Latest News: Updated the documentation.
In this tutorial you will learn how to duplicate an existing form to create a new contact form. In most cases duplicating a form is the most logical step. Most of the times all contact forms use the same fields “mail tags” with the exceptions of a few contact forms that require special fields “mail tags” . For this tutorial I will be inserting 2 new tags date and drop-down-menu to create a simple contact form for a driving school site.
These instructions are very simple to follow.
What you need:
- Contact Form 7 plugin
Contact Form Tutorial List:
- Default Settings
- Create a Custom Form
- Insert Custom Tags
- Adding File Upload Tag
- Integration
Recommended Plugins/Extensions
Create A Custom Form Using WP Contact Form 7
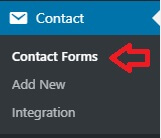
Step 1 ) Go to Contact -> Contact Forms as illustrated in the image below.
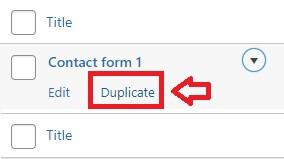
Step 2 ) Locate the contact form of your choice if you have more than one. Click on Duplicate link as illustrated in the image below. It is best to simply duplicate a contact form if you are only going to use the same fields and or add a couple more to your new form. However in your case you might like to start a new form from scratch.
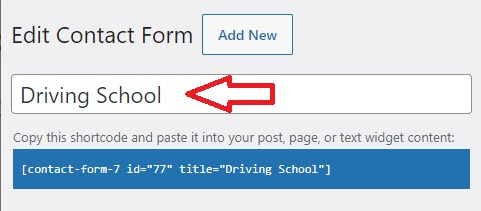
Step 3 ) Next edit the title of your new contact form as illustrated in the image below. For this tutorial I chose Driving School. Pay attention to the new shortcode illustrated in blue in the image below. This is the shortcode that copied and paste to a page or post.
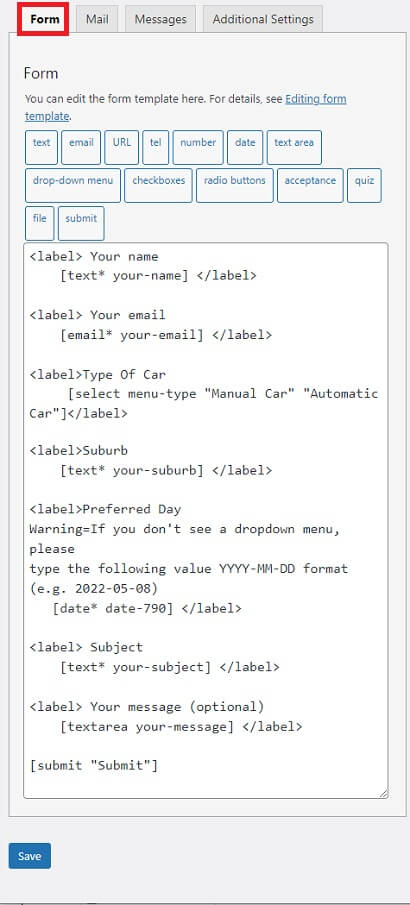
Step 4 ) Next, click on Form tab as illustrated in the image below, to start editing the form fields. It is very straightforward to understand what each field does. For this form, I will be using the following tags from the tag-generator tool.
Note: No <br /> and <p> HTML tags are added. Line breaks and blank lines in the fields below are automatically formatted with <br /> and <p> HTML tags. Labels are used in this form. To learn more about labels, click on can I add text labels to input fields.
Tags Used:
- text
- drop-down-menu
- date
- text area
- submit
Form Fields
- <label> Your name = This is the label field that is displayed in the form.
- [text* your-name] </label> = This is the empty text field required that is displayed in the form. What this means is, anyone submitting the form from your site must fill in this field. Or else they will receive an error message.
- <label> Your email = This is the label field that is displayed in the form.
- [email* your-email] </label> = This is the empty text field required that is displayed in the form. What this means is, anyone submitting the form from your site must fill in this field. Or else they will receive an error message.
- <label>Type Of Car = This is the label field that is displayed in the form.
- [select menu-type “Manual Car” “Automatic Car”]</label> = This is the select text field required that is displayed in the form. Two options are available to choose from, “Manual Car” and “Automatic Car”.
- <label>Suburb = This is the label field that is displayed in the form.
- [text* your-suburb] </label> = This field is required and the client will enter their preferred suburb.
- <label>Preferred Day = This is the label field that is displayed in the form.
Warning=If you don’t see a dropdown menu, please
type the following value YYYY-MM-DD format (e.g. 2022-05-08)- [date* date-790] </label> = This field is required and the client will select the booking date.
- <label> Subject = This is the label field that is displayed in the form.
- [text* your-subject] </label> = This is the empty text field required that is displayed in the form. What this means is, anyone submitting the form from your site must fill in this field. Or else they will receive an error message.
- <label> Your message (optional) = This is the label field that is displayed in the form.
- [textarea your-message] </label> = This is the empty text field that is displayed in the form.
- The form tag [submit “Submit”] is a straight forward submit button that is not surrounded by label tags.
- Make sure you click on Save button once you have completed the form settings tab.
Mail Tags
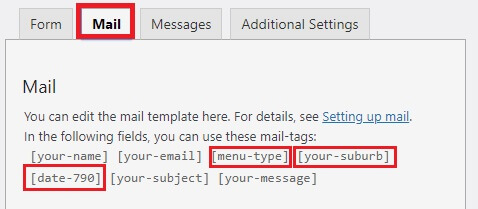
Step 5 ) The following image illustrates the 3 extra tags created for the new form above. Note: This is a duplicate form of Contact Form 1.
New Tags:
- [menu-type]
- [your-suburb]
- [date-790]
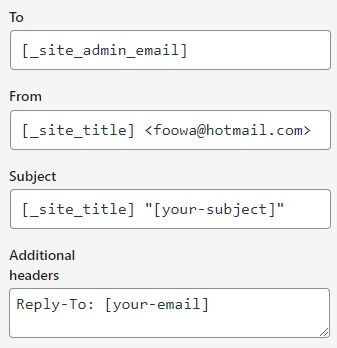
To / From / Subject / Additional headers
Step 5-a ) The following image illustrates the To / From / Subject / Additional headers fields. This can be configured how ever you want as long as it makes sense. For this tutorial I chose the following structure.
Note: If you want to learn more about the following mail tags, click on special-mail-tags link. This has a list of mail tags you can use.
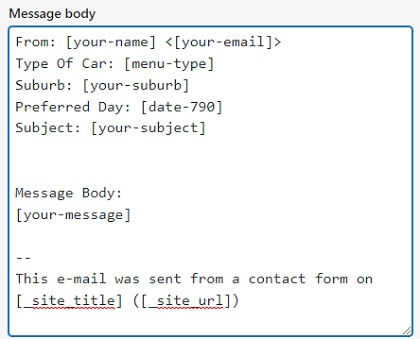
Message Body
Step 5-b ) The following image illustrates the Message Body structure. This can be configured how ever you want as long as it makes sense. For this tutorial I chose the following layout.
- Note: Make sure you click on Save button once you have completed the mail settings tab.
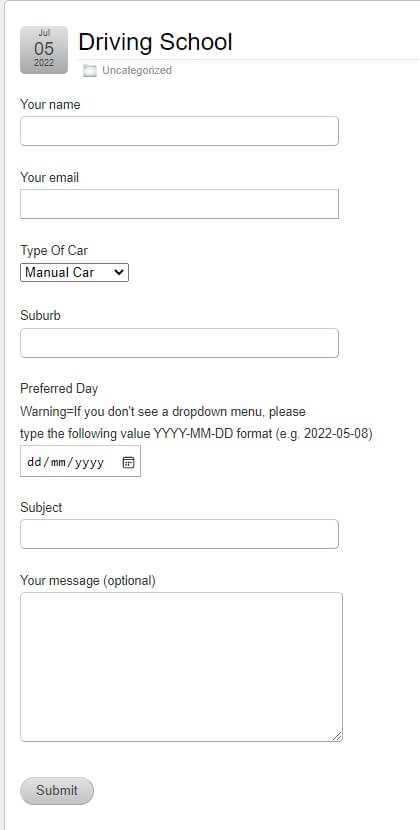
Contact Form Final Results
Step 6 ) The following image shows you the final results for the contact form above.
==============================
That’s how simple it is to duplicate an existing form to create a new contact form in your site using Contact Form 7 plugin.
If you have any questions please let me know.
Enjoy.