How To Edit CataBlog Templates shows you how to edit a template, create new templates for your catalogs, and your shopping cart and much more.
Last Updated: November 24, 2019
Latest News: Updated the documentation.
CataBlog has 4 default templates you can use straight away. These templates control all the different viewing for your catalogs. Each template serves a different purpose. Always make sure you select the correct template to display your products, images and more.
In this post you will learn what each default template does and the code it uses. Remember if you make a mistake use the undo current changes link. CataBlog templates uses a token system to insert data into your templates. You can read more about the tokens from the following URL making-custom-templates.
Note: Never edit a default template. It is better to use the default template code and create a custom template. This will prevent you from running into issues in the future.
How To Edit CataBlog Templates
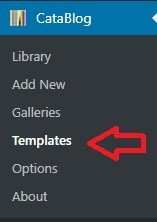
Step 1 ) Click on CataBlog -> Templates to start editing the templates as illustrated in the image below.
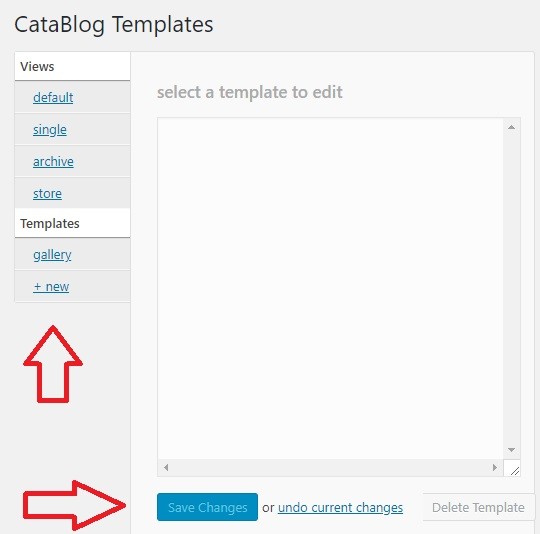
Step 2 ) The following image CataBlog Templates Panel shows you the panel you will use to edit and create new templates. This is important when creating special templates for various products or images. You can even create customized templates for your online shopping store.
The following image shows you the following features you can edit and manage.
CataBlog Template Panel
- Views = This list the 4 default templates created by the plugin.
- Templates = This will display all the custom templates you create.
- Click on Save Changes button when you are finished editing.
- Click on undo current changes link if you made a mistake and need to revert back to the default settings.
- Click on Delete Template button if you want to delete a template you created and no longer need or use.
CataBlog Views
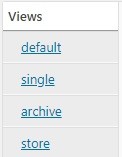
Step 3 ) The following image Views shows you catablog default templates. These templates cannot be deleted. For example: If you select a default template the Delete Template button is not clickable. This option is added for security reasons.
CataBlog Views Default Templates
The following information comes from Zachary’s website.
- Default = This template is used when you do not specify a template parameter in your ShortCodes.
- Single = This template is used when you enable the ‘Public’ option and view a Single CataBlog page.
- Archive = This template is used when you enable the ‘Public’ option and view a CataBlog Category page.
- Store = This template is used to render the Buy Now Button.
Note: Always use the default template code to create a new template.
Default Templates
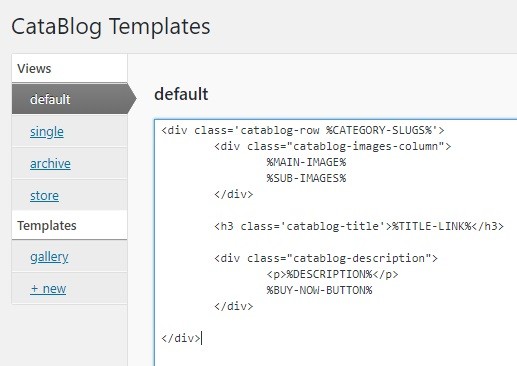
Step 3-a ) The following image Template Views Default shows you the code used in the default template.
I will explain what each part of the code does in the default template. You can see that it is using HTML code. Most of might have an idea of how HTML code works. However some might not.
The templates also uses tokens. Each token serves a purpose. An example of a token is %CATEGORY-SLUGS%.
The following template is using the following tokens with HTML code.
<div class=’catablog-row %CATEGORY-SLUGS%’>
<div class=”catablog-images-column”>
%MAIN-IMAGE%
%SUB-IMAGES%
</div>
<h3 class=’catablog-title’>%TITLE-LINK%</h3>
<div class=”catablog-description”>
<p>%DESCRIPTION%</p>
%BUY-NOW-BUTTON%
</div>
</div>
Default Template Tokens
- %CATEGORY-SLUGS% = A string of category slugs for each catalog item, very useful for setting html class attributes.
- %MAIN-IMAGE% = The catalog item’s primary image thumbnail, wrapped with an anchor tag for the LightBox.
- %SUB-IMAGES% = All of the catalog item’s secondary image thumbnails, each wrapped individually with a LightBox anchor tag.
- %TITLE-LINK% = The title rendered as a link for each catalog item. No link is rendered if the link value itself is empty.
- %DESCRIPTION% = The description for each catalog item.
- %BUY-NOW-BUTTON% = This will render the buy now button for each catalog item with a price greater than zero. The store view in CataBlog Templates will be used to render this button.
Each token is inserted into a div container. Each div container uses a class system to control the outcome using CSS code. This allows you to manipulate and customize each template further.
Single Template
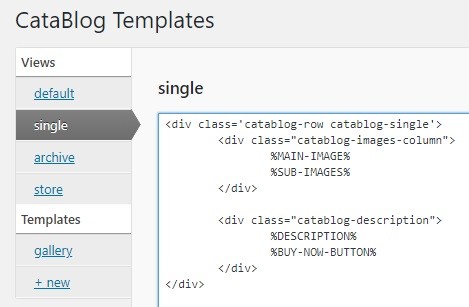
Step 3-b ) The following image Template Views Single shows you the code used in the single template.
Single Template Tokens
- %MAIN-IMAGE% = The catalog item’s primary image thumbnail, wrapped with an anchor tag for the LightBox.
- %SUB-IMAGES% = All of the catalog item’s secondary image thumbnails, each wrapped individually with a LightBox anchor tag.
- %DESCRIPTION% = The description for each catalog item.
- %BUY-NOW-BUTTON% = This will render the buy now button for each catalog item with a price greater than zero. The store view in CataBlog Templates will be used to render this button.
Archive Template
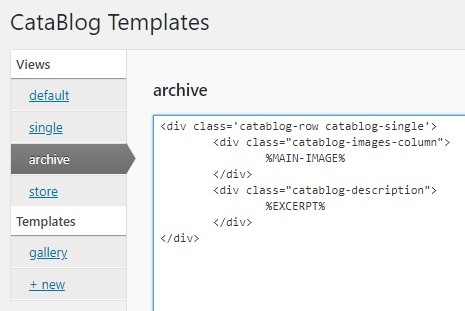
Step 3-c ) The following image Template Views Archive shows you the code used in the archive template.
Archive Template Tokens
- %MAIN-IMAGE% = The catalog item’s primary image thumbnail, wrapped with an anchor tag for the LightBox.
- %EXCERPT% = A shorter version of the description.
Store Template
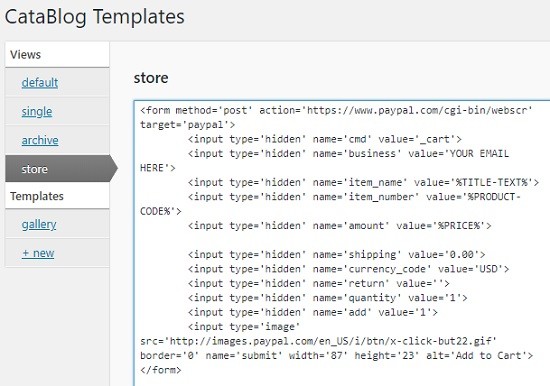
Step 3-d ) The following image Template Views Store shows you the code used in the store template. You can see the store template with a lot more code than the other 3 templates. That is because it needs extra code for your PayPal online store.
Store Template Tokens
- %TITLE-TEXT%: The catalog item’s title, no link will be wrapped around this title.
- %PRODUCT-CODE%: The product code for each catalog item.
- %PRICE%: The price, without currency symbol for each catalog item.
The following tutorials will help you learn more about the Store template, how it works and what you can do with it.
- Shopping Cart Settings = Shopping Cart Settings shows you how to add a price to your items so that you can sell them using PayPal.
- Goods Value Options = Shopping Cart Goods Value Options is an advance tutorial for the Shopping Cart. I am going to show you some cool features that you can add to the CataBlog shopping cart.
- Variation Control = Shopping Cart Variation Control is an advance tutorial that shows you how to set up a variation control for your products.
- Shopping Cart Template = This is an advance tutorial that shows you how to create different templates for various items.
Templates Panel
Step 4 ) The Templates panel area show you any custom template you create. In most cases you will spend more time in this area than the Views area.
I hope the above helps you understand how the code and tokens work in CataBlog templates and how to manage your catalogs.
If you have any questions please let me know.
Enjoy.
CataBlog tutorials list: