CataBlog Shopping Cart Template is an advance tutorial that shows you how to create different templates for various items.
Last Updated: January 23, 2018
Latest News: I have added another link to the menu below.
A variation control allows your customers more control in what they want to select. In this example I will show you how simple it is for your customers to select a size and a color for the t-shirt. This will also be added to the final cost of the product.
Important: When you want to create a different template for your stores, navigate to the following CataBlog -> Templates -> Templates. Also remember to add the new template you just created to the shortcode. In this example tutorial, I created new-store template [catablog template=”new-store”]. You can also use categories to further control how you want to sell all your different items.
The advantage of creating different store templates will give you more flexibility and allow you to customize how you charge different items. For example you might need a variation control for shirts and pants but something different for shoes and hats etc. You might not want a variation control for all items. This allows you to use different shortcodes with different store’s template and even use categories for more control.
CataBlog Shopping Cart Template
Step 1 ) In the following example I have added a table inside the template. This code adds a drop down menu for 3 different sizes and a color field to the shopping cart.
This is the full code I copied into the template for this tutorial. (Remember your code will be different)
<div class=’catablog-row %CATEGORY-SLUGS%’>
<div class=”catablog-images-column”>
%MAIN-IMAGE%
%SUB-IMAGES%
</div>
<h3 class=’catablog-title’>%TITLE-LINK%</h3>
<div class=”catablog-description”>
%DESCRIPTION%
%BUY-NOW-BUTTON%
</div>
</div>
<form method=’post’ action=’https://www.paypal.com/cgi-
bin/webscr’ target=’paypal’>
<input type=’hidden’ name=’cmd’ value=’_cart’>
<input type=’hidden’ name=’business’ value=’[email protected]’>
<input type=’hidden’ name=’item_name’ value=’%TITLE-TEXT%’>
<input type=’hidden’ name=’item_number’ value=’%PRODUCT-CODE%’>
<input type=’hidden’ name=’amount’ value=’%PRICE%’>
<table>
<tr>
<td>
<input type=’hidden’ name=’on0′ value=’Size’>Size</td>
<td>
<select name=”os0″>
<option value=”Select a Size”>Select a Size
<option value=”Small”>Small
<option value=”Medium”>Medium
<option value=”Large”>Large
</select></td>
</tr>
<tr>
<td>
<input type=’hidden’ name=’on1′ value=’Color’ maxlength=’200′>Color</td>
<td>
<input type=’text’ name=’os1′></td>
</tr>
</table>
<input type=’hidden’ name=’shipping’ value=’0.00′>
<input type=’hidden’ name=’currency_code’ value=’USD’>
<input type=’hidden’ name=’return’ value=”>
<input type=’hidden’ name=’undefined_quantity’ value=’1′>
<input type=’hidden’ name=’add’ value=’1′>
<input type=’image’ src=’http://images.paypal.com/en_US/i/btn/x-click-but22.gif’ border=’0′ name=’submit’ width=’87’ height=’23’ alt=’Add to Cart’>
</form>
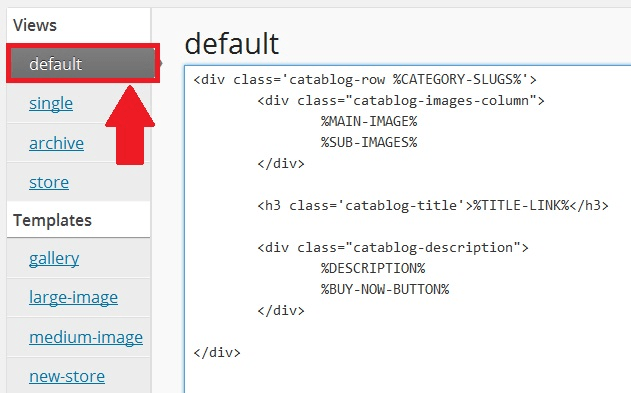
Step 2 ) The above code was copied from the default template. I also copied the code from the store template into the new template. See image below
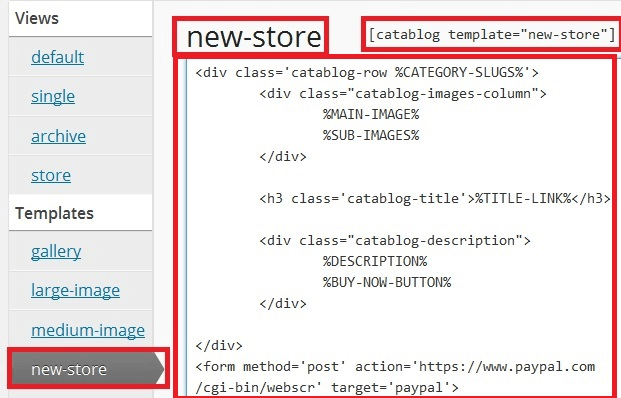
Step 3 ) In the following image you can see the full code copied and pasted into the new template new-store. It also displays the following.
- Template title = new-store
- The shortcode = [catablog template=”new-store”]
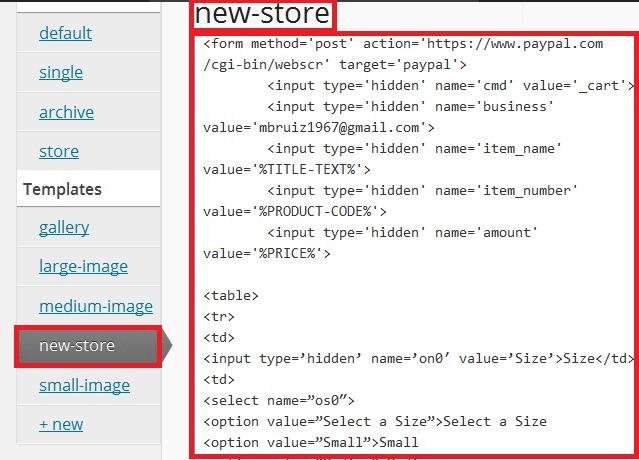
Step 4 ) The following image illustrates the rest of the code pasted into the new template.
Step 5 ) The final result. You can see the white t-shirt with some description, a drop down menu that allows you to select the size and an entry field that allows you to type the color. You can also see the Add to Cart button.
The following shortcode [catablog template=”new-store”] was added to the following page Catablog shopping cart.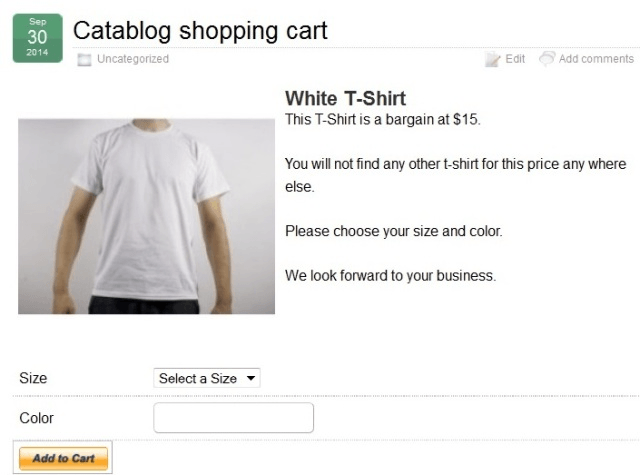
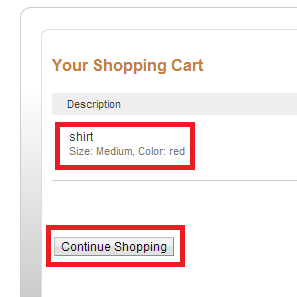
Step 6 ) The following image shows you how it looks in PayPal. You can see a size and a color entry. You can also see the Continue Shopping button.
As you can see from the above tutorial you can do a lot more with the shopping cart by creating different templates. Remember you can also use categories.
Click on the following URL Responsive Settings to continue.
If you have any questions please let me know.
Enjoy.
CataBlog tutorials list: