How To Setup A Shopping Cart Using CataBlog shows you how to configure your items and add a price value so that you can sell them using PayPal.
Last Updated: February 10, 2018
Latest News: I have updated the documentation.
In this post you will learn how to set up your shopping cart using CataBlog. There are a few steps you need to take to make this happen. One very important part of this tutorial is to update the template. This is where you will add you currency symbol and your PayPal account e-mail address.
Before you begin remember CataBlog comes with 4 default templates. They are located under CataBlog -> Templates -> Views. These templates can be modified. However it is always best to leave this templates alone and use them to create your custom templates. Your custom templates can be created under CataBlog -> Templates -> Templates comes into play.
How To Setup A Shopping Cart Using CataBlog
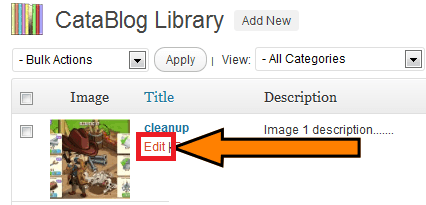
Step 1 ) To start selling your products, you need to edit a few fields. You also need to add a value to the images that you want to use for selling a product or sell the image. The following image displays an image and the Edit link. Click on the Edit link to start setting up the image for your shopping cart.
Store shortcode examples.
- [ catablog_gallery id=”2″ ]. This shortcode will create the store and display the items in a gallery format with id=”2″ and add the Add to Cart button as illustrated in Step 4 below. Note: Your id will be different.
- [ catablog_gallery id=”2″ category=”selling” ]. This shortcode will do the same as the code above except it will only display the items that belong to category=”selling”.
- [ catablog template=”new-store” ]. This shortcode will display all your items using a customize store template named new-store.
Note: There are many different variations of shortcodes you can use to sell your items.
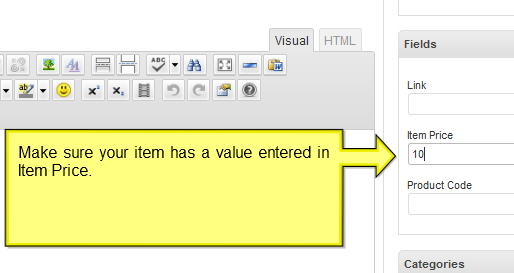
Step 2 ) The following image shows you the field Item Price where you enter a value to sell the item. You also need to add a price value to the description so the buyer knows how much the item cost.
Note: Don’t add a currency symbol i.e $. Only add numbers in the following format 10 or 10.00 which represents $10.00.
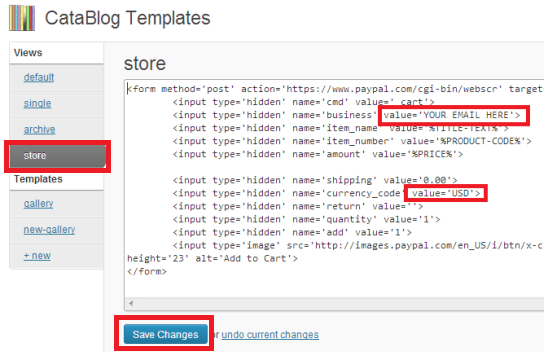
Store Template
Step 3 ) The following image shows you the Store Template. You need to edit a few entries in the template so that PayPal can process your payments. You have to enter your PayPal e-mail address and change the currency_code value.
There are more advance features you can set up in the store template. The following is list of tutorials to help you further.
- Shopping Cart Goods Value Options = This is an advance tutorial for the Shopping Cart that shows you some cool features that you can add to the shopping cart.
- Shopping Cart Variation Control = This post shows you how to set up variation control for your products.
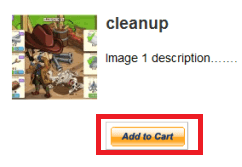
Step 4 ) The next image displays your products with an Add to Cart button.
Note: The Add to Cart button only appears if you add a value to Item Price mentioned in Step 2 ) above.
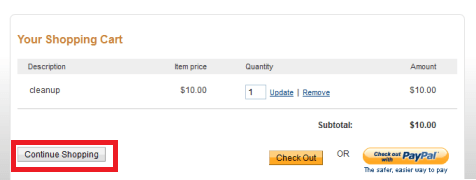
Step 5 ) The next image shows you the shopping cart. You can also click on Continue Shopping button if you want to keep shopping.
Note: PayPal is one of the most secured methods for purchasing goods online and more. Their servers are very secured.
Click on Shopping Cart Goods Value Options to continue.
If you have any question please let me know.
Enjoy.
CataBlog tutorials list: