CataBlog Shopping Cart Variation Control is an advance tutorial that shows you how to set up a variation control for your products.
Last Updated: January 23, 2018
Latest News: I have updated the information.
A variation control allows your customer to select what they want to purchase from a selection or a drop down menu. In this example I will show you how simple it is for your customers to select a shipping company and charge a different rate based on the selection. This will also be added to the final cost of the product.
Please remember that if you wish to create a different template for your stores navigate to the following CataBlog -> Templates -> Templates. Also remember to add the new template you just created to the shortcode for example [catablog template=”new-store”].
CataBlog Shopping Cart Variation Control Steps
Step 1 ) In the following example I have added some more code. This code adds a drop down menu for 3 different shipping companies. Allows the buyer to choose which company they prefer for their delivery.
USPS = $3.95
UPS = $5.95
FedEx = $7.95
<select name="shipping" style="margin-bottom: 5px;">
<option selected value="3.95">USPS $3.95</option>
<option value="5.95">UPS $5.95</option>
<option value="7.95">FedEx $7.95</option>
</select><br>
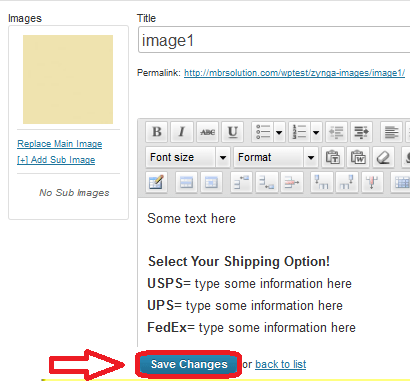
Step 2 ) I have added some information to the item so the buyer knows the difference between each shipping company. Make sure you click on Save Changes button. See image below.
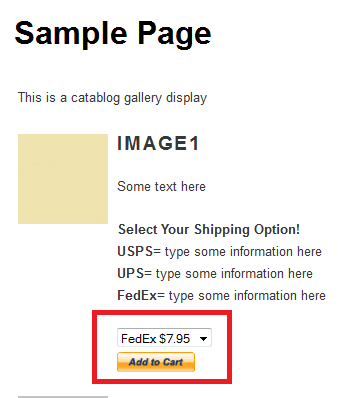
Step 3 ) On the web page you will see the drop down menu for the customer to select. This will be added to the Total cost. I have selected FedEx $7.95. See image below.
Shipping and Handling
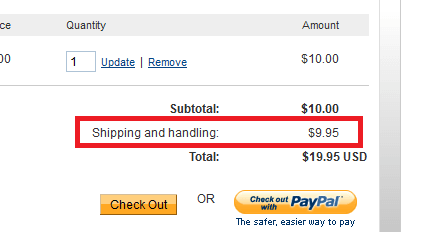
Step 4 ) The Shipping and handling cost is now $9.95. This is how it works out. You add FedEx $7.95 + handling $2.00 = $9.95. See image below.
Note: The handling of $2.00 was added in the previous tutorial.
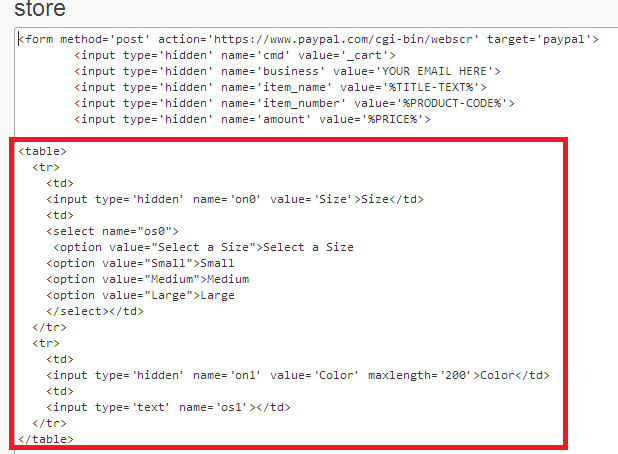
Step 5 ) What if we wanted to add a colour and size to the item? I have used an image of a t-shirt to make it look like a proper shopping cart. You will need to add the following code. See images below.
Code
<table>
<tr>
<td>
<input type=’hidden’ name=’on0′ value=’Size’>Size</td>
<td>
<select name=”os0″>
<option value=”Select a Size”>Select a Size
<option value=”Small”>Small
<option value=”Medium”>Medium
<option value=”Large”>Large
</select></td>
</tr>
<tr>
<td>
<input type=’hidden’ name=’on1′ value=’Color’ maxlength=’200′>Color</td>
<td>
<input type=’text’ name=’os1′></td>
</tr>
</table>
Step 6 ) I have selected Medium and Red colour. See image below
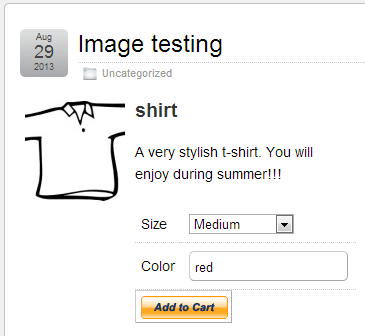
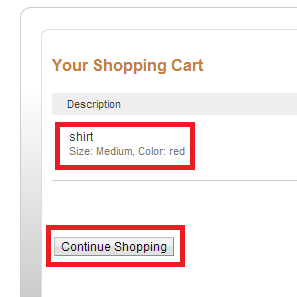
Step 7 ) When you view your shopping cart in the PayPal website you will see the extra data added. See image below.
I hope you enjoyed this little tutorial. As you can see from above, Catablog allows you to do much more with the plugin than simply add images. If you are planning on adding more than one template, you might like to check the following URL Shopping Cart Template.
Click on Display Images Using Columns to continue.
If you have any questions please let me know.
Enjoy.
CataBlog tutorials list: