CataBlog Display Images Using Columns shows you how to add columns to your CataBlog items on your website.
Last Updated: January 23, 2018
Revision Update: I have updated the information.
Hint: Always work with a child theme and not the parent theme if you are going to create a lot of customization on your website.
CataBlog Display Images Using Columns
Step 1 ) I am going to use Twenty Eleven theme as an example. You can use your own theme if you like. The steps are very similar regardless of the theme you use.
Step 2 ) You can use an ftp program or you can use Cpanel from your server to upload the files. First we need to create a folder and give it a name. I created a folder named twentyeleven-child and assigned 755 permissions.
To learn more about file permission please read the following link Changing File Permissions.
Option: If you zip your files on your computer and then upload them to your website from your admin panel then you don’t have to do it manually.
I just wanted to show you the manual method as well. See image below. 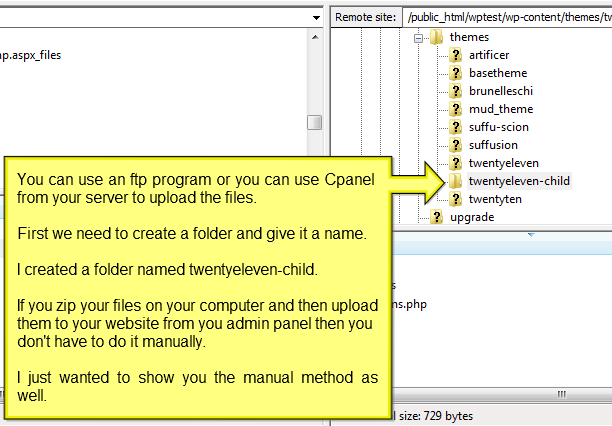
Step 3 ) I created two files on my computer style.css and functions.php (optional). These are the standard files created for child themes.
Step 3.1 ) style.css
In your style.css file add the following:
/**
* Theme Name: Twenty Eleven Child
* Theme URI: add a website here
* Description: add some information here
* Version: add a version here
* Author: add your name
* Author URI: add some information here
* Template: twentyeleven
* License: add a license here
*/
/* import layout */
@import url(“../twentyeleven/style.css”); <—-this is what imports the style from the parent theme. It is important that you get the path correctly or else it will not work.
Step 3.2 ) functions.php ….. For the function.php file you can read more about it at wordpress.org.
Important: You don’t need to add the functions.php file but it is good to have it ready just in case later on you decide to add some function to your website.
Dragged the two files into the child theme directory “folder” on the server and assigned the following permissions 644 to each file.
Refresh the Browser
Step 4 ) You might have to refresh your browser to view the child theme you just created. Activate the child theme to start editing the files created above in Step 3 ).
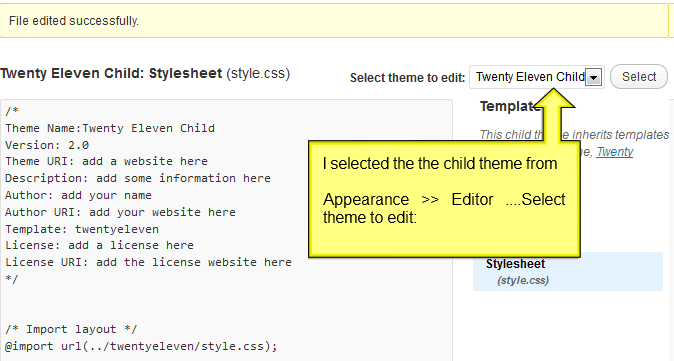
Step 5 ) Select the child theme to edit from Appearance -> Editor ….Select theme to edit: See image below.
Hint: This is where you will add any extra style to modify your website.
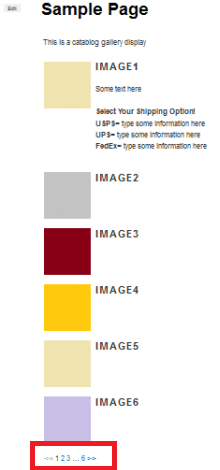
Step 6 ) This is what your CataBlog gallery might look like on your website using the following shortcode.
[catablog_gallery id="57" limit="6"]
The following image shows you a single column display on the website. It also has a navigation desplayed below to scroll to the next pages. The reason for the navigation below the images is because of the limit=”6″ added above.
Note: If you have less than 6 images added you won’t see the navigation scroll bar.
Copy and Paste Code
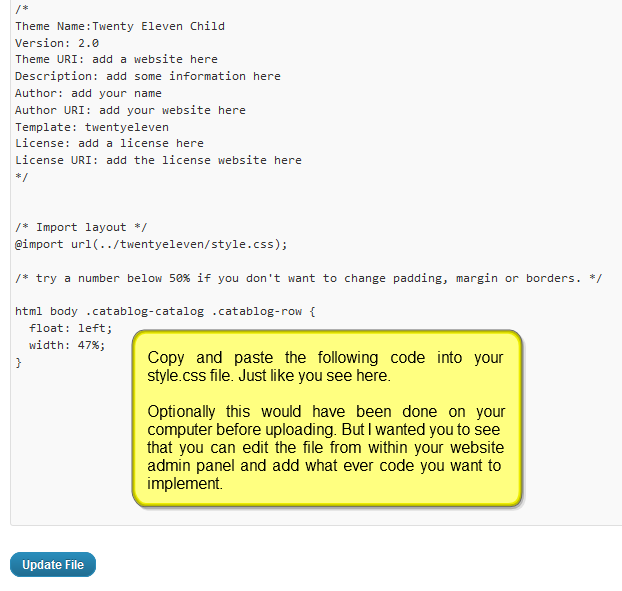
Step 7 ) Copy and paste the following code into your style.css file. We are going to add two columns.
// try a number below 50% if you don’t want to change padding, margin or borders.
html body .catablog-catalog .catablog-row {
  float: left;
  width: 47%;
}
Optionally this would have been done on your computer before uploading. But I wanted you to see that you can edit the file from your website admin panel and add what ever code you want to implement. See image below.
Hint: Always click on Update File after you add the code.
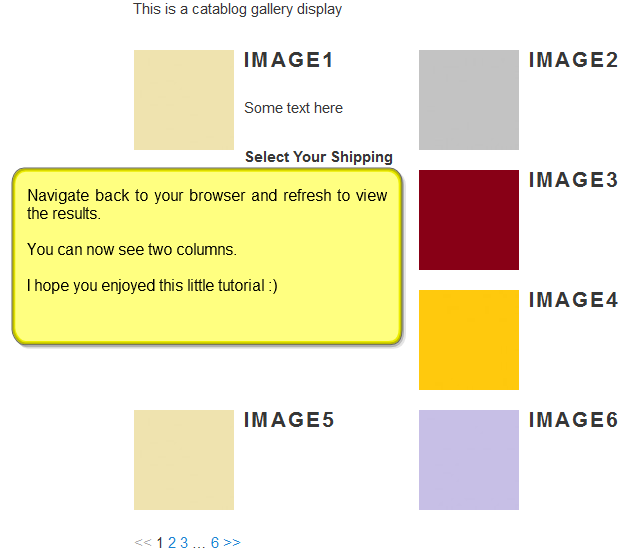
Step 8 ) Navigate back to your browser and refresh to view the results. You can now see two columns. See image below.
Step 9 ) What if we want to add another column? Edit the following code and add it to the child theme as you did in Step 7 ) above.
Hint: Always remember that you are working with the width of your front page. Try not to add more columns than what your page width permits.
html body .catablog-catalog .catablog-row {
  float: left;
  width: 27%;
}
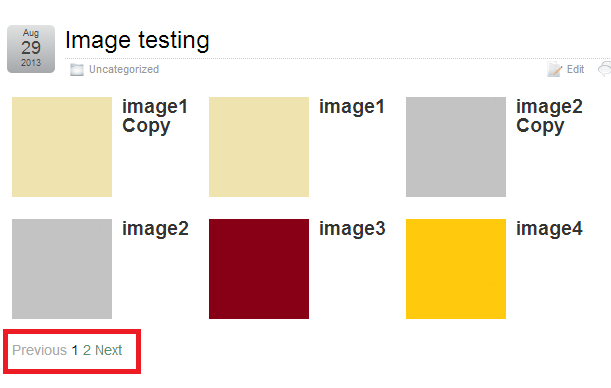
You will see 3 columns with the same amount of images displayed. You will also notice there are 2 pages. See image below.
I hope you enjoyed this little tutorial. Click on the link below to read the advanced tutorials I have created for you.
If you have any questions please let me know.
Enjoy.
CataBlog tutorials list:
Great tutorial and it helped me a lot, as I was fighting the very same puzzle, f adding multiple columns. Thanks!
Thank you Val Vesa for your comment. I am glad it helped you.
Kind regards
Yes, I used 23% for 4 columns.
That is good to know. Always remember the limitation by the width of your page or post.
Kind regards
Thanks! I used the shortcode “gallery” and it does create columns.
The gallery now looks like this: http://oi40.tinypic.com/mrelqv.jpg
But how do I make it so that:
1. The distance between the thumbnail and the details is smaller? Something like this: http://oi41.tinypic.com/dy4nx3.jpg
2. By default it seems (as seen in the screenshot from above (1)) that all items are aligned to right. How can I make them be left aligned?
2. How can I have the same link on the thumbnail as the one on the dog’s name? SO that when the image OR the dog’s name are clicked the link of the attached page is displayed, NOT the image. Possible?
Thanks!
Hi Val Vesa, the reason why your description is a bit distant from the image is due to the way your theme is design. It is a matter of tweaking your CSS file to reduce the distance.
In regards to your 3 question read this tutorial it will help you with your question.
If you have anymore questions please let me know.
Kind regards
I fixed the other things, but the distance between thumbnails and details is way too large: http://oi43.tinypic.com/axzbz6.jpg
What do you mean is theme CSS, can it not be tweaked from the catablog CSS?
Hello Val, the CSS code you might want to look at is something like this
.catablog-description {margin: 0 0 0 120px;
}
You will have to change the 120px to something to suit your needs. Remember that in your theme the code might be different. The aforementioned is just an example.
I hope this helps you.
Kind regards
This is within the CSS file of the plugin right?
Yes that is correct. However if you change the code in the plugin when ever you update the plugin you will loose your new configuration. It is always best to create a child theme and work from there.
Kind regards
Yes, I will do a child theme.
Problem is that nowhere in the catablog.css is there such a code:
.catablog-description {

margin: 0 0 0 120px;

}
I DID find this though:
.catablog-gallery.catablog-row .catablog-description {
display: none;
margin: 0; !important;
}
So I am kind of lost.
Hi Val, create the child theme and once you start working with your child theme then look into your code. I always work with Firefox and I use Firebug extension. It is very good when it comes to troubleshooting issues like yours.
Kind regards
Hello,
i am using WordPress+Catablog for making a site with a gallery. I tested it in local and all was fine. When i replicated the site on the new domain, i am experiencing this issue:
As you can see, this is a gallery of only one image. All those strange horizontal lines were not present when i tested the site in local. Nothing changed, but i can’t understand why they appear. I tried different images, but those lines won’t disappear. maybe i’m missing something? TY for all the help you will provide ;-)
David
Hello David, thank you for your question.
I had a look at your website. First of all I would change your permalink structure. Once your permalink structure is set up nicely then we can look at your issue. To change your permalink structure have a look under Settings >> Permalinks…. you can read about it in my tutorial… have a look at step 6
One question what is the difference between your local install working great and your live website not working? For example:
1 ) Are they both using the same theme?
2 ) Are they both running the same plugins?
3 ) Are they both running the same WordPress version?
Kind regards
Ok, i changed the permalink structure (now per postname). In The local installation there are no difference in themes, plugins or wordpress version.
How can i understand why the images are shown with this lines? I noticed also that the lines change on the rollover…what can be the problem ?
Hello Davide, you did not answer my previous question. It is important that you share with me the following so that I can help you further.
What is the difference between your local install which was working and your live website that is not working? For example:
1 ) Are they both using the same theme?
2 ) Are they both running the same plugins?
3 ) Are they both running the same WordPress version?
Kind regards
Local live website have no differences at all…same theme, same plugin, same version. I replicated all the same. The only thing is different is the address of the site in the wordpress setup ;-)
Hi Davide, can you uninstall CataBlog and make sure it is deleted and then reinstall it again but make sure that you create a backup of your CataBlog data.
Kind regards