WordPress Gutenberg Editor View Post shows you how to organize the preview or publish of a post or a page and much more.
Last Updated: July 6, 2023
Latest News: Updated missing tags and category in the backend.
The following tutorial shows you how to organize the preview, publish or update of a new post or page. You can choose when to publish a post or page, add some tags and much more. You can also preview a post or page while you are creating the content. These steps are very simple to follow.
What you need:
WordPress Gutenberg Editor Tutorials:
- Gutenberg Editor
- Top Left Editor Options
- Top Right Editor Options
- Adding Blocks
- View Post
- Post Settings
WordPress Gutenberg Editor View Post
Step 1 ) Create a new post, page or edit a post or page. You can choose to preview the post or page before you decide to publish.
When you click on Preview button as illustrated in the image below it allows you to choose from the following options.
Preview Post or Page Options
- Desktop
- Tablet
- Mobile
- Preview in a new tab

Publish
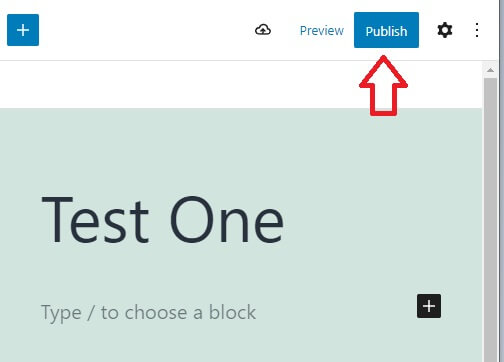
Step 2 ) The following image shows you the Gutenberg editor Publish button. This is located on the top right hand side of the screen.
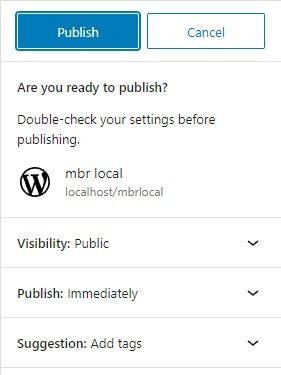
Step 3 ) The following image shows you the following options after you click on Publish button.
Publish Button Options
- Visibility: Note: Check Step 3-a ) below.
- Publish: Note: Check Step 3-b ) below.
- Suggestion: Note: Check Step 3-c ) below.
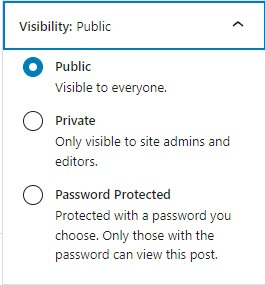
Step 3-a ) The following image Visibility allows you to choose from the following options.
Visibility Options
- Public
- Private
- Password Protected
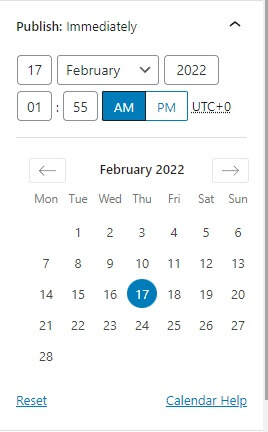
Step 3-b ) The following image Publish allows you to choose from the following options.
Publish Options
- Day, month and year
- Hour, minutes and AM or PM
- Choose a date from the calendar view
- Click on Reset link.
- Click on Calendar Help link.
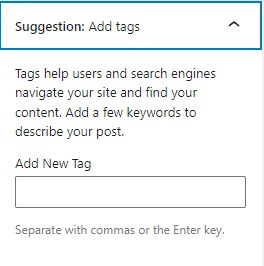
Step 3-c ) The following image Suggestion allows you to add new tags for your post.
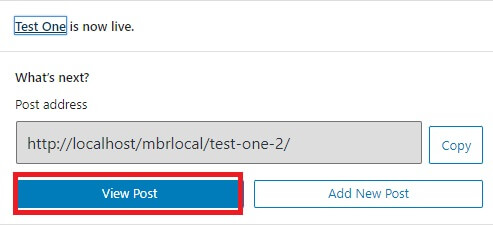
Step 3-d ) The following image shows you the following options after you click on Publish button and selected the appropriate options from the previous step.
Publish Button
- Post address
- Click on View Post button
- Click on Add New Post button
Update
Step 4 ) The following image shows you the View Post button after you click on the Update button. This button is displayed while you are updating a post or a page.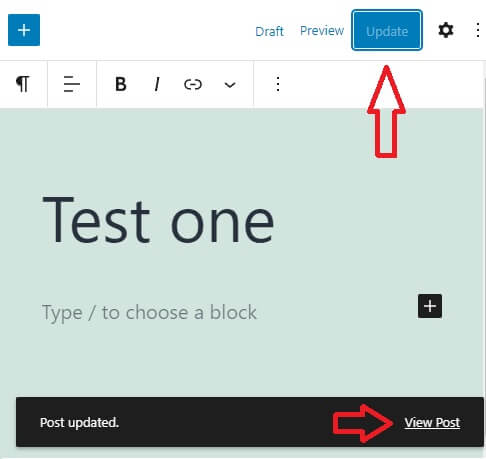
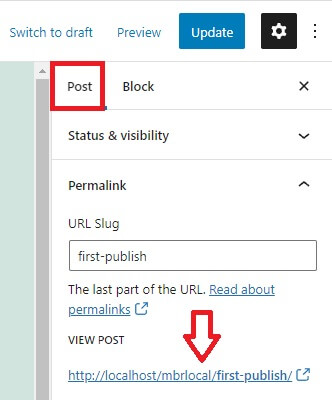
Permalink URL
Step 5 ) The following image shows you the URL link to view the post located under Permalink.
==============================
That is how simple it is to view a page or post using Gutenberg Editor.
If you have any questions please let me know. I will be updating this tutorial from time to time.
Enjoy.