Gimp Image Editor Tools Menu tutorial will cover the following tools, selection tools, paint tools, transform tools, color tools, paths, color picker and more.
Last Updated: May 22, 2023
Latest News: Updated the links below.
This tutorial talks about the Tools menu. The following Selection Tools, Paint Tools, Transform Tools, Color Tools, Paths and more is a list of tools you can use in Gimp. This can be overwhelming but with some practice you will learn how to manage and control all the tools. You probably will never get to use all the tools available.
What You Need:
Gimp Image Editor Tutorials:
- Layout
- Tools Menu File
- Tools Edit
- Select
- View
- Image
- Layer
- Colors
- Tools
- Filters
- Filters Part Two
- Filters Part Three
- Windows Help
Gimp Image Editor Tools Menu
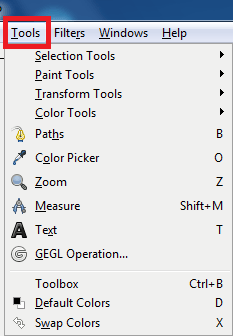
Step 1 ) Click on Tools menu to edit the following:
- Selection Tools
- Paint Tools
- Transform Tools
- Color Tools
- Paths
- Color Picker
- Zoom
- Measure
- Text
- GEGL Operation
- Toolbox
- Default Colors
- Swap Colors
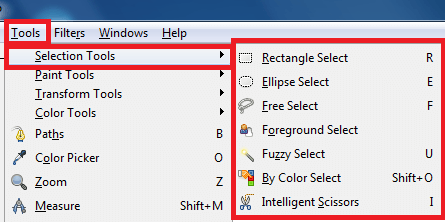
Step 2 ) Click on Tools -> Selection Tools to configure the following settings:
- Rectangle Select
- Ellipse Select
- Free Select
- Foreground Select
- Fuzzy Select
- By Color Select
- Intelligent Scissors
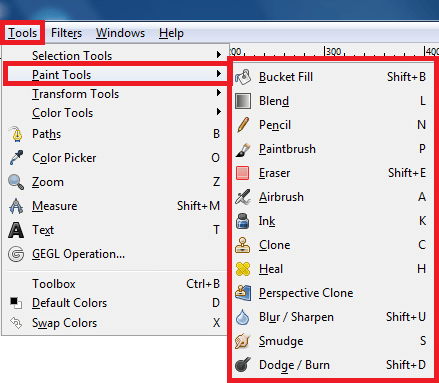
Step 3 ) Click on Tools -> Paint Tools to configure the following settings:
- Bucket Fill
- Blend
- Pencil
- Paintbrush
- Eraser
- Airbrush
- Ink
- Clone
- Heal
- Perspective Clone
- Blur / Sharpen
- Smudge
- Dodge / Burn
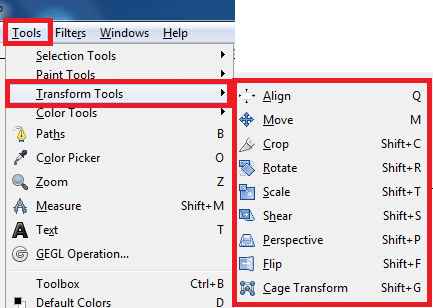
Step 4 ) Click on Tools -> Transform Tools to configure the following settings:
- Align
- Move
- Crop
- Rotate
- Scale
- Shear
- Perspective
- Flip
- Cage Transform
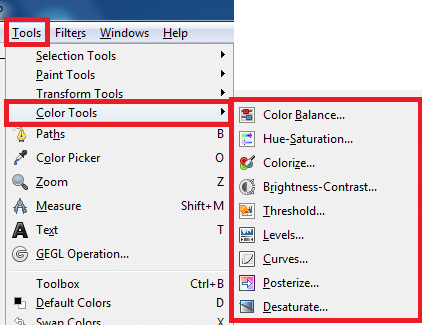
Step 5 ) Click on Tools -> Color Tools to configure the following settings:
- Color Balance
- Hue-Saturation
- Colorize
- Brightness-Contrast
- Threshold
- Levels
- Curves
- Posterize
- Desaturate
====================
Click on the following link Filters to learn more about the menu.
I will update this tutorial from time to time. So keep coming back for the latest. If you have any questions please let me know.
Enjoy.
Check out More Gimp Tutorials: