Gimp Image Editor Tools Menu File tutorial will cover the file menu list. Gimp files menu is very similar to other image editors.
Last Updated: May 22, 2023
Latest News: Updated the links below.
In this tutorial you will learn about the File -> Create options available in Gimp. You can create buttons, logos, patterns and much more. You need to spend some time understand all the different options it has to offer when creating logos and buttons.
What You Need:
Gimp Image Editor Tutorials:
- Layout
- Tools Menu File
- Tools Edit
- Select
- View
- Image
- Layer
- Colors
- Tools
- Filters
- Filters Part Two
- Filters Part Three
- Windows Help
Gimp Image Editor Tools Menu File Steps
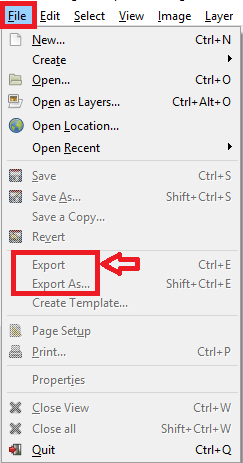
Step 1 ) Click on File to view all available tools. You can see that it is very similar to all image editors. The following has changed in the menu.
- Export
- Export As
Step 2 ) Click on File -> Create -> Buttons. You have two types of buttons you can create, Round Buttons and Simple Beveled Buttons.

Step 3 ) Click on File -> Create -> Logos. You will find a huge range of pre-design logos already for you to use.

Step 4 ) Click on File -> Create -> Patterns. You will find a number of patterns for you to choose from.

Step 5 ) Click on File -> Create -> Web Page Themes -> Alien Glow. You will find more options for the Alien Glow theme.

Step 6 ) Click on File -> Create -> Web Page Themes -> Beveled Pattern. You will find more options for the beveled patterns theme.

Step 7 ) Click on File -> Open Recent to view a history of all the files you have been working with.

====================
Click on the following link Gimp Image Editor Tools Edit to learn more about the menu.
I will update this tutorial from time to time. So keep coming back for the latest. If you have any questions please let me know.
Enjoy.
Check out More Gimp Tutorials: