WP Super Cache Plugin Advanced Settings shows you how to enable the advanced features available in the plugin and much more.
Last Updated: July 12, 2024
Latest News: I updated the documentation.
The following information talks about WP Super Cache advanced features. The plugin enables a few advanced features by default once you install the plugin for the first time. If you require more speed, then enable all the features labelled recommended in the plugin. These features should do the job and generally speaking should improve your website loading time and speed.
If you need to further improve your sites speed and make other changes because of the sites configuration, enable the extra features. Make sure you spend some time testing and understanding what these features do. Too many keep reporting issues with this plugin and functionality. Most of the time these issues are caused by enabling an advanced feature that causes conflicts with other plugins, theme or server settings.
What You Need:
WP Super Cache Plugin Advanced Settings
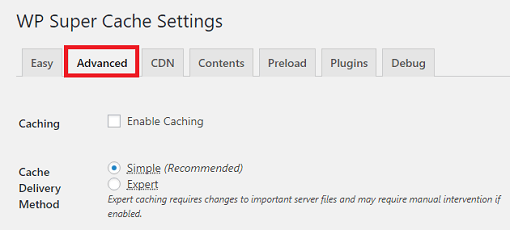
Step 1 ) Go to Settings -> WP Super Cache -> Advanced to start setting the plugins advanced features. See image below.
Caching
- Enable Caching
Cache Delivery Method
- Simple (Recommended)
- Expert
Miscellaneous Settings
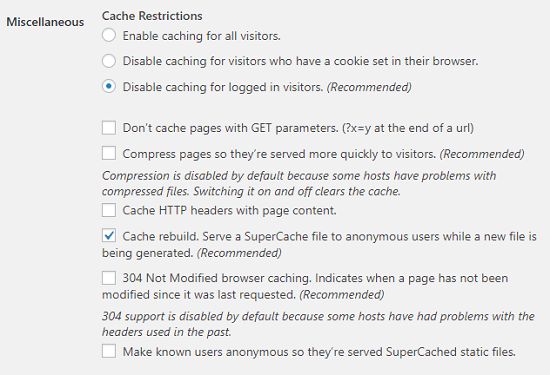
Step 2 ) The following image Miscellaneous allows you to enable one or all of the following options.
Miscellaneous Settings
- Enable caching for all visitors.
- Disable caching for visitors who have a cookie set in their browser.
- Disable caching for logged in visitors. (Recommended)
- Don’t cache pages for known users. (Recommended)
- Don’t cache pages with GET parameters. (?x=y at the end of a url)
- Compress pages so they’re served more quickly to visitors. (Recommended)
- Compression is disabled by default because some hosts have problems with compressed files. Switching it on and off clears the cache.
- Cache HTTP headers with page content.
- Cache rebuild. Serve a supercache file to anonymous users while a new file is being generated. (Recommended)
- 304 Not Modified browser caching. Indicate when a page has not been modified since it was last requested. (Recommended) 304 support is disabled by default because some hosts have had problems with the headers used in the past.
- Make known users anonymous so they’re served supercached static files.
Advanced Settings
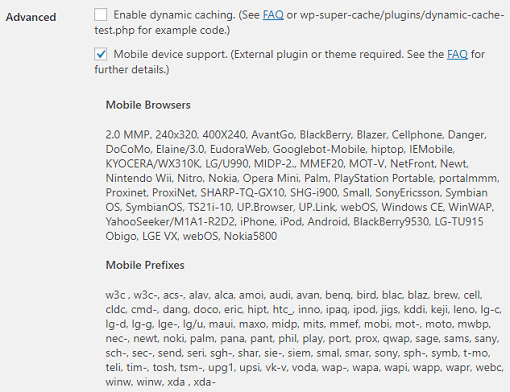
Step 3 ) The following image Advanced settings allows you to enable one or all of the following options.
Advanced Settings
- Enable dynamic caching. (See FAQ or wp-super-cache/plugins/dynamic-cache-test.php for example code.)
- Mobile device support. (External plugin or theme required. See the FAQ for further details.)
- Mobile Browsers
- Mobile Prefixes
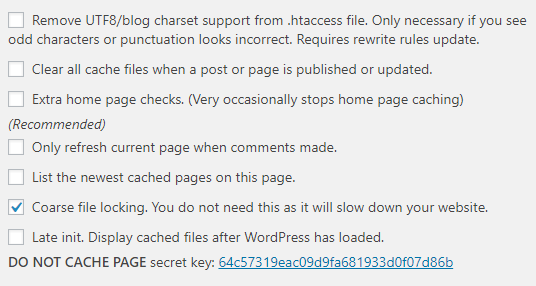
Step 3-a ) The following image allows you to enable the following options to further speed up your site.
Advanced Settings
- Remove UTF8/blog charset support from .htaccess file. Only necessary if you see odd characters or punctuation looks incorrect. Requires rewrite rules update.
- Clear all cache files when a post or page is published or updated.
- Extra home page checks. (Very occasionally stops home page caching) (Recommended)
- Only refresh current page when comments made.
- List the newest cached pages on this page.
- Coarse file locking. You do not need this as it will slow down your website.
- Late init. Display cached files after WordPress has loaded.
- DO NOT CACHE PAGE secret key: 64c57319eac09d9fa681933d0f07d86b
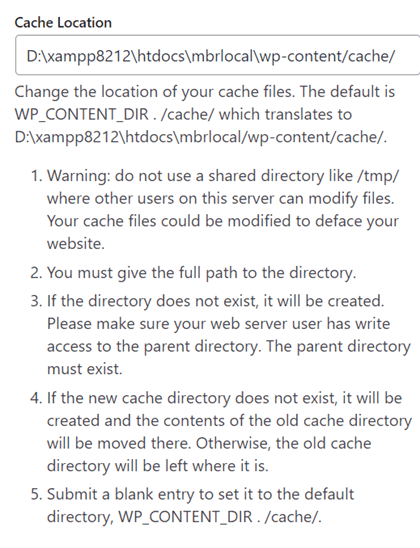
Cache Location
Step 4 ) The following image Cache Location allows you to change the location of your cache files.
Note: Make sure you read all the steps before you change the location.
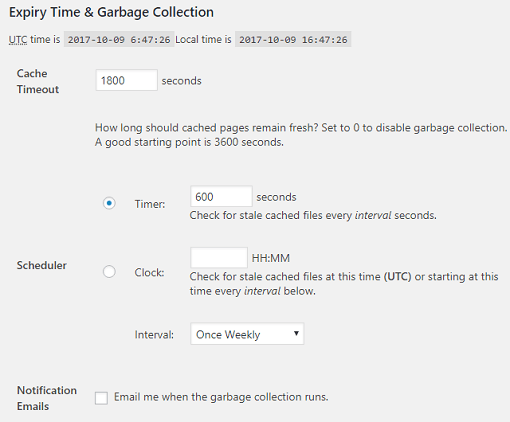
Expiry Time & Garbage Collection
Step 5 ) The following image Expiry Time & Garbage Collection allows you to set up the following options.
Expiry Time & Garbage Collection
- Cache Timeout
- Scheduler
- Notification Emails
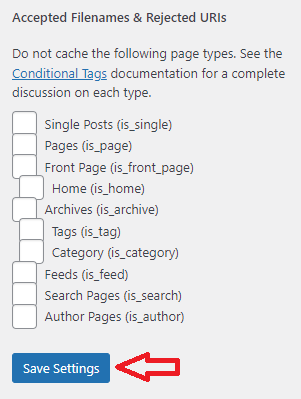
Accepted Filenames & Rejected URIs
Step 6 ) The following image Accepted Filenames & Rejected URIs allows you to enable one or all of the following options.
Accepted Filenames & Rejected URIs Options
- Single Posts (is_single)
- Pages (is_page)
- Front Page (is_front_page)
- Home (is_home)
- Archives (is_archive)
- Tags (is_tag)
- Category (is_category)
- Feeds (is_feed)
- Search Pages (is_search)
- Author Pages (is_author)
- Add strings per line.
- Click on Save Settings button when you complete the settings.
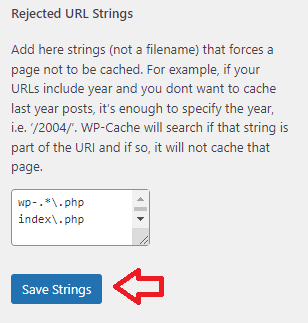
Rejected URL Strings
Step 7 ) The following image Rejected URL Strings allows you to add strings that will not be cached. Make sure you click on Save Strings button once you finish adding the strings that will not be cached.
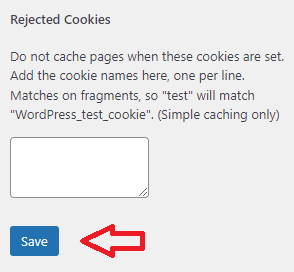
Rejected Cookies
Step 8 ) The following image Rejected Cookies allows you to add cookies from pages so that they won’t be cached. Make sure you click on Save button once you finish adding the cookies.
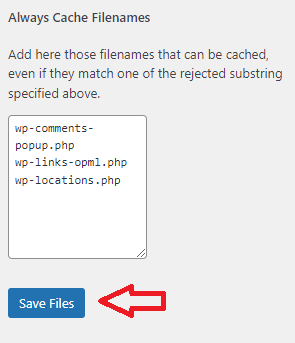
Always Cache Filenames
Step 9 ) The following image Always Cache Filenames allows you to add file names to be cached and also rejected user agents. Make sure you click on Save Files button once you finish adding the file names that can be cached.
Tracking Parameters
Step 10 ) The following image Tracking Parameters allows you to add tracking parameters to be ignored when caching. Make sure you click on Save button once you finish adding the tracking parameters.
![]()
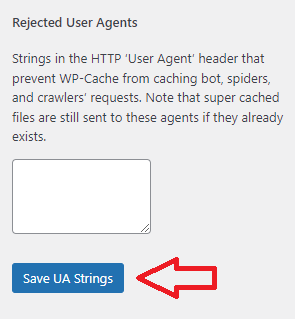
Rejected User Agents
Step 11 ) The following image Rejected User Agents allows you to add user agents strings. Make sure you click on Save UA Strings button once you finish adding the user agents strings.
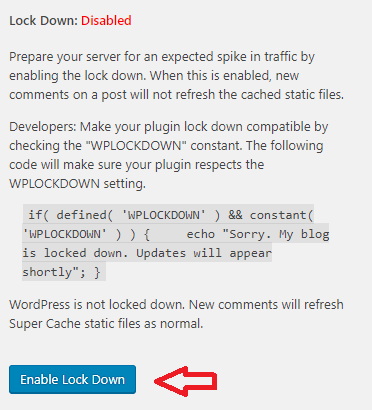
Lock Down
Step 12 ) The following image Lock Down allows you to lock down the site and also restore default configuration.
- Click on Enable Lock Down button if you wish to enable this feature.
- Click on Restore Default Configuration if you need to restore the plugins default settings.
Fix Configuration
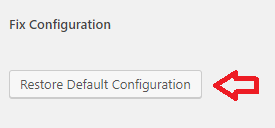
Step 13 ) The following image Fix Configuration allows you to lock down the site and also restore default configuration.
Fix Configuration Options
- Click on Restore Default Configuration button if you need to restore the plugins advanced default settings.
I will be updating this tutorial from time to time so keep coming back for the latest. If you have any questions please let me know.
Enjoy.
WP Super Cache Tutorials List: