WP Super Cache Plugin CDN Settings shows you how to set up the following features CDN and contents tabs and much more.
Last Updated: February 2, 2022
Latest News: I updated the documentation.
The following information talks about WP Super Cache CDN and Contents settings. These settings are important to manage and set up correctly from the beginning. The CDN feature is only needed if you are going to set up CDN “Content Delivery Network” on your site. Otherwise you don’t need to enable this feature.
The Contents feature allows you to manage all the cache currently served by the plugin. Here is were you delete all the content and regenerate new content for your site.
Note: Depending on the size of your site, these features can help you but make sure you carry out some test before you enable and save these settings.
What You Need:
WP Super Cache Plugin CDN Settings
Step 1 ) Go to Settings -> WP Super Cache -> CDN tab to start setting the plugins CDN settings. See image below.

Enable CDN Support
Step 2 ) The following image Enable CDN Support allows you to configure the following fields.
Enable CDN Support
- Site URL
- Off-site URL
- Include directories
- Exclude if substring
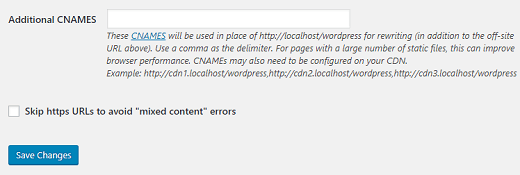
- Additional CNAMES

Step 3 ) The following image Additional CNAMES allows you add cnames in place of your site URLs. You can also enable the following feature Skip https URLs to avoid “mixed content” errors. Click on Save Changes button when you finish with the settings.
Note: Make sure you read the documentation because this can crash your site. If you don’t understand how this feature works, then leave this field blank.
Contents Settings
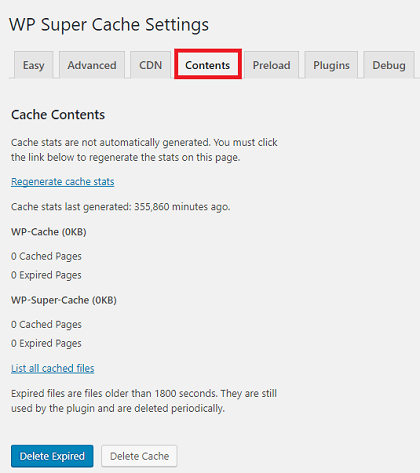
Step 4 ) The following image Contents tab allows you to control the cache content of your site.
Contents Settings
- Click on the following link Regenerate cache stats.
- Click on the following link List all cache files.
- Click on Delete Expired button to clear all the expired cache in your site.
- Click on Delete Cache button to clear all cache in your site.
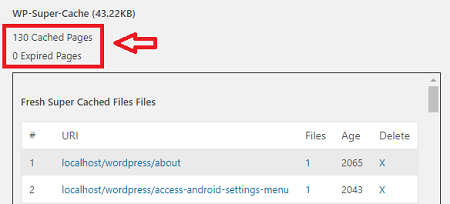
Step 4-a ) The following image Cached Pages, displays the number of pages that are currently cached and the number of pages that are expired in the plugin. You can also delete cached pages if you want.
Note: In your case these figures will be different.
Content Information
- Cached size of the content = In this example the size of the cached content is 43.22KB
- Cached Pages = In this example there are 130 pages cached.
- Expired Pages = In this example 0 pages have expired.
- URI page = Each cached page has a URI link for you to view.
- Number of Files
- Age of URI = This number is measured in seconds. For this example you can see 2 numbers 2065 and 2043.
- Option to delete the cached file = Click on the X link to delete the URI cached file.
I will be updating this tutorial from time to time so keep coming back for the latest. If you have any questions please let me know.
Enjoy.
WP Super Cache Tutorials List: