WordPress Stripe Payments Add New Product Settings shows you how to add new products in your site using a shortcode and more.
Last Updated: June 27, 2024
Latest News: Updated the documentation.
In this tutorial you will learn how to sell products in your site using Stripe Payment plugin. You will also learn how to edit the shortcode. There are a few settings and options you can enable in accordance to your needs for each product you sell in your site. Some of the settings are (optional).
Note: Make sure you read and understand how each feature works. You can drag and drop each feature up or down in the product’s page.
What You Need:
WordPress Stripe Payments Add New Product Settings
Step 1 ) Go to Stripe Payments -> Add New Product to start adding new products in your site. The first step you need to take is to give your product a name and add some description to your product. This is very similar to adding new pages and posts in your site.
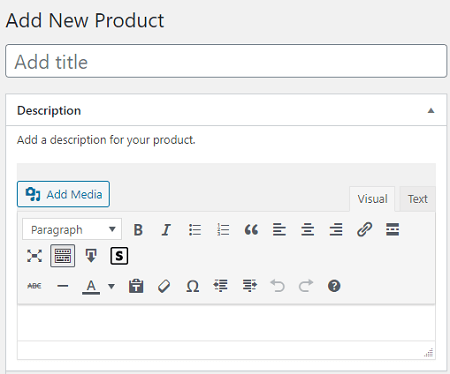
Step 2 ) The following is a list of options available for each product you add to your site. Make sure you read and understand how each feature works.
Note: You can drag and drop each feature up or down in the new product page.
New Products Options List
- Shortcode Description
- Price & Currency
- Variations
- Quantity & Stock
- Download URL
- Product Thumbnail
- Collect Address
- Shipping & Tax
- Thank You Page URL
- Appearance
- Coupons Settings
- Custom Field
- Advanced Settings
- Embed Product
Short Description
Step 3 ) The following image Short Description allows you to enter a short product description.

Price & Currency
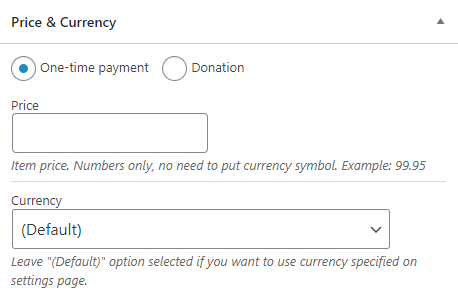
Step 4 ) The following image Price & Currency allows you to set up the following options.
Price & Currency
- One-time payment
- Price
- Currency
Donation
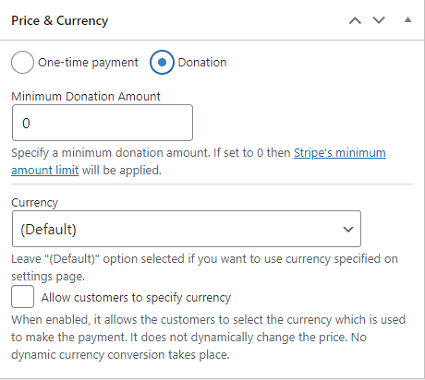
Step 4-a ) The following image allows you to set up the following options.
Price & Currency Donation
- Donation
- Minimum Donation Amount
- Currency
- Allow customers to specify currency
Variations
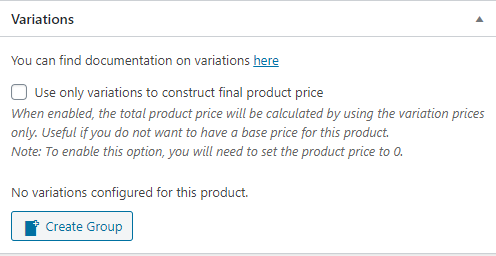
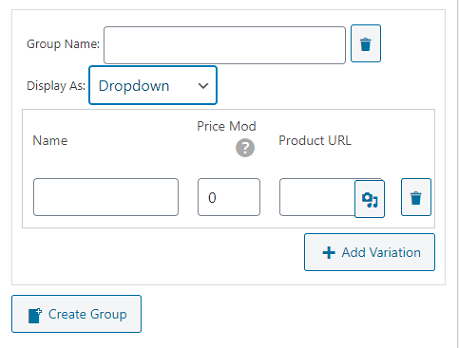
Step 5 ) The following image Variations allows you to set up the following options.
Note: Click on the following documentation creating-variable-products-using-the-stripe-payments-plugin to learn more.
Variations Options
- Use only variations to construct final product price = Note: When this option is enabled and you set the product price to “0″ it will display the product price=0 and also the variation prices. When the variations are selected, it will show the total in the “Total” row at the bottom. This is the intended behaviour for that option. You can hide the product price equals to 0 using custom CSS code. The following link forum post has more information.
- Click on Create Group button to start creating the price variations for your products.
Step 5-a ) The following image allows you to set up and manage the following options.
Create Group Options
- Group Name:
- Display As:
- Name
- Price Mod
- Product URL = You can click on the Select from Media Library button.
- Click on Add Variation button to add new product variations.
- Click on Create Group button when you finish setting up your product variations.
Quantity & Stock
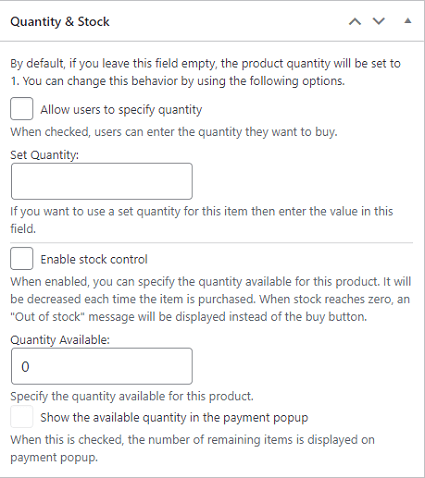
Step 6 ) The following image Quantity & Stock allows you to set up the following options.
Quantity & Stock
- Allow users to specify quantity.
- Set Quantity:
- Enable stock control
- Quantity Available:
- Show the available quantity in the Payment Popup
Download URL
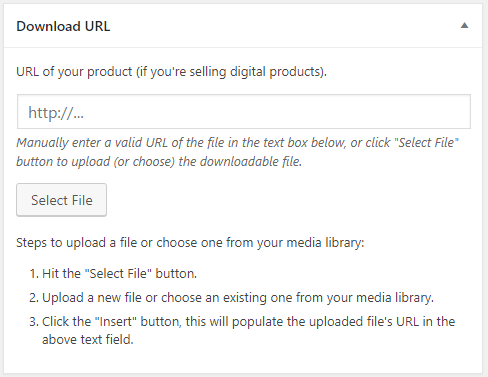
Step 7 ) The following image Download URL allows you to set up the following options.
Download URL
- URL of your product (if you’re selling digital products).
- Click on Select File button.
Product Thumbnail
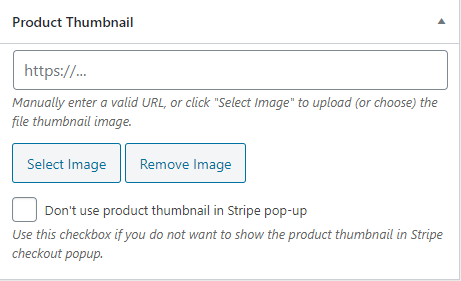
Step 8 ) The following image Product Thumbnail allows you to set up the following options.
Product Thumbnail
- URL of your product thumbnail.
- Click on Select Image button. You can also click on Remove Image button to remove the image URL.
- Don’t use product thumbnail in Stripe pop-up.
Collect Address
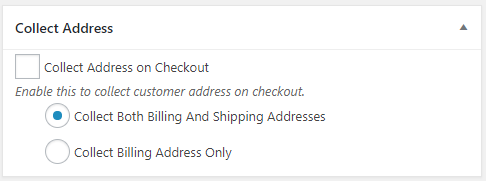
Step 9 ) The following image Collect Address allows you to set up the following options.
Collect Address
- Collect Address on Checkout.
- Collect Both Billing And Shipping Addresses.
- Collect Billing Address Only.
Shipping & Tax
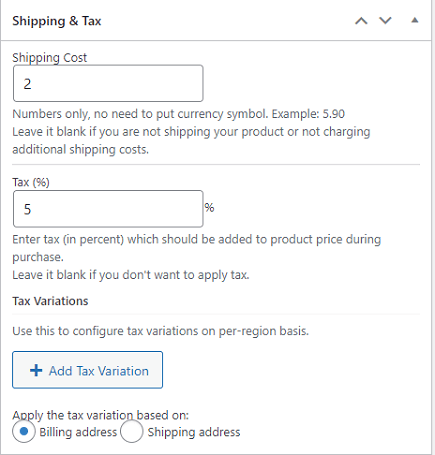
Step 10 ) The following image Shipping & Tax allows you to set up the following options.
Shipping & Tax
- Shipping Cost
- Tax (%)
- Tax Variations
- Apply the tax variation based on:
- Billing address
- Shipping address
Transaction Surcharge (Beta)
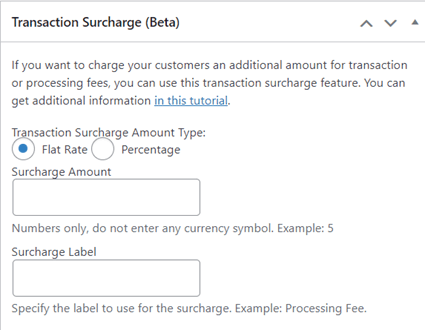
Step 11 ) The following image Transaction Surcharge (Beta) allows you to set up the following options.
Note: Click on the following documentation transaction-surcharge-feature-collect-processing-fees-for-products to learn more.
Transaction Surcharge (Beta) Options
- Flat Rate
- Percentage
- Surcharge Amount
- Surcharge Label
Thank You Page URL
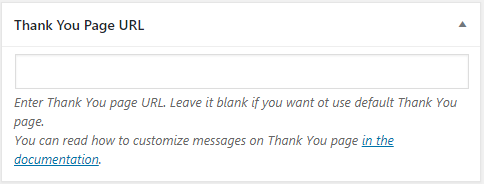
Step 12 ) The following image Thank You Page URL allows you to enter a unique URL for your thank you page. Note: Check the following link customize-the-thank-page-message-of-stripe-payments-plugin to learn more.
Appearance
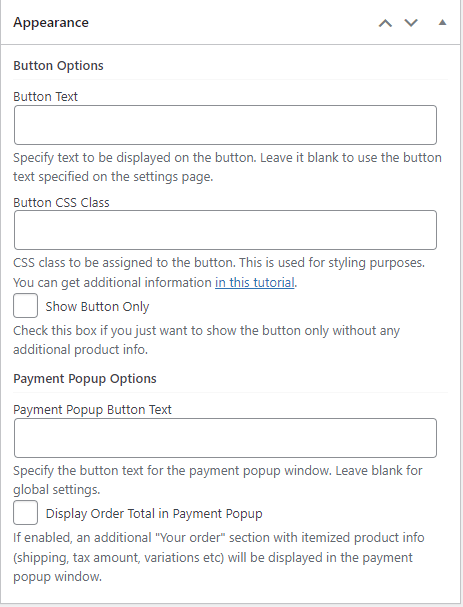
Step 13 ) The following image Appearance allows you to set up the following options.
Button Options
- Button Text.
- Button CSS Class = CSS class to be assigned to the button. This is used for styling purposes. Note: Check the following link customize-stripe-payment-button-appearance-using-css to learn more.
- Show Button Only.
Payment Popup Options
- Payment Popup Button Text
- Display Order Total in Payment Popup
Coupons Settings
Step 14 ) The following image Coupons Settings allows you to set up the following options.
Coupons Settings
- Use Global Setting
- Enabled
- Disabled

Custom Field
Step 15 ) The following image Custom Field will show you the custom field created under Advanced Settings tab in the plugin admin settings.
Note: Check the following link Stripe Payments Plugin Advanced Settings to learn more.

Advanced Settings
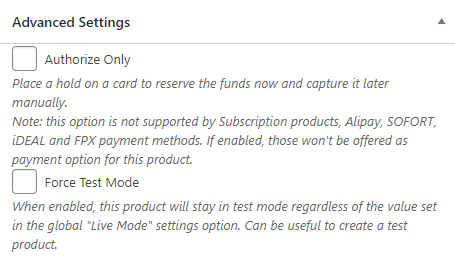
Step 16 ) The following image Advanced Settings allows you to enable the following option.
Advanced Settings
- Authorize Only
- Force Test Mode
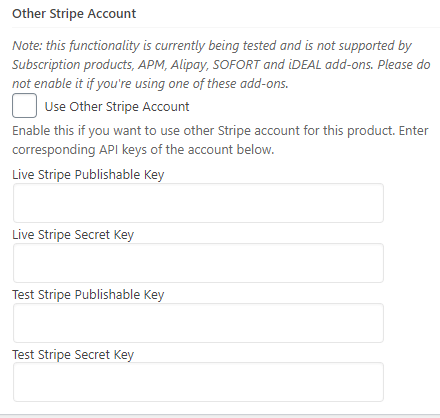
Step 16-a ) The following image Other Stripe Account allows you to enable the following option.
Advanced Settings Part 2
- Use Other Stripe Account
- Live Stripe Publishable Key
- Live Stripe Secret Key
- Test Stripe Publishable Key
- Test Stripe Secret Key
Note: The different stripe account for different product can only be used if you create a product inside the plugin like the following: https://s-plugins.com/creating-product-stripe-payments-plugin/. Click the following forum post to learn more.
Embed Product
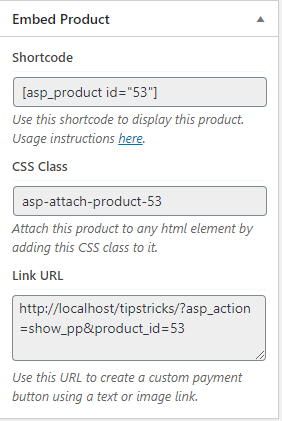
Step 17 ) The following image Embed Product provides the following information you can use to add the product to your page or post.
Embed Product
- Shortcode = Use this shortcode to display this product. Note: Check the following link embedding-products-post-page to learn more.
- CSS Class = Attach this product to any html element by adding this CSS class to it.
- Link URL = Use this URL to create a custom payment button using a text or image link.
Note: The details displayed in the image below will be different in your site.
Publish
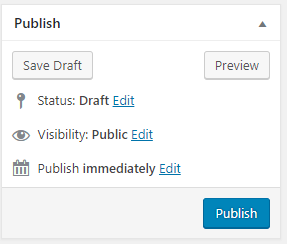
Step 18 ) The following image Publish allows you to manage when you will publish your product.
Note: Click the following URL Understand WordPress Posts Settings to learn how to set up and publish posts and pages.
Publish
- Click on Save Draft button. Or you can click on Preview button.
- Status:
- Visibility:
- Publish:
FAQ
Q1 Can a default country be set for the billing and shipping addresses?
Answer 1: The country is auto-detected in the stripe checkout popup (it is suppose to pick the country of the user checking out): You can read more about it from the following URL setting-default-address-in-billing-address/.
============
Q2 Can products be sorted in order or alphabetically?
Answer 1: You can read the following answer provided by (@alexanderfoxc) in the following support thread.
============
Q3 What is the minimum amount when setting up a donation button?
Answer 1: Please check the following documentation. Stripe does not allow a minimum amount to be lower than what the charging fees are for the currency used.
============
Q4 I want to customize the dialog box that pops up?
Answer 1: Payment popup design is controlled by Stripe and it cannot be changed, unfortunately. You can read more about it in the following support thread.
============
Q5 Is it possible to import invoices from stripe account into your plugin?
Answer 1: No, You can read more about it in the following support thread.
============
Q6 Is it possible to change the text of the ZIP code field on the payment page to ask for a “Postcode”?
Answer 1: Stripe should handle it automatically, based on your customer’s location. One of the developers comes from Europe and it shows “Postcode” for him when he tested this. You can read more about it in the following support thread.
============
Q7 Can we change the asp-products slug?
Answer 1: No, this is not possible. However you can create your own WP page and then embed a product on that page. You can read more about it in the following link support thread.
============
Q8 I have a product. let’s called this product Report A and the description is a report about Southeast Asia. I want the Buy Now button to be displayed in another page. However, once I check the [show button only] box, the product page doesn’t show the description either. What I want is to keep showing the description in the products page as well as displaying the buy now button and in another location only display the buy now button. Is this possible?
Answer 1: Yes, it is possible. For that, you need to use button_only="1" shortcode parameter. First you need to disable Show button only product option and then add the parameter to the shortcode where you want to display the button only. Click the following link support thread to learn more.
=================================
That is all you need to do to add a new product to your shopping cart.
I will be updating this post from time to time. So keep coming back for more.
Enjoy.
Stripe Payments Plugin Tutorials: