WordPress eStore Plugin Autoresponder Settings tutorial shows you how to set up the autoresponder settings which includes AWeber settings and more.
Last Updated: June 2, 2023
Latest News: Updated the information below.
The following tutorial shows you how to manage and set up the Autoresponder Settings. The following list all the settings you need to setup the autoresponder in your site. Please make sure you check carefully your settings and once you complete your settings, run a test to make it works as you expected.
Some of the settings include Aweber Settings, MailChimp Settings, GetResponse Settings and Generic Autoresponder Integration Settings.
What You Need:
- WordPress eStore (Note: This is an affiliated link = I get a small commission if you make a purchase.)
WordPress eStore Plugin Autoresponder Settings Steps
Remember: Check all your options before you save them. Run the sandbox settings for further testing before you publish your shopping cart. This plugin has many features to setup.
Autoresponder Settings
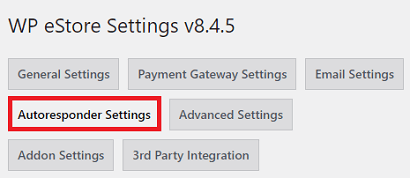
Step 1 ) Go to WP eStore -> Settings -> Autoresponder Settings tab as illustrated in the image below to begin making changes to the autoresponder settings.
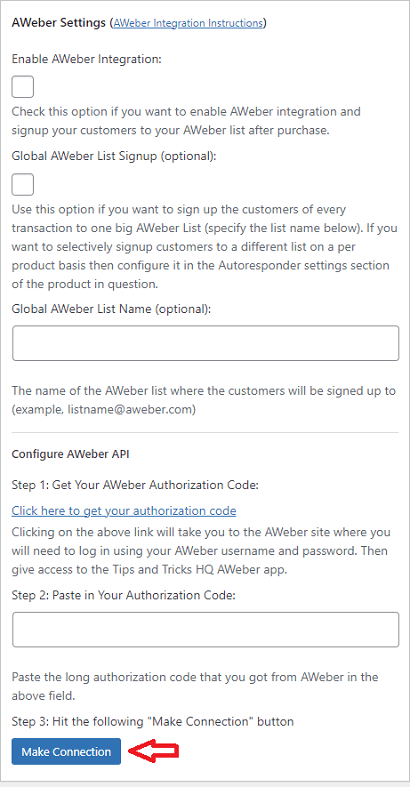
AWeber Settings
- Enable AWeber Integration:
- Global AWeber List Signup (optional):
- Global AWeber List Name (optional):
- Configure AWeber API.
- Step 1: Get Your AWeber Authentication code.
- Step 2: Past In Your Authentication Code.
- Step 3: Hit the Make Connection button.
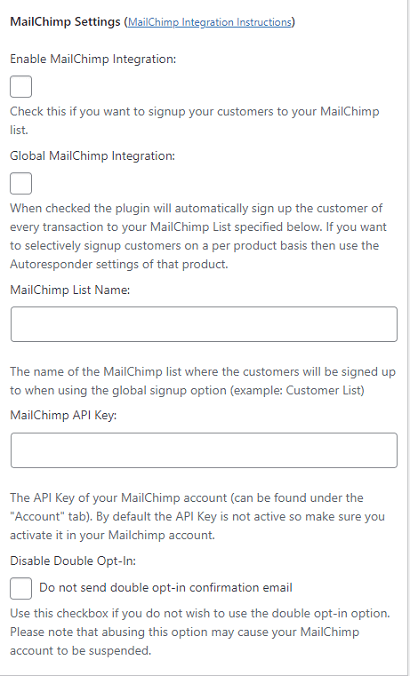
MailChimp Settings
Step 3 ) The following image MailChimp Settings allows you to setup the following options.
MailChimp Settings Options
- Enable MailChimp Integration:
- Global MailChimp Integration:
- MailChimp List Name:
- MailChimp API Key:
- Disable Double Opt-In:
GetResponse Settings
Step 4 ) The following image GetResponse Settings allows you to setup the following options.
GetResponse Settings Options
- Enable GetResponse Integration:
- Global GetResponse Integration:
- GetResponse Campaign ID:
- GetResponse API Key:

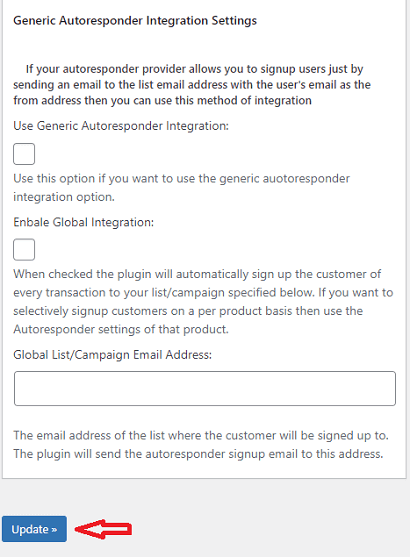
Generic Autoresponder Integration Settings
Step 5 ) The following image Generic Autoresponder Integration Settings allows you to set up the following.
Generic Autoresponder Integration Settings Options
- Use Generic Autoresponder Integration:
- Enable Global Integration:
- Global List/Campaign Email Address:
- Click on Update button once you complete the settings.
==================================
That’s all you have to do to setup the autoresponder settings in eStore plugin.
Click on the following link Advanced Addon Settings to continue with the set up.
I will be updating this post from time to time. So keep coming back for more. If you have any questions please let me know.
Enjoy.
WordPress eStore Plugin Tutorial List:
Thanks for this. Question: does WP estore have a native autoresponder capability, or does it have to be integrated with MailChimp etc to function? Cheers
Hi Ross, thank you for your question. If by native autoresponder you mean the following. When someone buys a product an automatic message is sent to the buyer letting them know of their purchase. The answer is yes there are settings that allows the plugin to automatically reply to a buyer.
Or if you meant the following. When someone buys a product they are automatically subscribed to a mailing list. If this is what you mean the answer is no. You need to integrate the plugin with your current mailing or subscriber service like MailChimp.