WordPress Affiliates Manager Registration Form Fields shows you how to set up and add new registration fields to the affiliate registration form.
Last Updated: March 6, 2023
Latest News: Updated the documentation.
The following tutorial shows you how to add new fields to your registration form. You can choose to enable as many fields as you like. You can even select to make the fields required or not. There are a few payment methods you can choose from.
What You Need:
- Affiliates Manager plugin.
- You can also purchase the Affiliate Manager premium version. (Optional)
WordPress Affiliates Manager Registration Form Fields
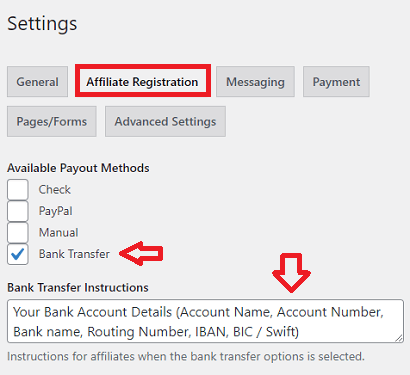
Step 1 ) Go to Affiliates -> Settings -> Affiliate Registration as illustrated in the following image to set up the following options.
Available Payout Methods
- Check
- PayPal
- Manual
- Bank Transfer
- Bank Transfer Instructions = Note: You can edit the instructions or leave the default instructions as they are.

Step 2 ) The following image Affiliate Registration Fields allows you to set up the following options.
Note: You can only edit and delete new custom fields added.
Add Custom Fields
- Click on Add Custom Field button to add new fields to your registration form.

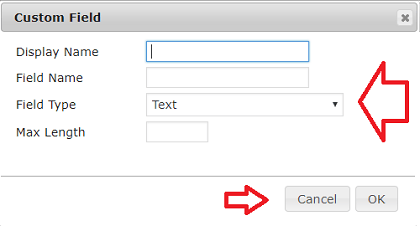
Step 2-a ) The following image Custom Field allows you to edit and select from the following options.
Custom Field Settings
- Display Name
- Field Name
- Field Type
- Max Length
- Click on Cancel button to cancel the entries or Ok button when you are finish setting up the new field.

Step 3 ) The following is a list of default registration fields you can choose to enable or not. You can also select to make the field required in the registration form.
Affiliate Default Fields
- First Name
- Last Name
- Phone Number
- E-Mail Address = Note: This filed cannot be edited or disabled.
- Address Line 1
- Address Line 2
- City
- State
- Zip Code
- Country
- Company Name
- Website URL
- Terms and Conditions
- Affiliates Homepage Message
Step 3-a ) The following image shows you two fields First Name and Last Name. Each field can be enabled or not. You can also select whether the field is Required or not.

Affiliates Homepage Message
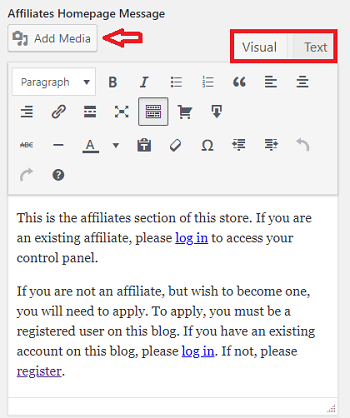
Step 4 ) The following image Affiliates Homepage Message allows you to customize the message shown to a normal visitor who is not logged into WordPress.
You can type any message you want using the Visual or Text editor. You can also add images if you want.

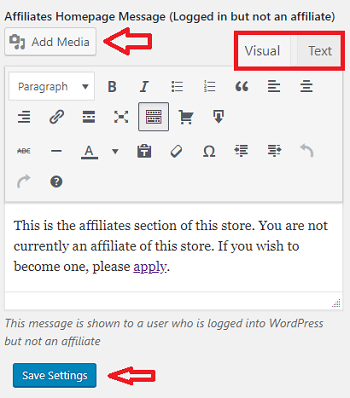
Step 5 ) The following image Affiliates Homepage Message (Logged in but not an affiliate) allows you to customize the message shown to a user who is logged into WordPress but is not an affiliate.
You can type any message you want using the Visual or Text editor. You can also add images if you want.
Note: Make sure you click on Save Settings button when you finish editing the messages.

FAQ
Q1 Is it possible to add some custom fields (Like Dropdown and File Upload control) to the registration page of the affiliate?
Answer: Unfortunately at present, no. Check the following support thread to learn more.
==========
Q2 I have added custom fields, but how can I view or show the custom fields in the dashboard?
Answer: It will show when you view/edit an affiliate’s profile. Check the following support thread to learn more.
==========
Q3 Is there a way to include, an affiliate’s PayPal email at registration?
Answer: There is no field for it in our registration form. An affiliate can enter their PayPal email address once they log in to the dashboard. Check the following support thread to learn more.
==================================
That is all you have to do to set up the registration form.
Click on the following URL Customize Messaging System to continue with the settings.
If you have any questions please let me know.
Enjoy.
WP Affiliates Manager Tutorials List