Restore WordPress Using XCloner plugin tutorial will guide you and help you to restore your website including your files and database using XCloner plugin.
Last Updated: June 8, 2020
Latest Update: Updated the documentation.
The latest version 4.0.1 has simplified the method to restore the website in comparison to it’s previous version. The following instructions will show you how simple it is to restore your site with a few clicks and uploading some files.
Important: Please remember to review the new version and report any issues to the developer.
What you need:
- Xcloner plugin.
Restore WordPress Using XCloner
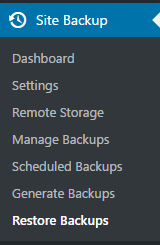
Step 1 ) Go to Site Backup -> Restore Backups and begin restoring your website. See image below.
==================================
Information: With the release of 4.0.3 version and above, you can restore backups locally without the need to download the restore script.
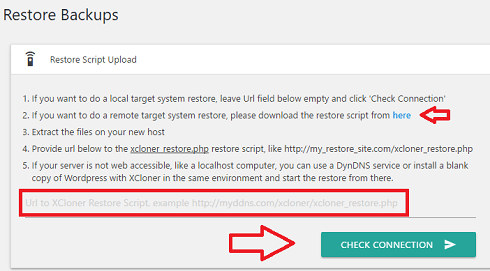
Step 2 ) Click on the following link here to download the files. These files contain the files needed to restore the website. If you are restoring locally simply click on Check Connection button. See image below.
Step 3 ) Unzip the content of the file you downloaded in Step 2 ) above if you are restoring the site. Then upload the following files and folder to your server via FTP or other means.
Files to Upload
- Vendor = This is a folder.
- vendor.phar
- xcloner_restore.php
Once you have uploaded the files and folder, type the website URL as illustrated in the image above. Here is an example of what your URL path might look like i.e. http://www.yourwebsite.com/xcloner_restore.php. Then click on CHECK button. If everything is carried out correctly you will not see any error messages.
Note: Make sure the files have been uploaded to the root of the site you are restoring. Or else you will see an error message when you run the restore script xcloner_restore.php.
==================================
Select Backup File
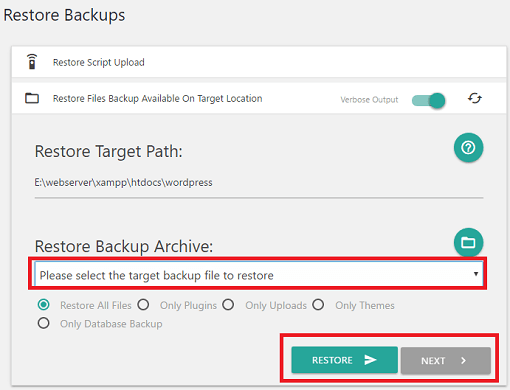
Step 4 ) Select the backup file you want to restore from the drop down menu. For this tutorial I am restoring the website in the same location locally using Xampp. Once you have selected the backup file from the drop down menu, click on Restore button. As of 4.0.3 you have the option to select what to restore.
Restoring Options
- Restore All Files
- Only Plugins
- Only Uploads
- Only Themes
- Only Database Backup
Note: If you are restoring or moving a backup to a new server, carry out the following steps if you run into trouble.
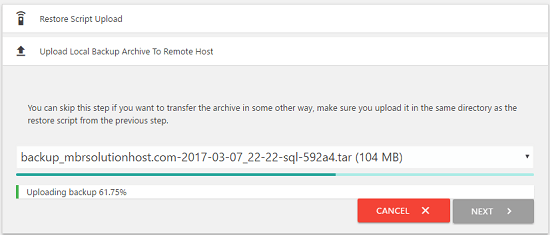
Step 5 ) The following image shows you the backup loading. You can cancel the uploading of the backup any time you want. Simply click on CANCEL button.
Restore Website
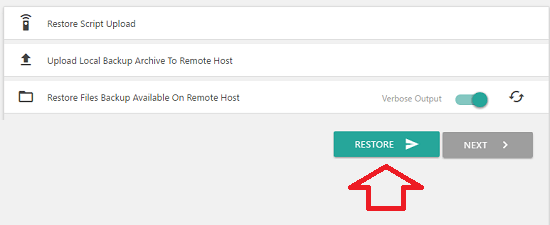
Step 6 ) Once the backup file has been uploaded, click on RESTORE button. The restoration of your site will begin. Once the restore has completed and if nothing has gone wrong you will see a message saying completed.
Troubleshooting Restoration
Q1 ) When I try to restore a site I get the following error message “Could not run restore script, AUTH_KEY missing or invalid!”. How do I fix this issue?
Answer: (Answer provided by Liuta Ovidiu in the forum) Make sure the restore script you are using is downloaded from the same location you attempting the restore, usually each backup location creates it’s own AUTH_KEY which is copied inside the restore script at the moment of download, if that changed maybe, try and re-download the restore script and try again
====================================
That is how simple it is to restore a website from a backup using XCloner plugin.
You might be interested to read the following tutorials.
Run and test your website locally
In the following tutorials you will learn how to setup WordPress locally using xampp and install your backup locally to run some testing.
- First read the following tutorial Install WordPress locally using Xampp to set up your WordPress locally
- Second read the following tutorial Test Your WordPress Site Locally which will show you how to restore a backup locally for testing and editing.
I will be adding more information in the near future. If you have any questions please let me know.
Good luck.
Go Back To XCloner Tutorials List
Thanks so much!
You are most welcome
Sorry for the off-topic.
Do you happen to know how can I instruct Xcloner to run complete backups instead of incremental?
Regards.
Hi, when you generate a backup make sure you don’t enter anything in the following field Backup Only Files Modified/Created After. Another words leave the default setting for this field.
Let me know if this helps you or not.
Kind regards
Using the remote target system restore. I want to make a copy of my site to a subdomain for development.
But I do need a new SQL database aswell.
Is a new SQL database generated or will this copy use the same database?
Thanks in advance!
Hi, as far as I know no. If you want to create a new database, you need to set it up manually.
Kind regards