WP eMember Plugin Pages Forms Settings tutorial will show you how to set up your forms and in which page they will be added.
Last Updated: October 17, 2019
Latest News: Updated a link.
Information: As I mentioned on the fist part of this tutorial, this is a very powerful plugin and has many features to configure. Please take your time to read and understand all the options available to avoid any issues.
WP eMember Plugin Page Forms Settings Steps
Pages/ Forms Settings
Step 1 ) Go to WP eMember -> Page/Forms Settings to manage the plugins pages created and to add optional pages to the plugin settings. See image below.

General Settings
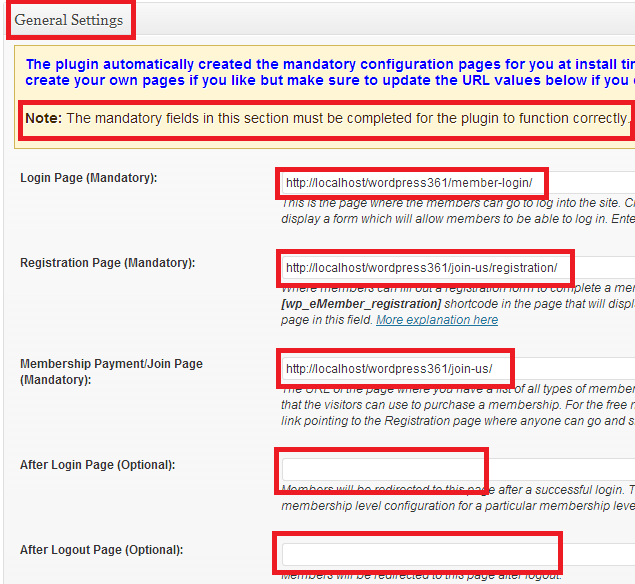
Step 2 ) The following image General Settings allows you to configure the following options. There are three mandatory pages.
Note: These mandatory pages are created automatically by the plugin the first time you install the plugin.
- Login Page (Mandatory)
- Registration Page (Mandatory) This option has a more explanation here link for you to read and help you understand further this settings.
- Membership Payment/Join (Mandatory) This option has a more explanation here link for you to read and help you understand further this settings.
- After Login Page (Optional)
- After Logout Page (Optional).
Step 2-a ) The following is an example of the three pages created by the plugin. You can change these pages if you need to, as long as you enter the correct URL as illustrated below or else you will run into all sorts of trouble.
Note: As a general rule it is always best to not edit the default pages URL created by the plugin unless you know what you are doing.
- http://localhost/wordpress361/member-login/
- http://localhost/wordpress361/join-us/registration/
- http://localhost/wordpress361/join-us/
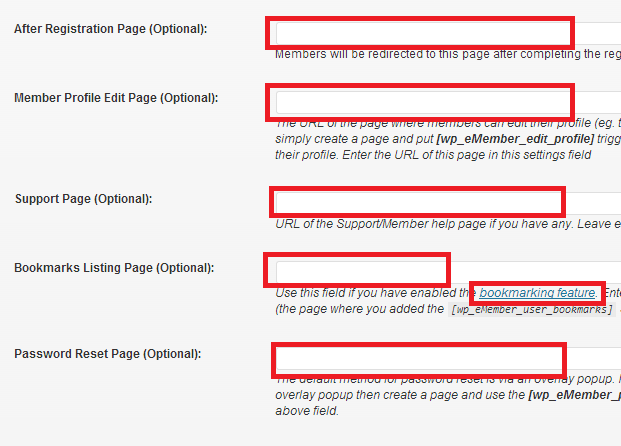
Step 3 ) The following image allows you to edit the following options.
- After Registration Page (Optional)
- Member Profile Edit Page (Optional)
- Support Page (Optional)
- Bookmarks Listing Page (Optional) Only use this feature you have enabled bookmarking features.
- Password Reset Page (Optional)
Registration Form Fields
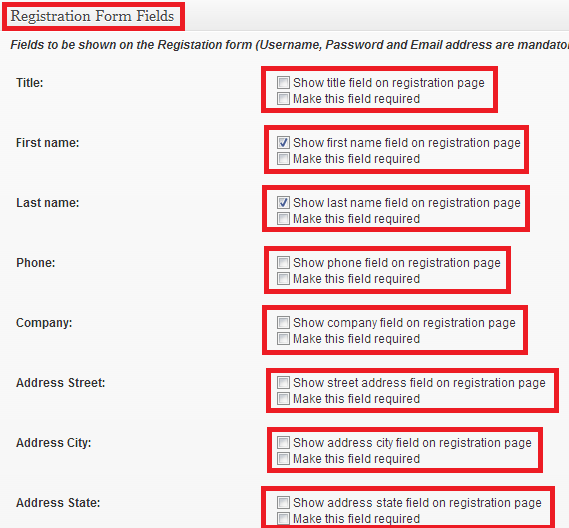
Step 4 ) The following image Registration Form Fields allows you to select from the following options to be included in your registration form. You can also select if these fields are required.
Form Fields
- Title
- First Name
- Last Name
- Phone
- Company
- Address Street
- Address City
- Address State
- Address Zipcode
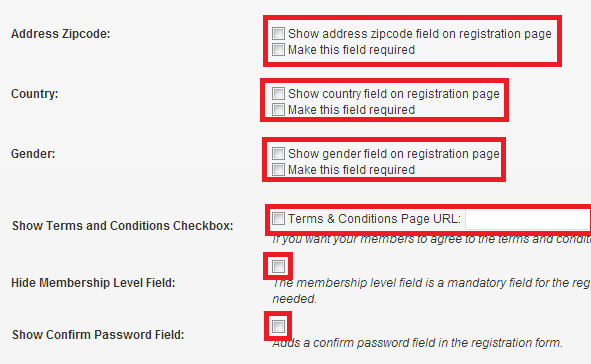
Step 5 ) The following image allows you to select from the following options to be included in your registration form. You can also select if these fields are required.
Form Fields Continued
- Address Zipcode
- Country
- Gender
- Show Terms and Conditions Checkbox
- Hide Membership Level Field
- Show Confirm password Field
Edit Profile Form Fields
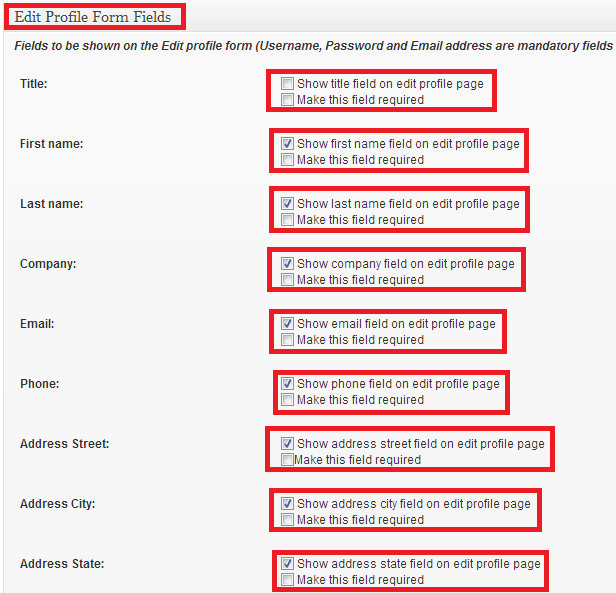
Step 6 ) The following image Edit Profile Form Fields allows you to select from the following options to be included. You can also select if these fields are required.
Profile Form Fields
- Title
- First Name
- Last Name
- Company
- Phone
- Address Street
- Address City
- Address State
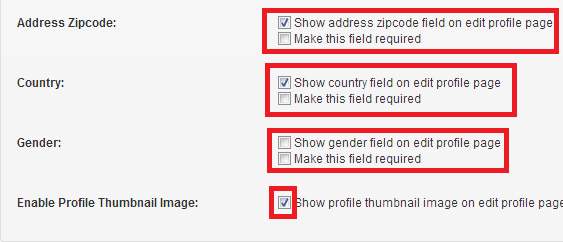
Step 7 ) The following image allows you to select from the following options to be included. You can also select if these fields are required. After you have completed the following settings remember to click on Update Options.
Profile Form Fields Continued
- Address Zipcode
- Country
- Gender
- Enable Profile Thumbnail Image
Login Widget Message
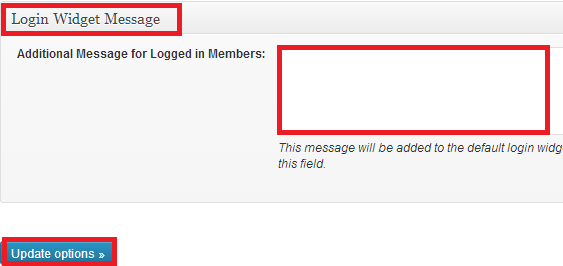
Step 8 ) The following image Login Widget Message allows you to add additional message for Logged in Members. This is very important if you wish to convey some extra information to your members when they log in.
Click on the following link Email Settings to complete the next tutorial.
I will be updating this post from time to time. So keep coming back for more.
Enjoy.
eMember Plugin Tutorial List: