Create Redirect URL Using WP Redirection Plugin tutorial shows you how to check your 404 error log files and how to delete or export the log files.
Last Updated: May 20, 2023
Information: Updated the information.
This tutorial shows you how to check for 404 file not found error messages using Redirection plugin. You will learn how to delete the errors in bulk or individually. You will also learn how to export the log files.
Exporting the log files is important if you want to further analyze what is going on behind these error messages. Remember that as your site becomes large and popular you will start seeing many 404 error messages on the background. This is unavoidable and it happens because there will always be changes happening on your site. That is why exporting the log file makes sense, especially if it has a large number of entries.
Note: Keep checking your 404 log file not found error messages regularly to stay on top of this.
What You Need
- Redirection plugin.
Redirection Plugin Tutorials
- Redirects Settings
- Add New WP Redirection To Your Site
- Options Settings
- Create Redirect URL
Create Redirect URL Using WP Redirection Plugin
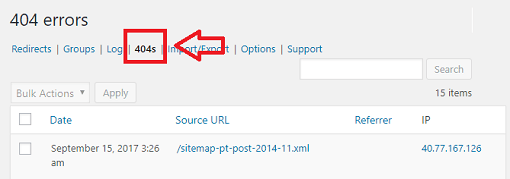
Step 1 ) Go to Tools -> Redirection -> 404s to see if there are any 404 file not found errors. See the image below.
If your site has some file not found errors, each file displayed will have the following information provided by the plugin. This information is vital and gives you some important information about the error message including who the referrer is.
The error might be a bot, a legitimate person looking for a URL that has changed lately or someone trying to hack via one of your links. It could also mean that the URL in question might be down for various reasons.
- Date
- Source URL
- Referrer
- IP
Delete Log Entries
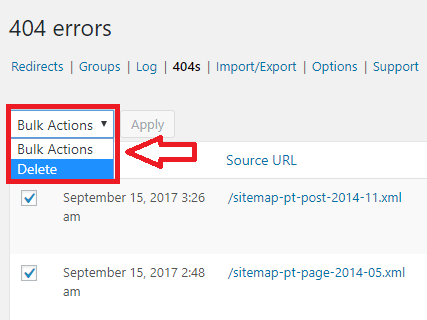
Step 2 ) The following image shows you the drop down menu allowing you to delete the log entries in bulk after selecting more than one.
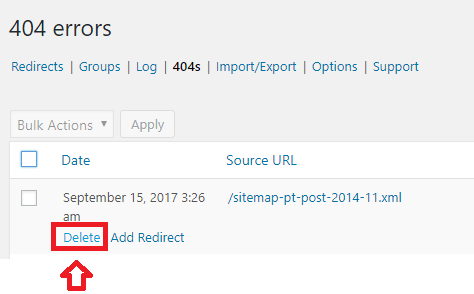
Step 2-a ) The following image shows you how to delete one log entry.
Step 2-b ) The following image displays a warning message before you go ahead and delete the log entry.
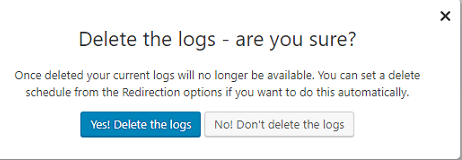
Note: Make sure you are 100% certain that you want to delete the log files.
Create Redirect
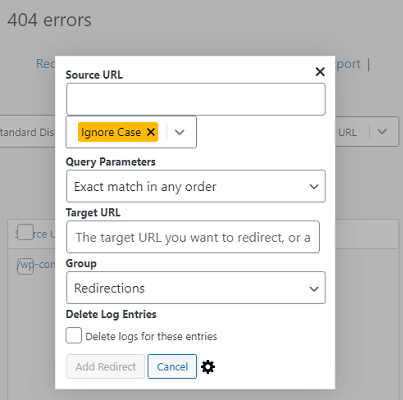
Step 3 ) In some cases you might want to create a redirect URL for the file not found error. The following image shows you how to carry out this action.
Steps To Create a Redirect
- Click on Add Redirect link below the log entry.
- Select the Query Parameters.
- Enter the Target URL where the new redirect file is.
- Select which Group this redirect belongs too.
- Click on Add Redirect button once you have completed the task.
Note: After you add a new redirect to your site, it will be displayed under Redirects tab.
Export Log Entries
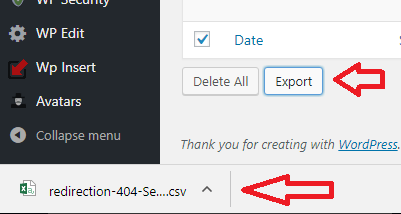
Step 5 ) The following image Export allows you to export the log entries. Once you click on the Export button, the logs will be downloaded in a csv file as illustrated in the following image.
=================================
I hope the above information helps you manage your 404 errors log files.
I will be updating this tutorial from time to time. So keep coming back for the latest.
If you have any question please let me know.
Enjoy.