WordPress Redirection Plugin Options Settings shows you how to set up and manage all redirects in your site by configuring a few settings.
Last Updated; July 20, 2021
Latest News: Updated the documentation.
This tutorial shows you how to set up and configure the plugin option settings. They are straight forward, so you won’t find them too difficult to set up. In most cases the default settings will be more than enough.
Note: If this plugin helps you, please consider making a small donation to the plugin developer/s. Thank you.
What You Need
- Redirection plugin.
Redirection Plugin Tutorials
- Redirects Settings
- Add New WP Redirection To Your Site
- Options Settings
- Create Redirect URL
WordPress Redirection Plugin Options Settings
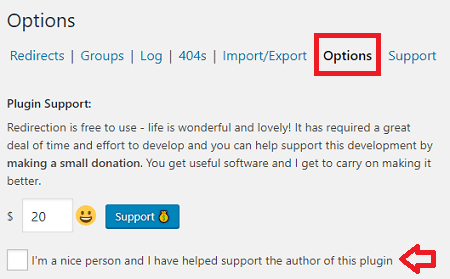
Step 1 ) Go to Tools -> Redirection -> Options to learn how to set up the plugins functionality. See the image below.
The first feature you will see in the plugin is the option to donate to the developer/s. If you use this plugin and you find that it works for you, then please consider donating an amount to the developer/s.
Logs
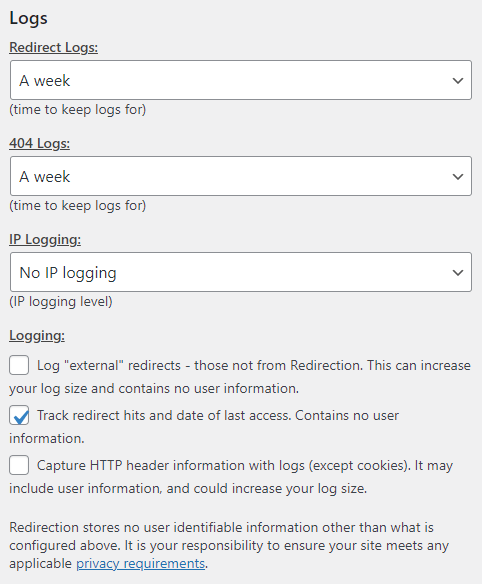
Step 2 ) The following image Logs allows you to setup the following options.
Logs Options
- Redirect Logs:
- No logs
- A day
- A week
- A month
- Two months
- Forever
- 404 Logs:
- No logs
- A day
- A week
- A month
- Two months
- Forever
- IP Logging:
- No IP logging
- Full IP logging
- Anonymize IP (mask last part)
- Logging:
- Log “external” redirects – those not from Redirection. This can increase your log size and contains no user information.
- Track redirect hits and date of last access. Contains no user information.
- Capture HTTP header information with logs (except cookies). It may include user information, and could increase your log size.
URL
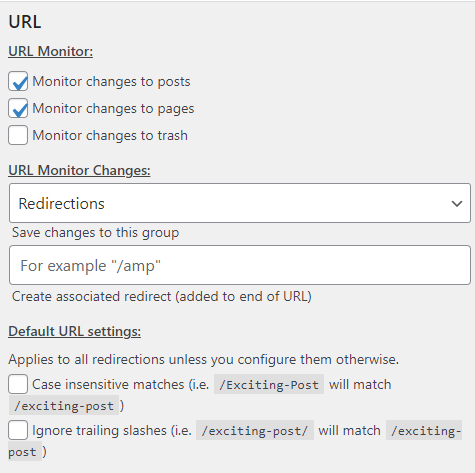
Step 3 ) The following image URL allows you to setup the following options.
URL Options Part 1
- URL Monitor:
- Monitor changes to posts
- Monitor changes to pages
- Monitor changes to trash
- URL Monitor Changes:
- Redirections
- Modified Posts
- Save changed to this group
- Default URL settings:
- Case insensitive matches (i.e. /Exciting-Post will match /exciting-post)
- Ignore trailing slashes (i.e. /exciting-post/ will match /exciting-post)
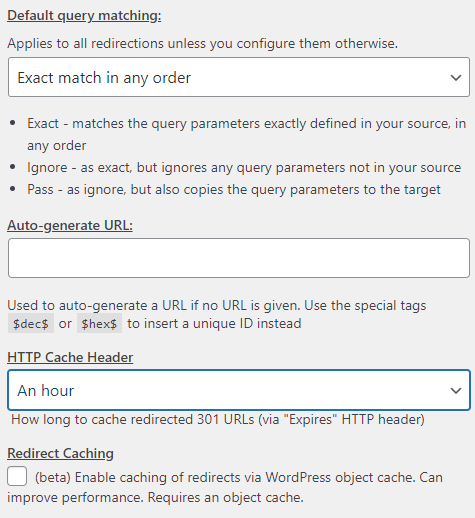
Step 3-a ) The following image URL allows you to setup the following options.
URL Options Part 2
- Default query matching:
- Exact match in any order
- Ignore all query parameters
- Ignore and pass all query parameters
- Auto-generated URL:
- HTTP Cache Header
- Never cache
- An hour
- A day
- A week
- For ever
- Redirect Caching
Advanced
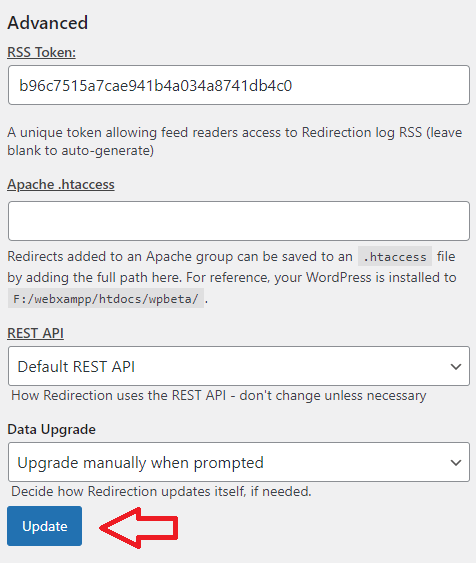
Step 4 ) The following image Advanced allows you to set up and enable the following options.
Advanced Options
- RSS Token:
- Apache .htaccess
- Rest API
- Default Rest API:
- Raw Rest API:
- Relative Rest API:
- Data Upgrade
- Update manually when prompted
- Automatically upgrade on admin pages
News Letter
Step 5 ) Want to keep up to date with changes to Redirection?
Sign up for the tiny Redirection newsletter – a low volume newsletter about new features and changes to the plugin. Ideal if you want to test beta changes before release.
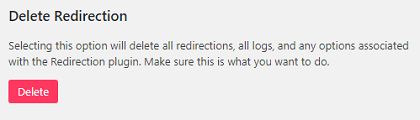
Delete Redirection
Step 6 ) The following image Delete Redirection allows you to completely remove everything from the plugin. Please make sure that you are sure you want to do this when you click on the Delete button.
=================================
I hope the above information helps understand and manage the plugins options.
Click on the following URL Create Redirect URL to learn more.
I will be updating this tutorial from time to time. So keep coming back for the latest.
If you have any question please let me know.
Enjoy.