All In One Security Dashboard tutorial helps you setup this great and powerful plugin which covers many WordPress security areas.
Last Updated: December 16, 2024
Latest News: Updated the documentation.
This post talks about the AIOS plugin dashboard and what is the function of the dashboard. The dashboard shows the administration activities of your site. These activities are related to your members, users and visitors. This information is very useful because it can help you investigate suspicious activities in your site and more.
The dashboard should be the first place you visit when you log into your site to check the activities before you start to work.
Important Information: The plugins Dashboard is only visible to the Administrator account. In other words, the following user profiles Subscriber, Contributor, Author, Editor will not see the Dashboard when logged into their account.
What you need:
All In One Security Dashboard
Step 1 ) Go to WP Security -> Dashboard admin sidebar menu as illustrated in the image below.
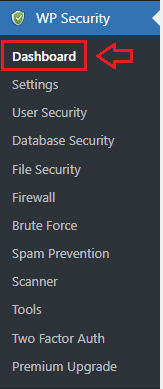
Dashboard
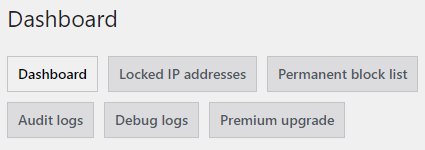
Step 2 ) The following image Dashboard as illustrated in the image below allows you to set up the following options.
Dashboard Settings
- Dashboard
- Locked IP Addresses
- Permanent Block List
- Audit logs
- Debug logs
- Premium upgrade
Security Strength Meter
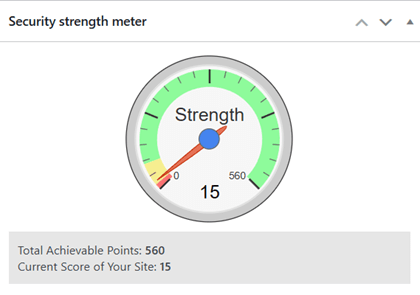
Step 3 ) The following image Security Strength Meter displays a metered reading of the different security features enabled in the plugin. A visual display of the meter reading is important for those who want to know what security settings have been enabled. It works great as a guide.
Security Strength Meter
- Total achievable points: 560.
- Current score of your site: 15. (Note: This is an example score. Your current score will be different).
Security Points Breakdown
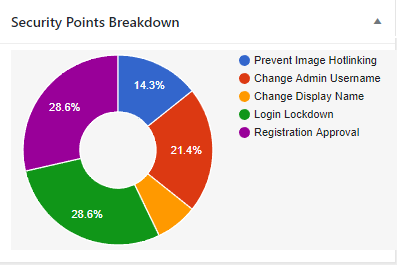
Step 4 ) The following image Security Points Breakdown shows you what percentage your current security settings represents in the overall settings.
Security Points Breakdown
- It displays the overall percentage and the different levels of security set up.
Information: The breakdown reading below is just an example. Your breakdown reading will be different.
Critical Feature Status
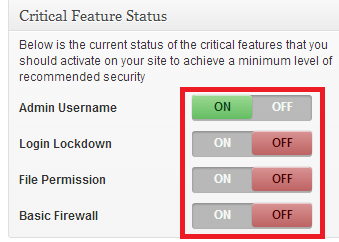
Step 5 ) The following image Critical Feature Status shows you straight away some of the most critical security settings that should be configured straight away.
Critical Feature Status
- Admin Username
- Login Lockdown
- File Permission
- Basic Firewall
Maintenance Mode Status
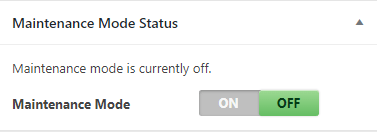
Step 6 ) The following image Maintenance Mode Status allows you to put your site in maintenance mode.
Important: Make sure you deactivate maintenance mode once you have completed your work.
Logged In Users
Step 7 ) The following image Logged In Users lets you know if there are other users logged into your website. This is very handy to know especially if you are planning on doing some development work in the site. Knowing if there are other users logged in, allows you to notify them straight away before you begin.

Locked IP Addresses
Step 8 ) The following image Locked IP Addresses lets you know if anyone has being locked out from your site.

Last 5 Logins
Step 9 ) The following image Last 5 Logins displays who was logged in, in the last 5 times.

Locked IP Addresses Tab
Step 10 ) The Locked IP Addresses tab lets you view all the IP addresses of locked out visitors who attempted to log in with an account.
Step 10-a ) The following image shows two options you can carry out when IP addresses have been locked out. You can select whether to Unlock or Delete the locked out IP address.
Difference Between Unlock and Delete
- “Unlock” = Unlock will release the locked status and hence allow that IP address to access the site again. (However the row containing that IP address will still remain in the login_lockdown table in the database).
- “Delete” = Delete will also allow access for that IP address but this is because the row entry for that IP address is totally deleted from the login_lockdown table in the database.
Sometimes people want to keep medium or long term records of all locked IP ranges and the corresponding data for investigation purposes which is why we have the unlock command. If you simply want to unlock an address and don’t want to keep that record in the DB then use the delete option.
PS: The developers in the near future will improve the unlock table so you can also see the previously unlocked records which are still in the DB. In the meantime you can view these records via phpMyAdmin.

Permanent Block List
Step 11 ) The Permanent Block List tab lets you view all the IP addresses that have been blocked permanently in your site. To learn more about this feature you might like to read the following URL Spam Prevention.
Permanent block list serves as a general IP blocking list similar to the blacklist but the difference is that the blacklist uses only .htaccess directives to block IPs whereas the permanent block list works at the PHP level independent of .htaccess.
In other words the permanent block list will be an alternative to the blacklist and will cater for people who don’t have an Apache style server installation.
Note: The permanent block list was added to cater for the following.
- Auto blocking of comment spammers – go to SPAM Prevention -> Comment SPAM IP Monitoring tab. You can enable auto blocking of comment spammer IPs based on minimum spam comments they produce.
- Spammers who register for wordpress accounts and are manually blocked by the administrator – Go to User Registration -> Manual Approval tab. If the manual approval checkbox is selected, this tab will list those users pending approval and you can block selected IP addresses permanently.
Audit logs
Step 12 ) Go to WP Security -> Dashboard -> Audit logs to set view the audit logs in your site. Refer to the following link Audit Logs to learn more.
================================
Debug logs
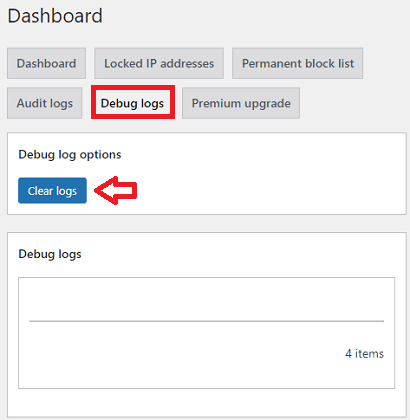
Step 13 ) The following image Debug logs allows you to select and view the log files.
Debug logs
- Debug log options
- Click on Clear logs button to clear your log entries.
- Debug logs
- View current log entries.
=============================
Click on the following link Settings to continue configuring the plugins settings.
If you have any questions please let me know.
Enjoy.
All In One Security (AIOS) Plugin Tutorial List
Using your latest version, the Import/Export tab is missing. How do I enable this?
Plugin Version: 3.7.7
WP Version: 3.9.1
WPMU: No
MySQL Version: 5.5.37
Hi Bob, thank you for your question.
Have you tried to deactivate all other plugins to see if the Import/Export tab shows? If that does not fix the problem, try one of WordPress default theme like Twenty Fourteen and see if works.
Kind regards
After re designing one of the sites with a new theme (Enigma) the site worked, and now when you try to view it shows the maintenance page and no one seems to be able to view the site. I have disabled the maintenance and have wiped the text on that page, but it still appears. It has been a week and don’t really want to switch the wp security off to test. Any idea?
Thank you
ps. It did the same with the old version of WP and as the last resort I have updated to the latest with no results
Hi Kamal, thank you for your question. I have replied to your question in the plugin wordpress forum.
Kind regards
Hello,
You have a great plugin thank you, however yesterday I made some additional changes to your features, brute force to get a better score and today I can’t access my site. I get the 127 page. I looked in wp support and I watched the FTP video and deactivated all of my plugins but I still don’t have access and now I believe my entire site is down.
You mentioned replacing the .htaccess file, but I’m not sure how to do this.
Please can I get some advice, Thanks
Dwight Pretulac
951-536-1134
Hi Dwight Pretulac, thank you for your question. I did check your website above and your site is working.
Please check the following link and focus on question 11.
Once you have totally removed the plugin, install it again and don’t enable any of the Brute Force features. First disable all your other plugins except this one then activate the Brute Force feature you had problems with. Test to make sure it is working, if it is then start enabling one by one your other plugins and at the same time check to make sure you still have access. Carry out this until you come across the conflicting plugin.
Let me know if you need more help.
Regards