Add A New BackWPup Job Files Settings will show you how to configure the following settings files, plugins, external backup for the new job.
Last Updated: October 8, 2017
Latest News: I have changed the menu structure below.
BackWPup Backup Plugin Tutorials:
- Backup Plugin
- Settings
- Add A New Job
- Add A New Job File Settings
- Restore WordPress
Add A New BackWPup Job Files Settings
Step 1 ) Click on BackWPup -> Add New Job -> Files tab to select from one of the following.
- Backup root folder
- Backup content folder
- Backup plugins
- Backup themes
- Backup uploaded folders
Important: Remember you can select to exclude files and folders from your backup.
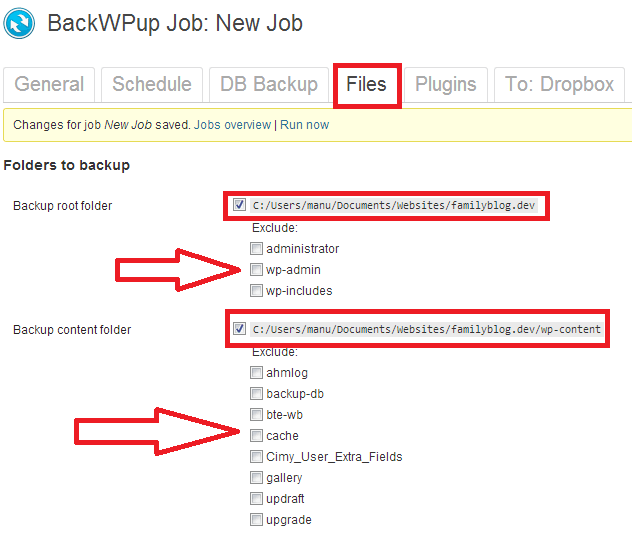
Step 1-1 ) The following image allows you to select from one of the following options.
- Backup plugins
- Backup themes
- Backup uploads folder
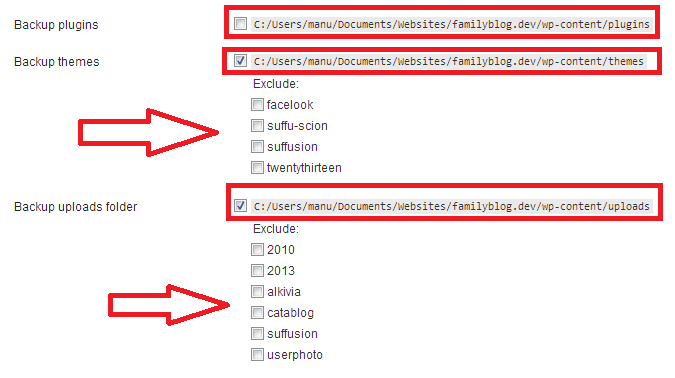
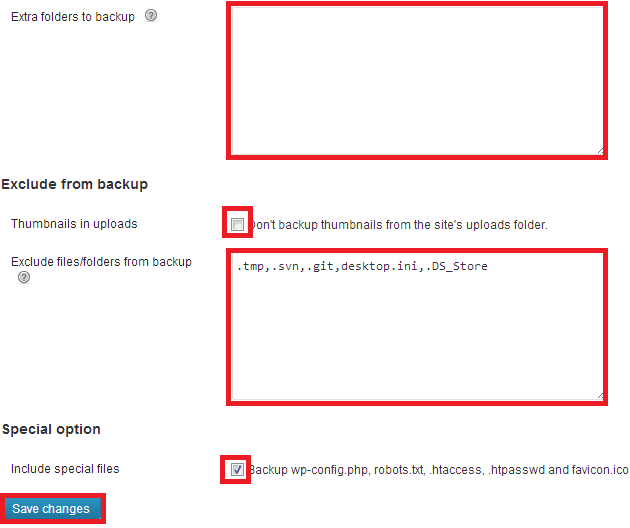
Step 1-2 ) The following image allows you to set up the following.
- Extra folders to backup
- Thumbnails in uploads
- Exclude files/folders from backup
- Include special files
- Click on Save changes button
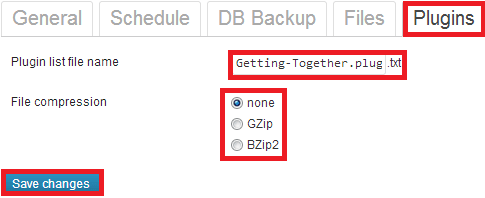
New Job Plugins Settings
Step 2 ) Click on BackWPup -> Add New Job -> Plugins tab to set up the following.
- Plugin list file name
- File compression = none, GZip or BZip2
- Click on Save changes button
I have added the following two steps just to show you what the plugin displays when you select your backup to be saved in a Folder and also in SugarSync. This option is enabled in General tab under Job Destination.
Note: There are other destinations you can choose to save your backup to.
New Job To: Folder Settings
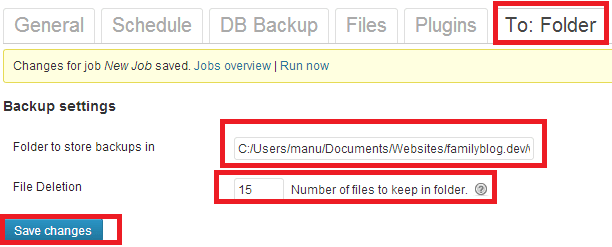
Step 3 ) Click on BackWPup -> Add New Job -> To: Folder tab to set up the following. See image below.
- Folder to store backups in
- File Deletion
- Click on Save changes button
Remember your path will be different to mine. (This step is optional)
Hint: Make sure your backup folder is protected. To secure the folder you can add an index.html file or add a .htaccess file on the backup folder.
New Job To: SugarSync Settings
Step 4 ) Click on BackWPup -> Add New Job -> To: SugarSync tab to set up the following. (This step is optional) See image below.
- Authentication
- Sync folder selection
- Folder in root
- File deletion
- Click on Save changes button
Option: If you want some extra storage, enable one of the many FTP options that BackWPup provides for you to upload directly into. I chose SugarSync which gives you 5 gb of storage for free. The root is not visible until you have created an account.
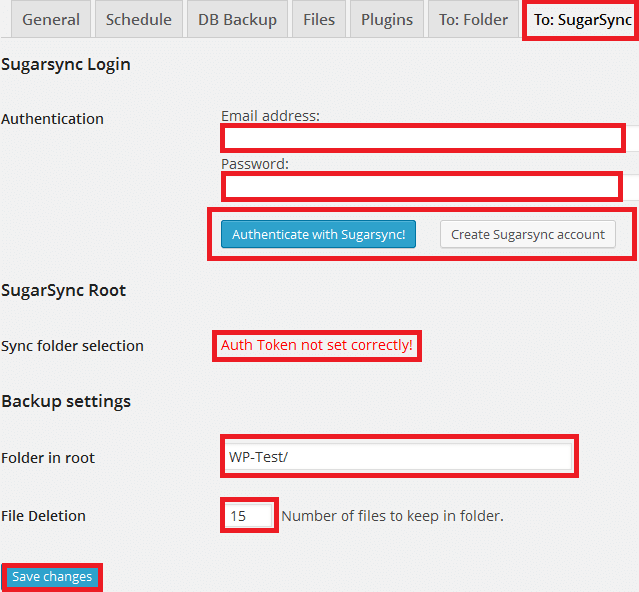
Note: Remember to add a number of copies to your sugarsync account or else you will receive the following error. [ERROR] SugarSync API: Http Error: 499
Run The Job
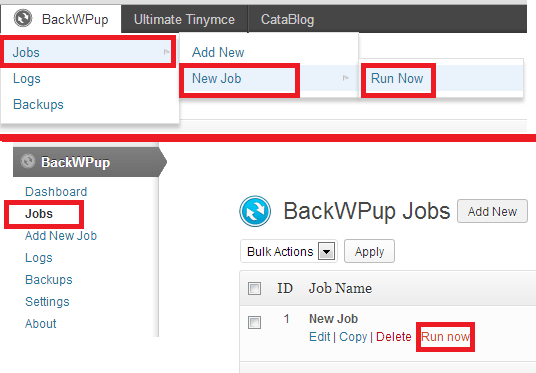
Step 5 ) Once the job has been created, you need to run the job to create the backup. There are two options to run the job, run now after the job has been created or through the admin top bar. See image below.
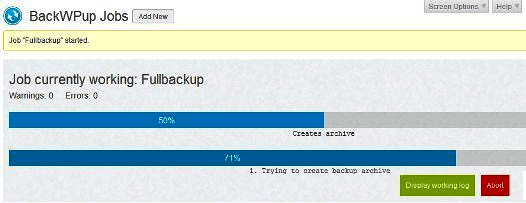
Step 6 ) The following image shows the job running.
Download Your Backup Locally
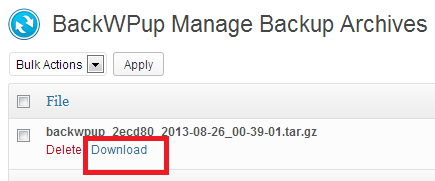
Step 7 ) Once you have created the backup, you can download a copy locally to your computer. See image below:
Note: It is always better to use FTP to download or upload files.
Option: Keep a copy of the backup zipped file on your server if you have space.
Hint: If you want to create an automated process to download to your computer, create a sugarsync or dropbox account. Then download and install the SugarSync or Dropbox software on your computer and run a sync from your computer to the server using the software. Always remember the size limitations.
===========================
That is how simple it is to create a backup.
Click on the following link Restore WordPress to continue learning.
I will be updating this post from time to time. So keep coming back for more. If you have any questions please send me an e-mail or leave a comment.
Enjoy.
Excellent, Thank you very much!
It was very useful for me because it explains step by step in detail.
Hi Win thank you for your comment and I am happy to hear that it helped you.
Kind regards