Paint Net Image Editor Top Right Menu Layers will show you how to use the layers tool box and what options you have.
The layers are very important when you are working with images. Learning how to use them and manage them can become a skill on its own. This little tutorial provides some information on how to manage and edit the Layers using this tool.
Paint Net Image Editor Tutorials:
- Paint Net Image Editor
- Paint Net Image Editor Top Menu Tools
- Paint Net Image Editor Top Right Menu
- Paint Net Image Editor Effects
- Paint Net Image Editor Top Right Menu Layers
Paint Net Image Editor Top Right Menu Layers Steps
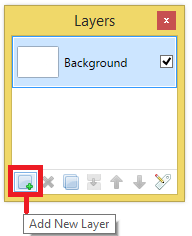
1 ) Click on Add New Layer to add as many layers as you want. The Background layer is the default layer you will see every time you start a new project unless you make changes in the Settings area.
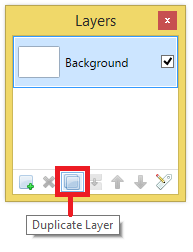
2 ) Click on Duplicate Layer to duplicate which ever layer you have selected. In this example Background layer is selected so this layer would be duplicated.
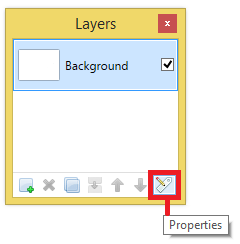
3 ) Click on Properties to manage the layer selected.
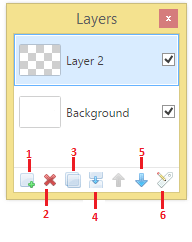
4 ) In the following image a new layer was added. The tool automatically added a transparent Layer 2. Once this layer is added another 3 buttons become active. Now you have 6 buttons active.
- Add New Layer
- Delete the layer selected
- Duplicate the layer selected
- Merged the layers selected
- Move down the layer selected
- Properties of the layer selected
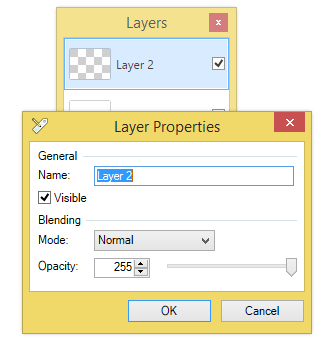
5 ) The following image Layer Properties allows you to manage the following options.
- Name
- Visible
- Mode
- Opacity
I will update this tutorial from time to time. So keep coming back for the latest. If you have any questions please let me know.
Enjoy